
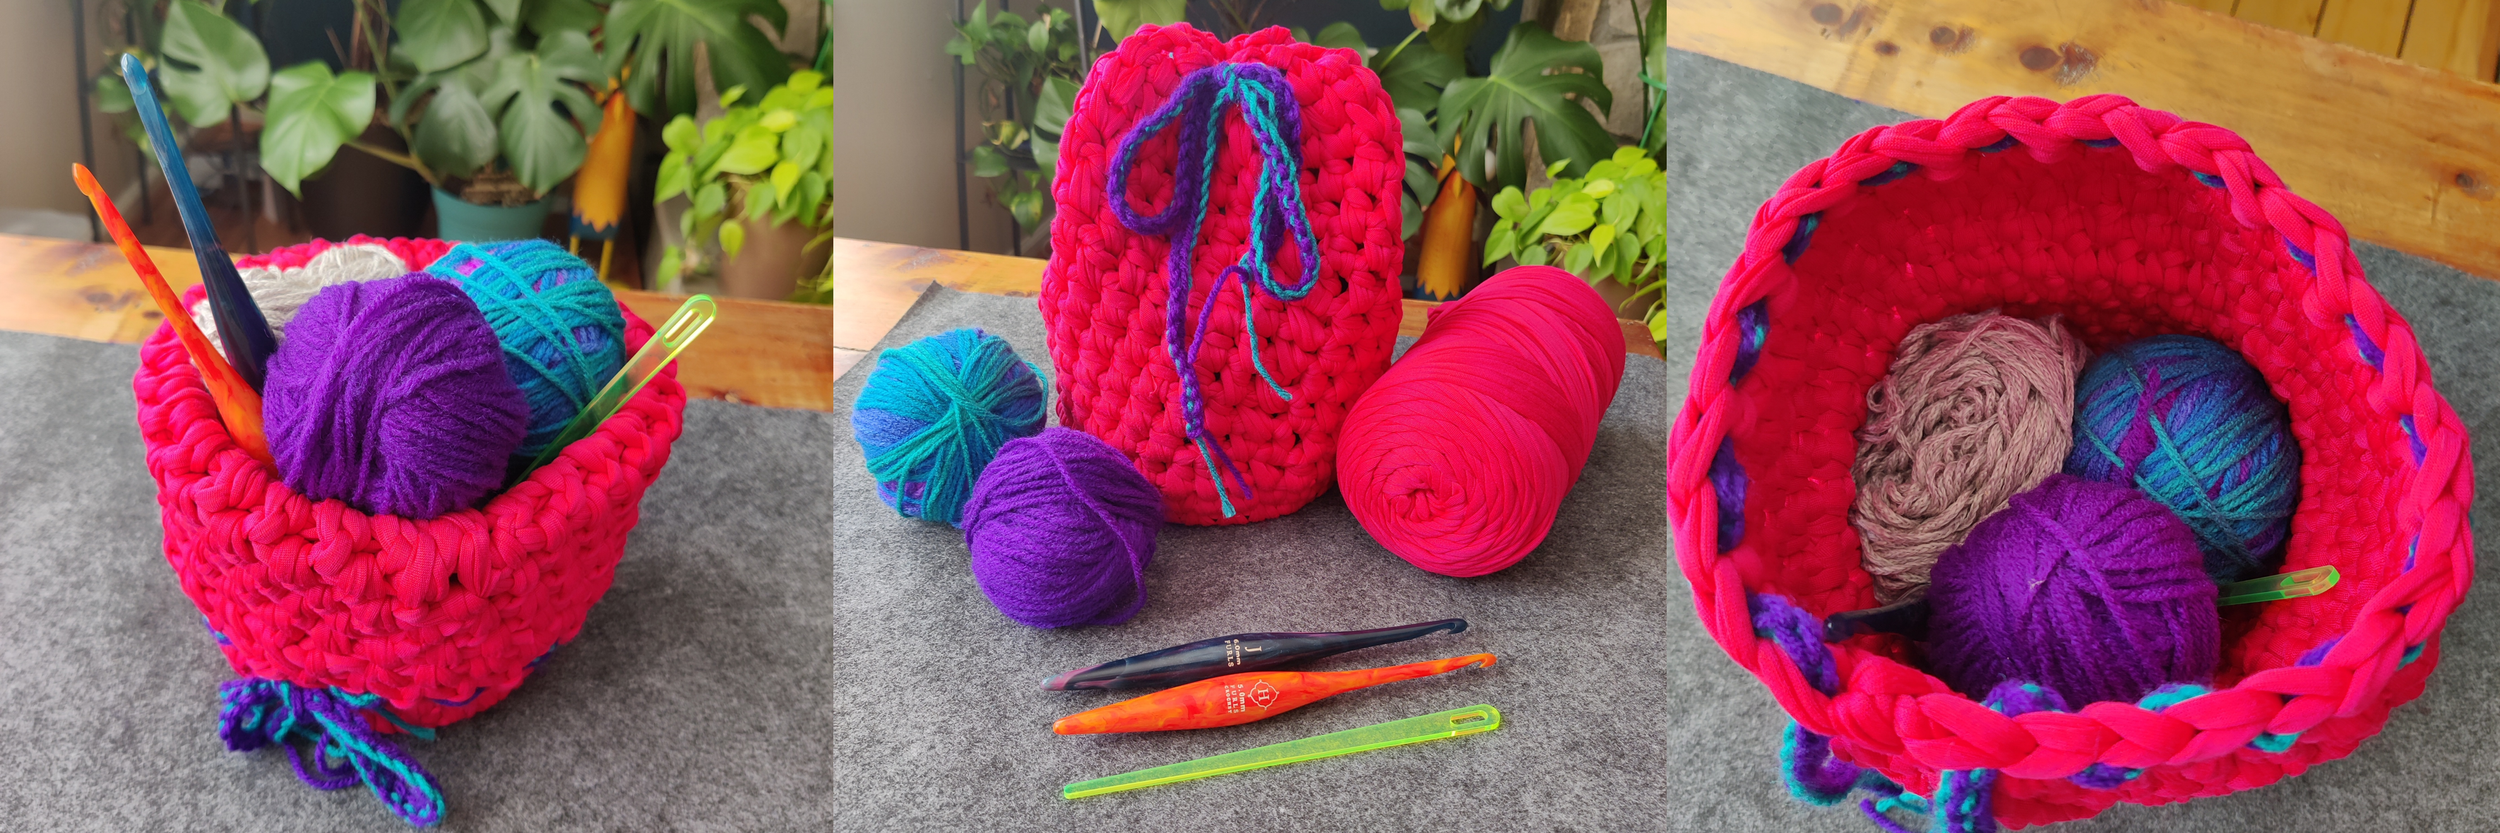
Two projects. One base. Make it yours.
Whether you're making a home for your favorite yarn or a portable bucket bag for your latest work in progress, this guide will help you create something that's uniquely yours.
Using a Waterloo Works wooden basket base, you'll learn how to crochet a sturdy yarn bowl that can also become a taller bucket bag with a handmade drawstring closure.
The best part? You get to decide when you're finished!
Stop at the yarn bowl stage for an easy way to keep your yarn organized, or keep crocheting to create a bucket bag that travels with you.
Skill Level - Adventurous Beginner
A basic understanding of crochet is helpful, but we've included step-by-step photos to guide you through the process.
Finished Size
Your finished project will vary depending on:
Basket base shape and size selected
Yarn used
Hook used
Crochet tension
Desired project height
You can make a shorter yarn bowl or continue adding rounds to create a taller bucket bag.
Estimated Time: 2–5 hours
(Time will vary depending on basket size and experience level.)
Materials
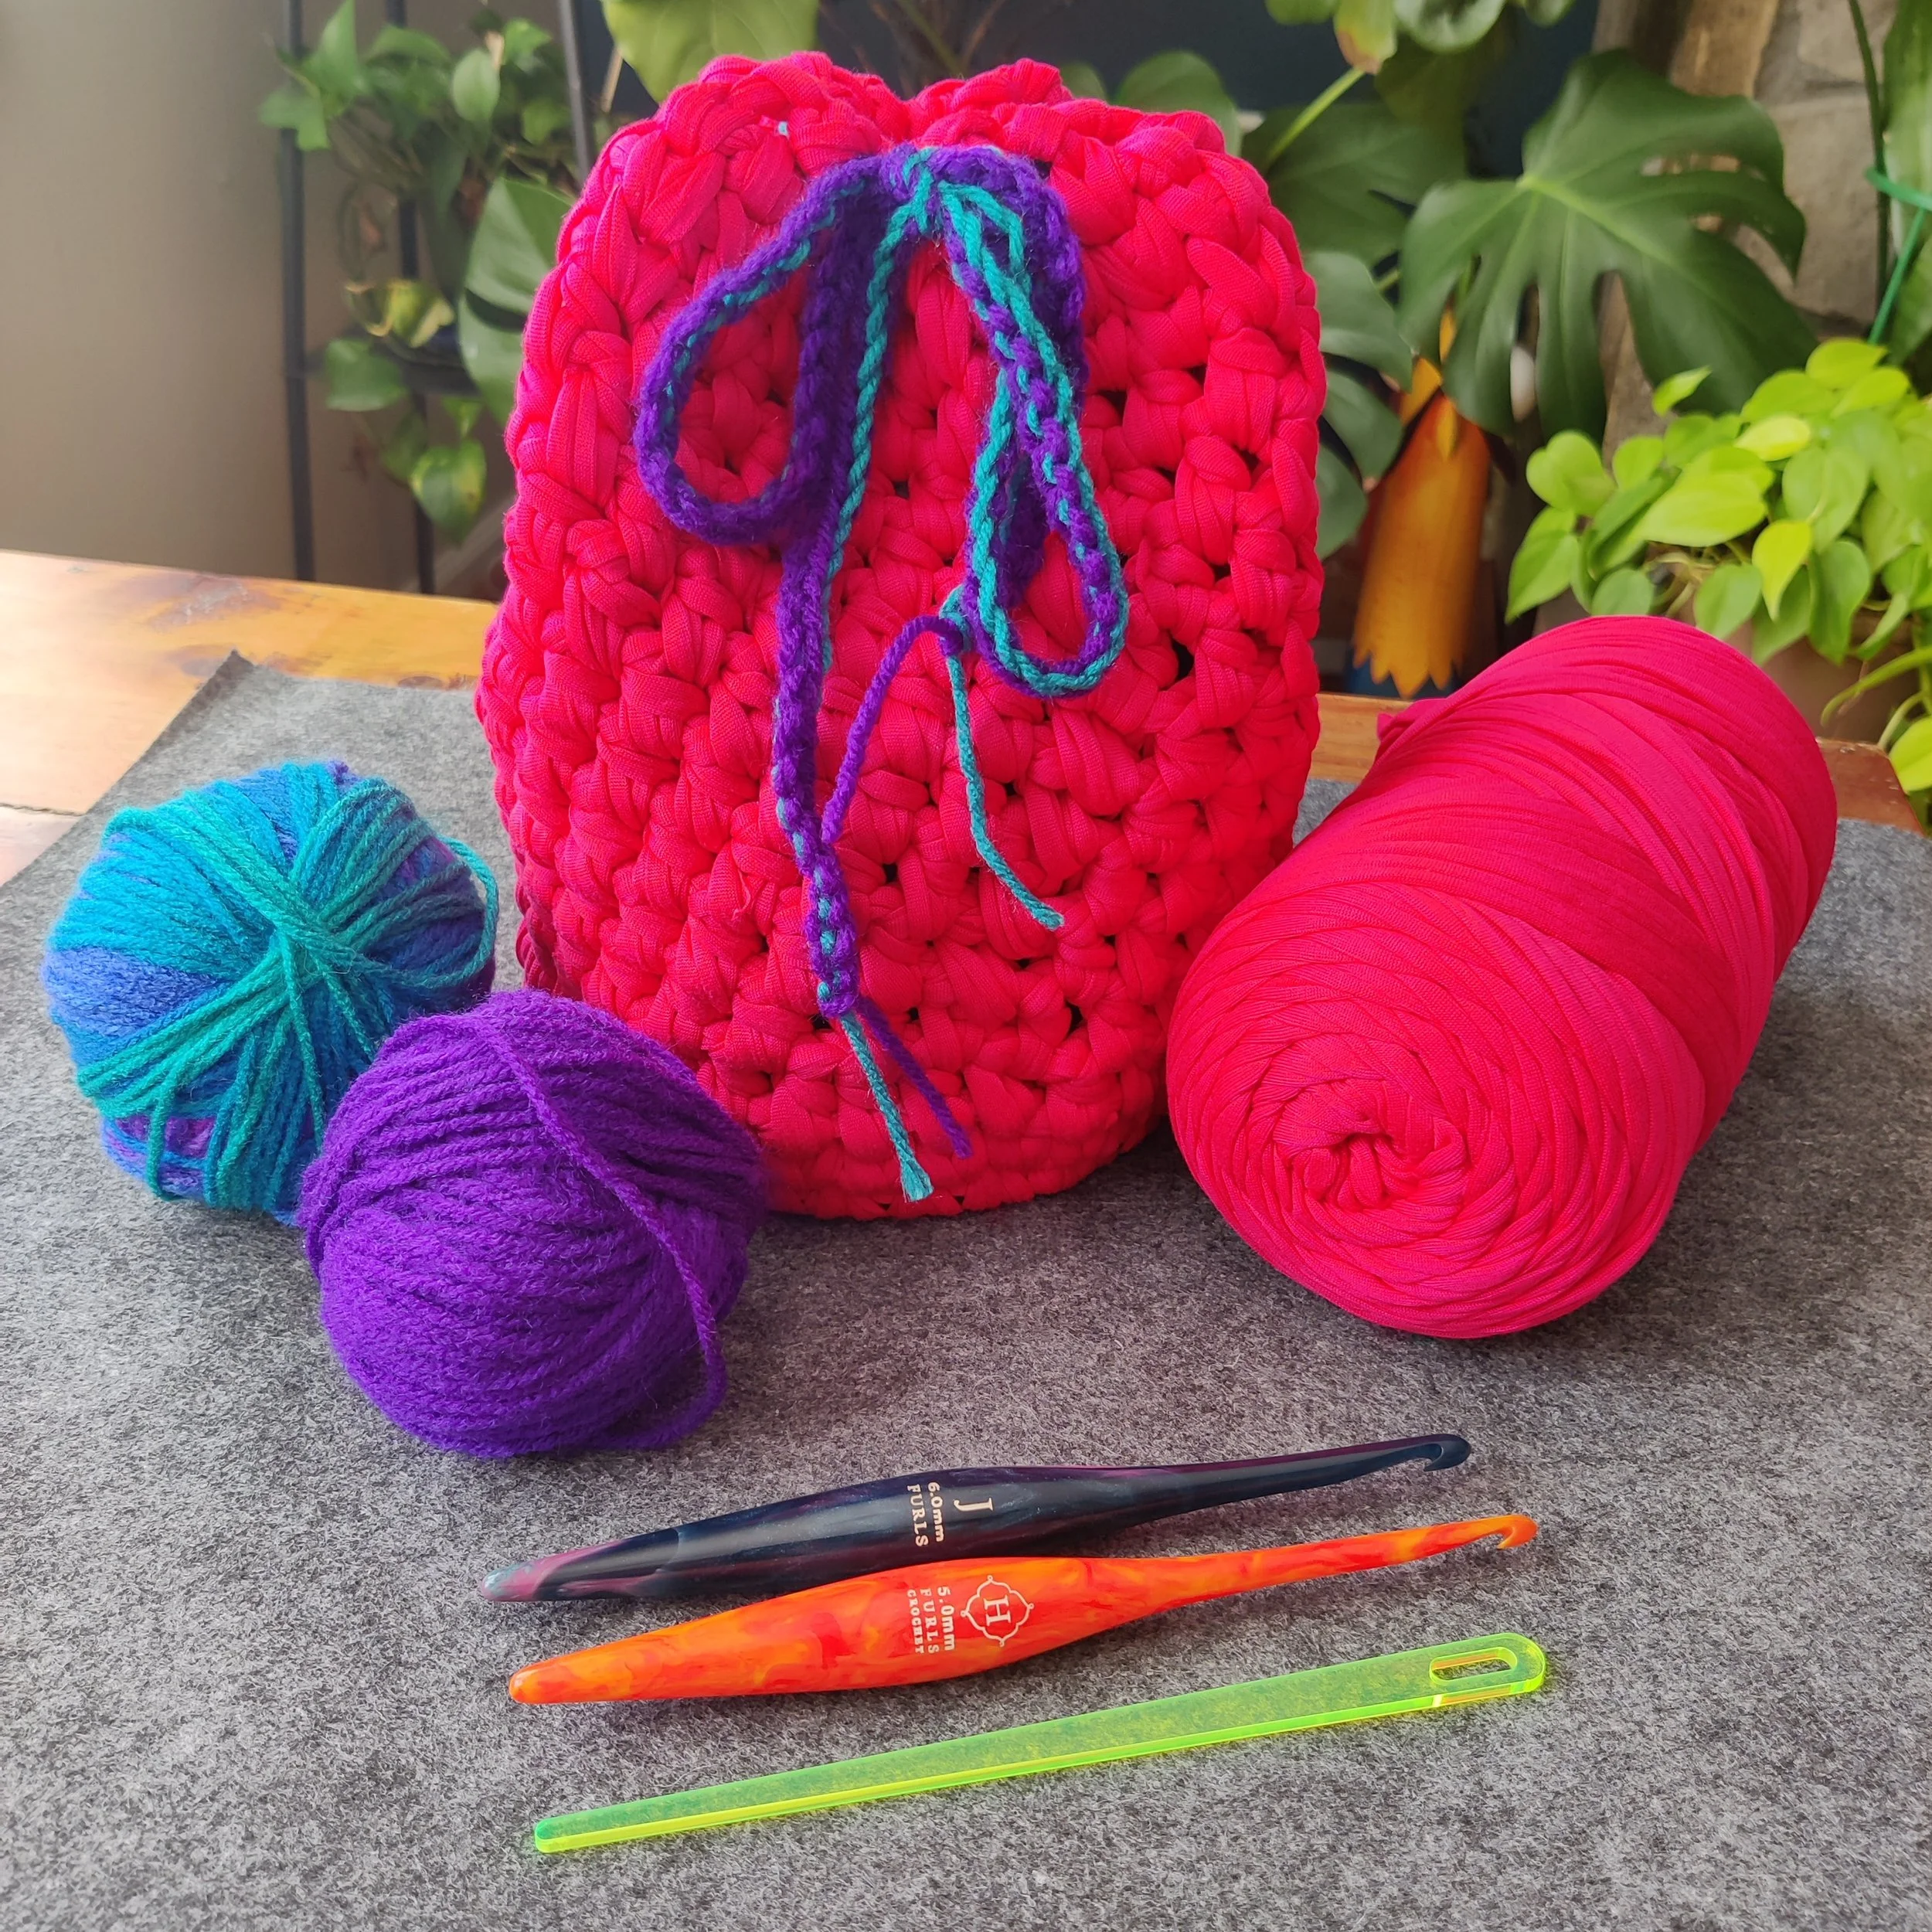
Waterloo Works Wooden Basket Base
(Round or Oval, Small, Medium, or Large)Bulky Weight Yarn
Worsted Weight Yarn: Two strands of yarn for making the drawstring cord (matching or contrasting colors).
Crochet Hook: Choose the hook size that works best for you and your yarn. Everyone crochets with different tension, so select a hook that creates comfortable, even stitches while keeping your project sturdy enough to hold its shape.
5 mm (US H-8)
5.5 mm (US I-9)
6 mm (US J-10)
6.5 mm (US K-10.5)
Scissors
Tapestry Needle (optional)
Recommended Yarn
We recommend T-shirt yarn for this project. Its thickness helps create a sturdy fabric that holds its shape while still having enough flexibility for your finished project.
Most bulky weight yarns will also work well with the recommended hook sizes.
Using Worsted Weight Yarn for Your Project
You can also use worsted weight yarn to make your yarn bowl or bucket bag. Keep in mind that lighter yarn generally creates a softer, more flexible finished project.
If using worsted weight yarn:
Use a 5 mm (US H-8) or 5.5 mm (US I-9) crochet hook.
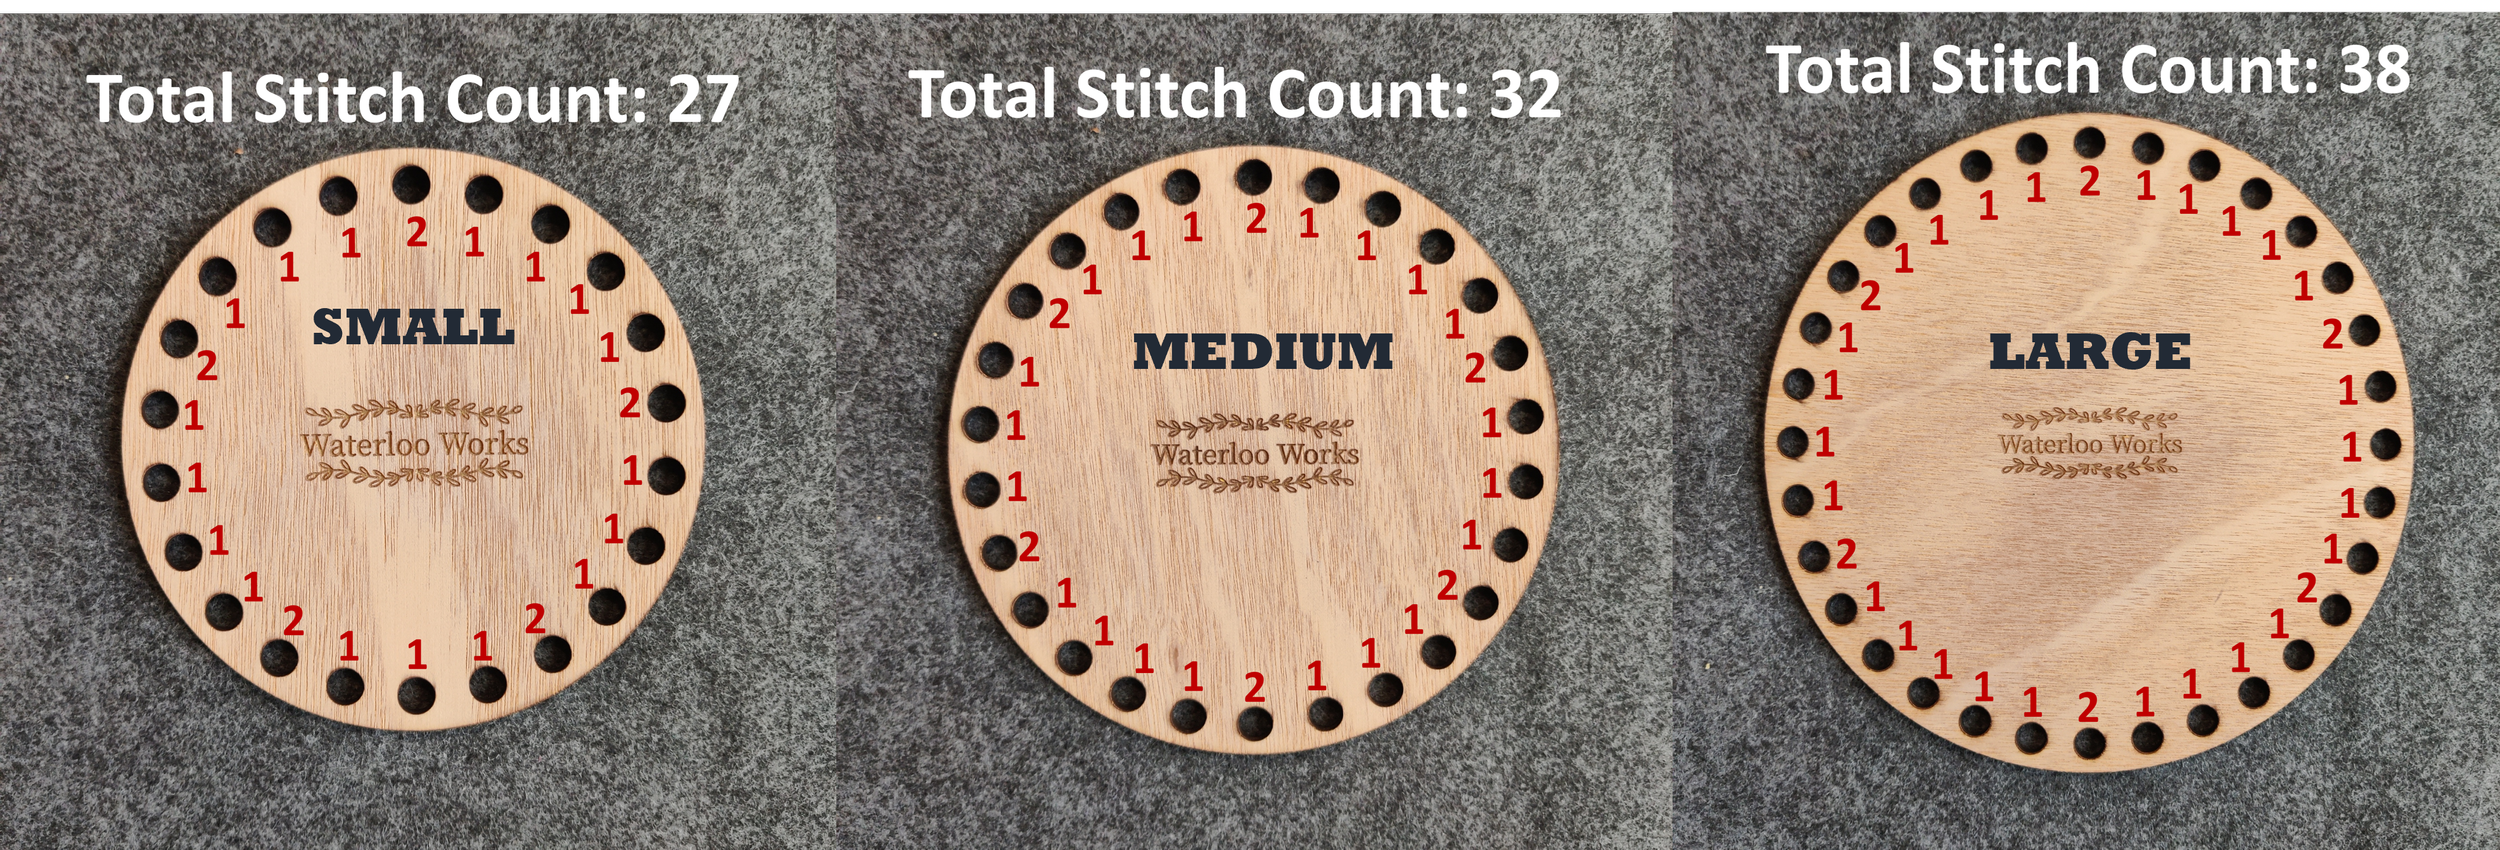
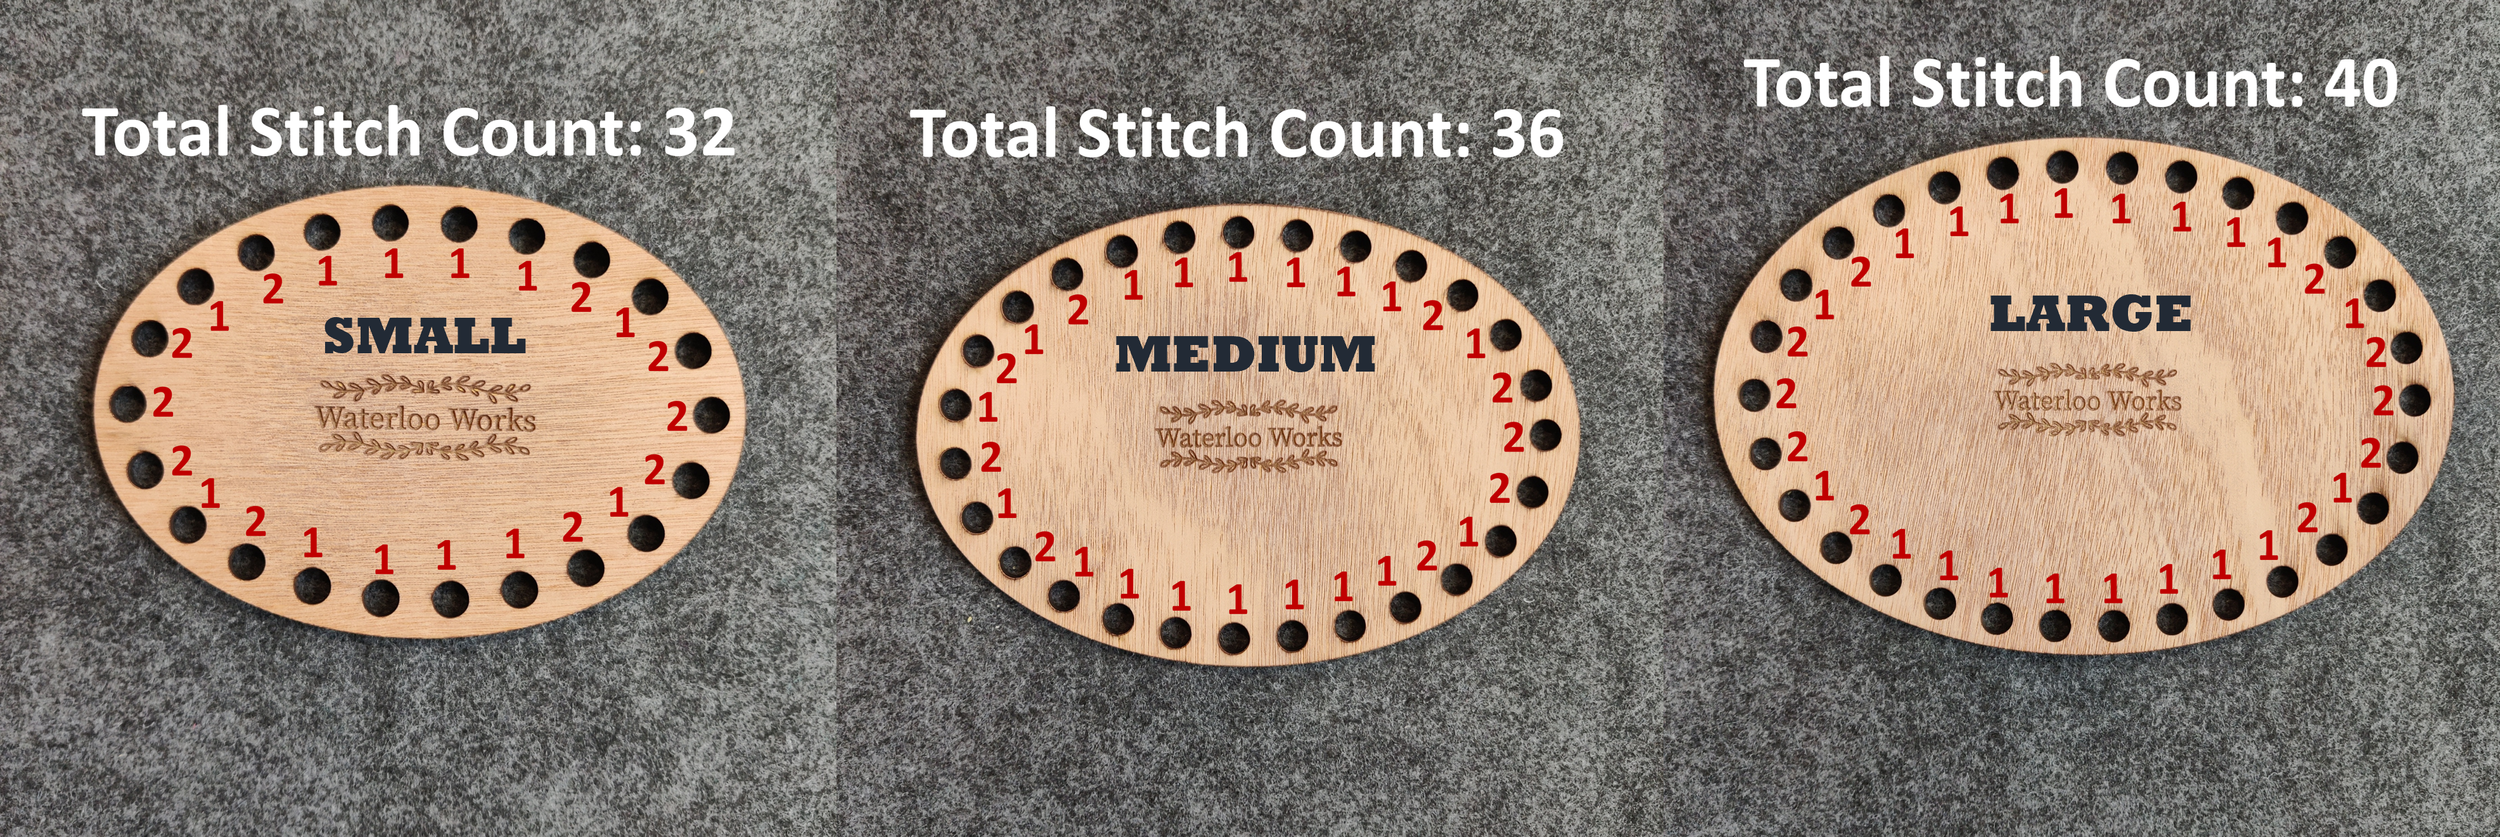
Find your selected wooden base in the stitch count diagrams below.
For every hole marked "1," work 2 single crochet stitches into that hole.
For every hole marked "2," work 3 single crochet stitches into that hole.
This adds extra stitches to accommodate the thinner yarn.
Stitches & Techniques
This guide uses the following stitches and techniques:
Single Crochet (sc): A basic stitch used to create a sturdy fabric.
Half Double Crochet (hdc): A slightly taller stitch that adds height and flexibility.
Invisible Join: A technique for joining rounds without a noticeable seam.
Double Chain Cord or Half I-Cord: A thicker crochet cord used to create your project bucket's drawstring.
Before You Begin
All Waterloo Works basket bases are available in round and oval shapes in three sizes: Small, Medium, and Large.
The construction method is the same for both shapes. The number of stitches needed to work around the base will depend on the shape and size you choose.
Finding Your Stitch Count
Find the base you're using in the diagrams below.
Each diagram shows how many crochet stitches to work into each hole around the wooden base.
Follow the markings for your specific base to ensure you have the correct number of stitches before building the sides.
Notes
Read through the entire guide before beginning.
Photo references are included throughout the instructions.
Every round ends with an Invisible Join.
These instructions apply to all Round and Oval basket bases. The only difference is the stitch count.
Once you've mastered this construction method, you can substitute almost any stitch pattern to personalize your basket.
Let's Get Started!
Round 1: Attach Your Yarn to the Wooden Base
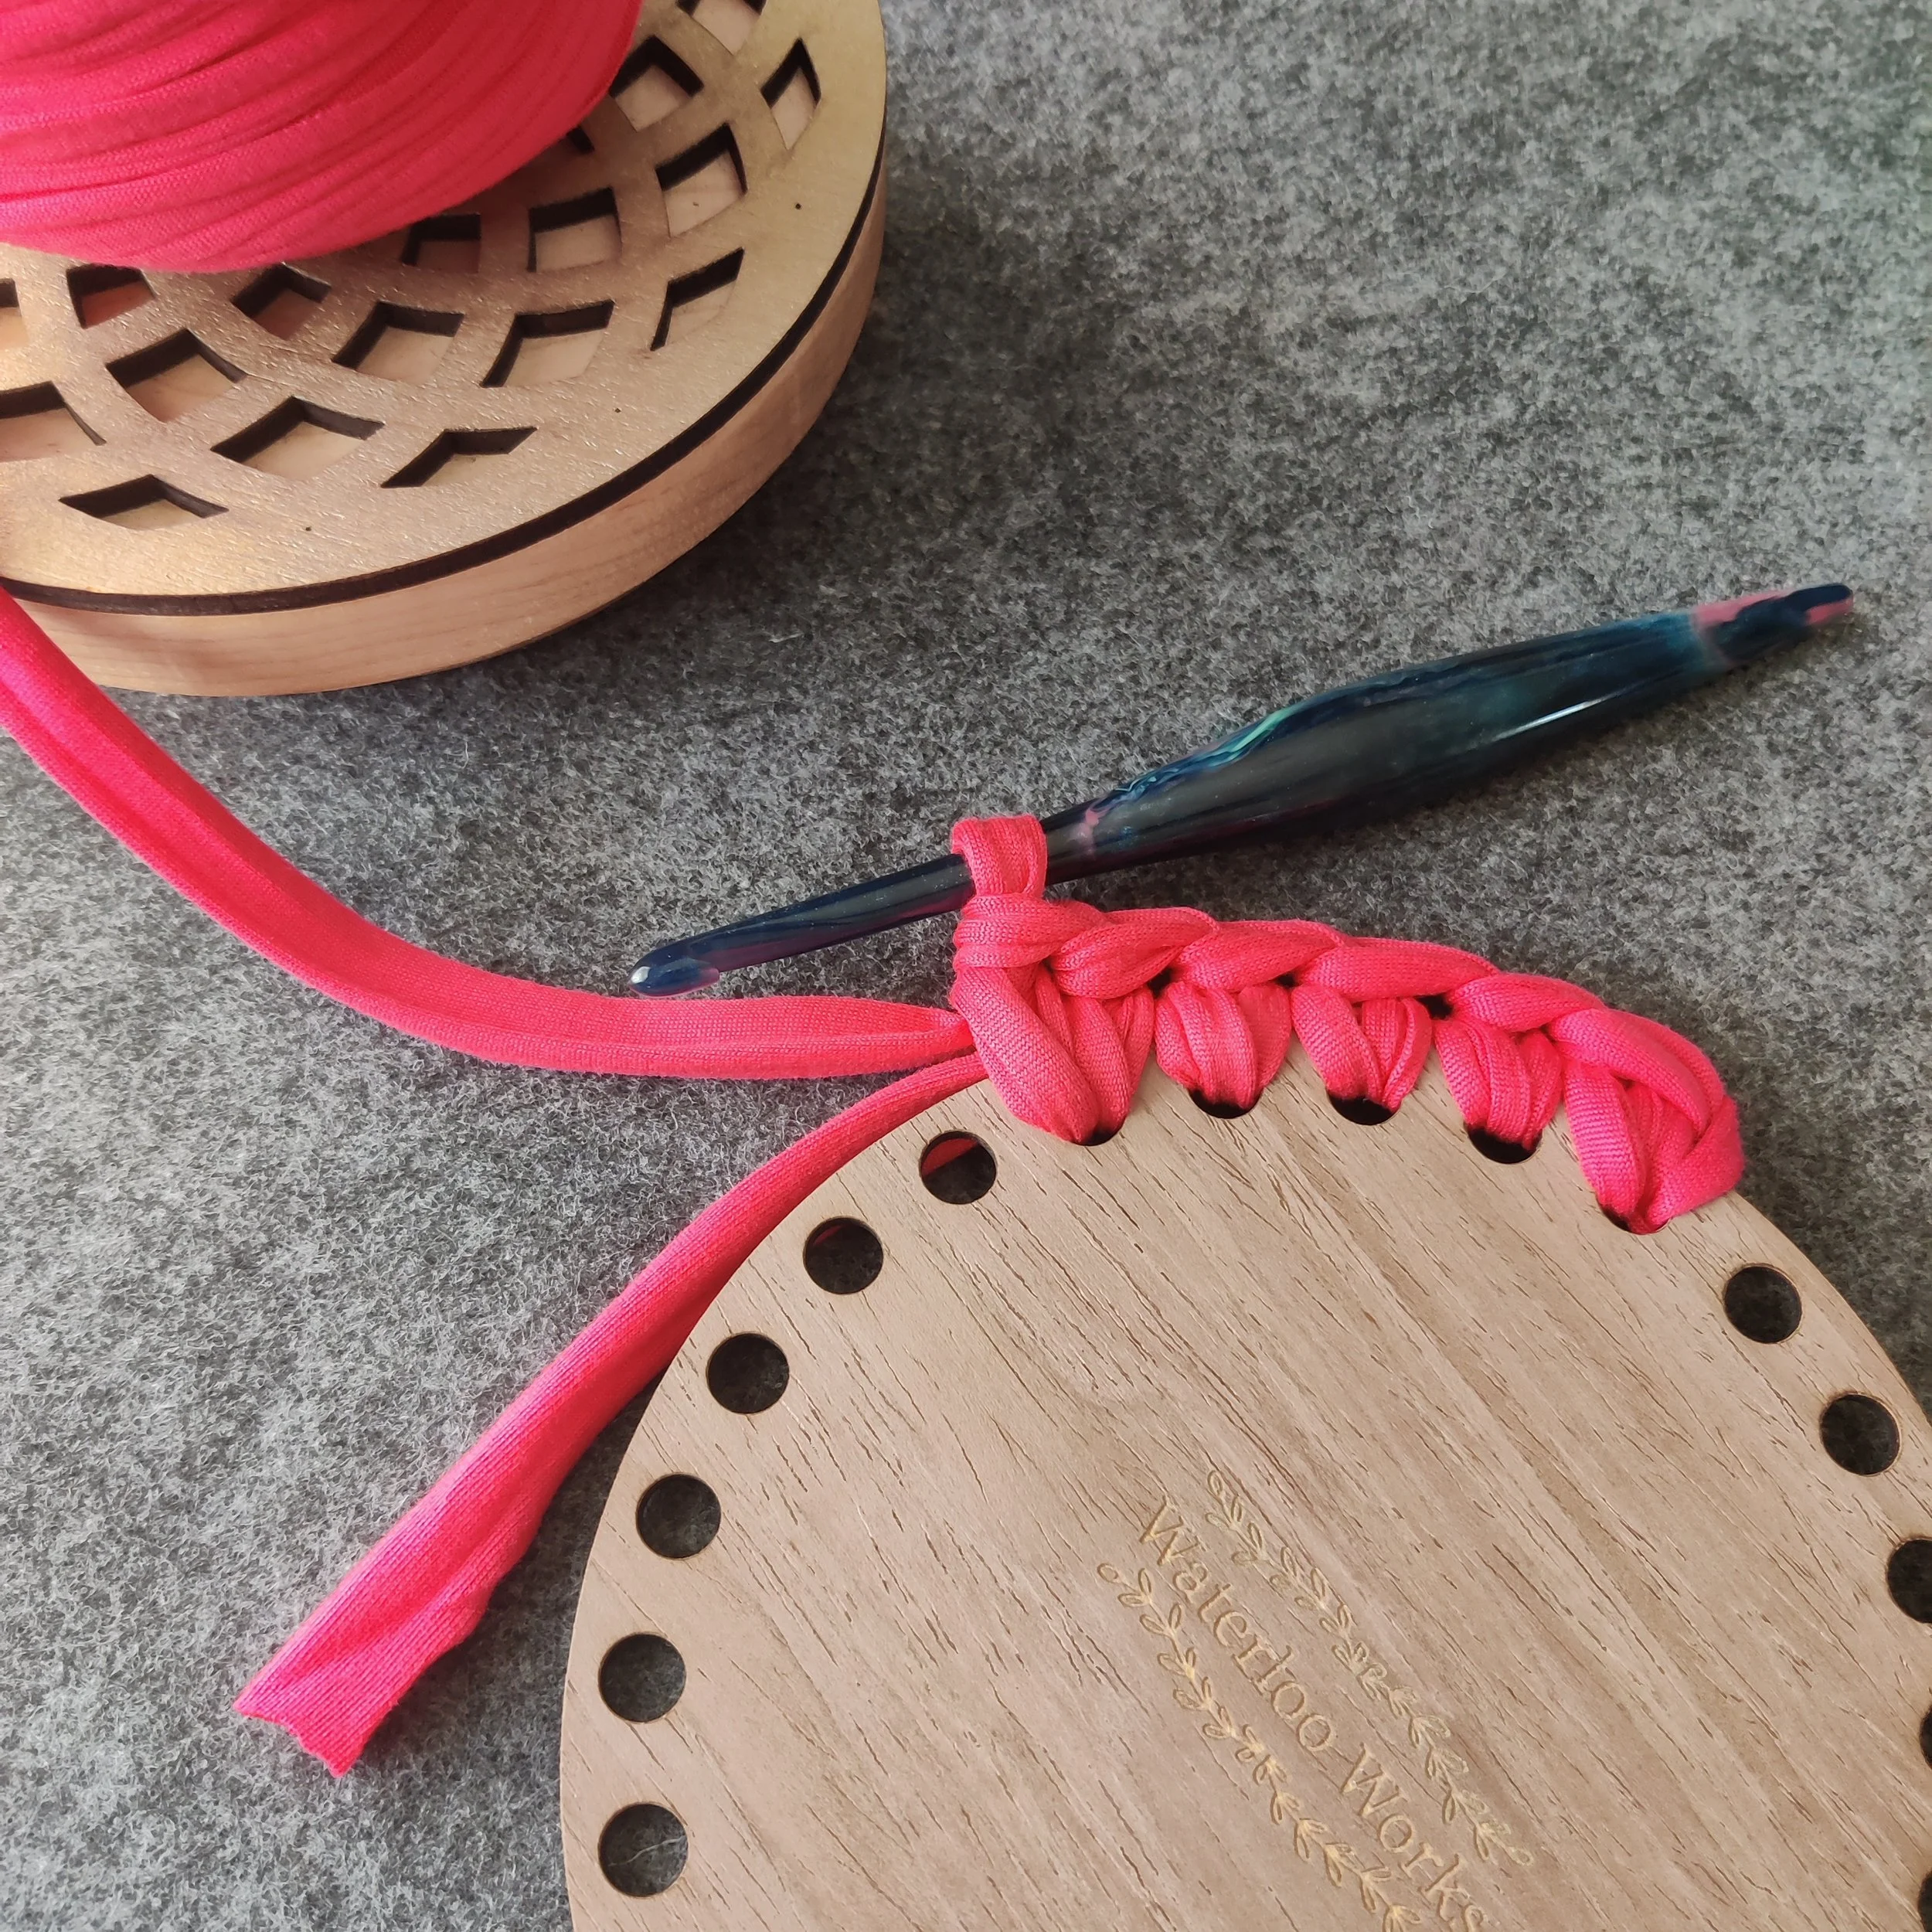
Pick a starting hole on your wooden base.
Insert your crochet hook through the hole and attach your yarn.
Work single crochet stitches into each hole, following the stitch markings for your selected base.
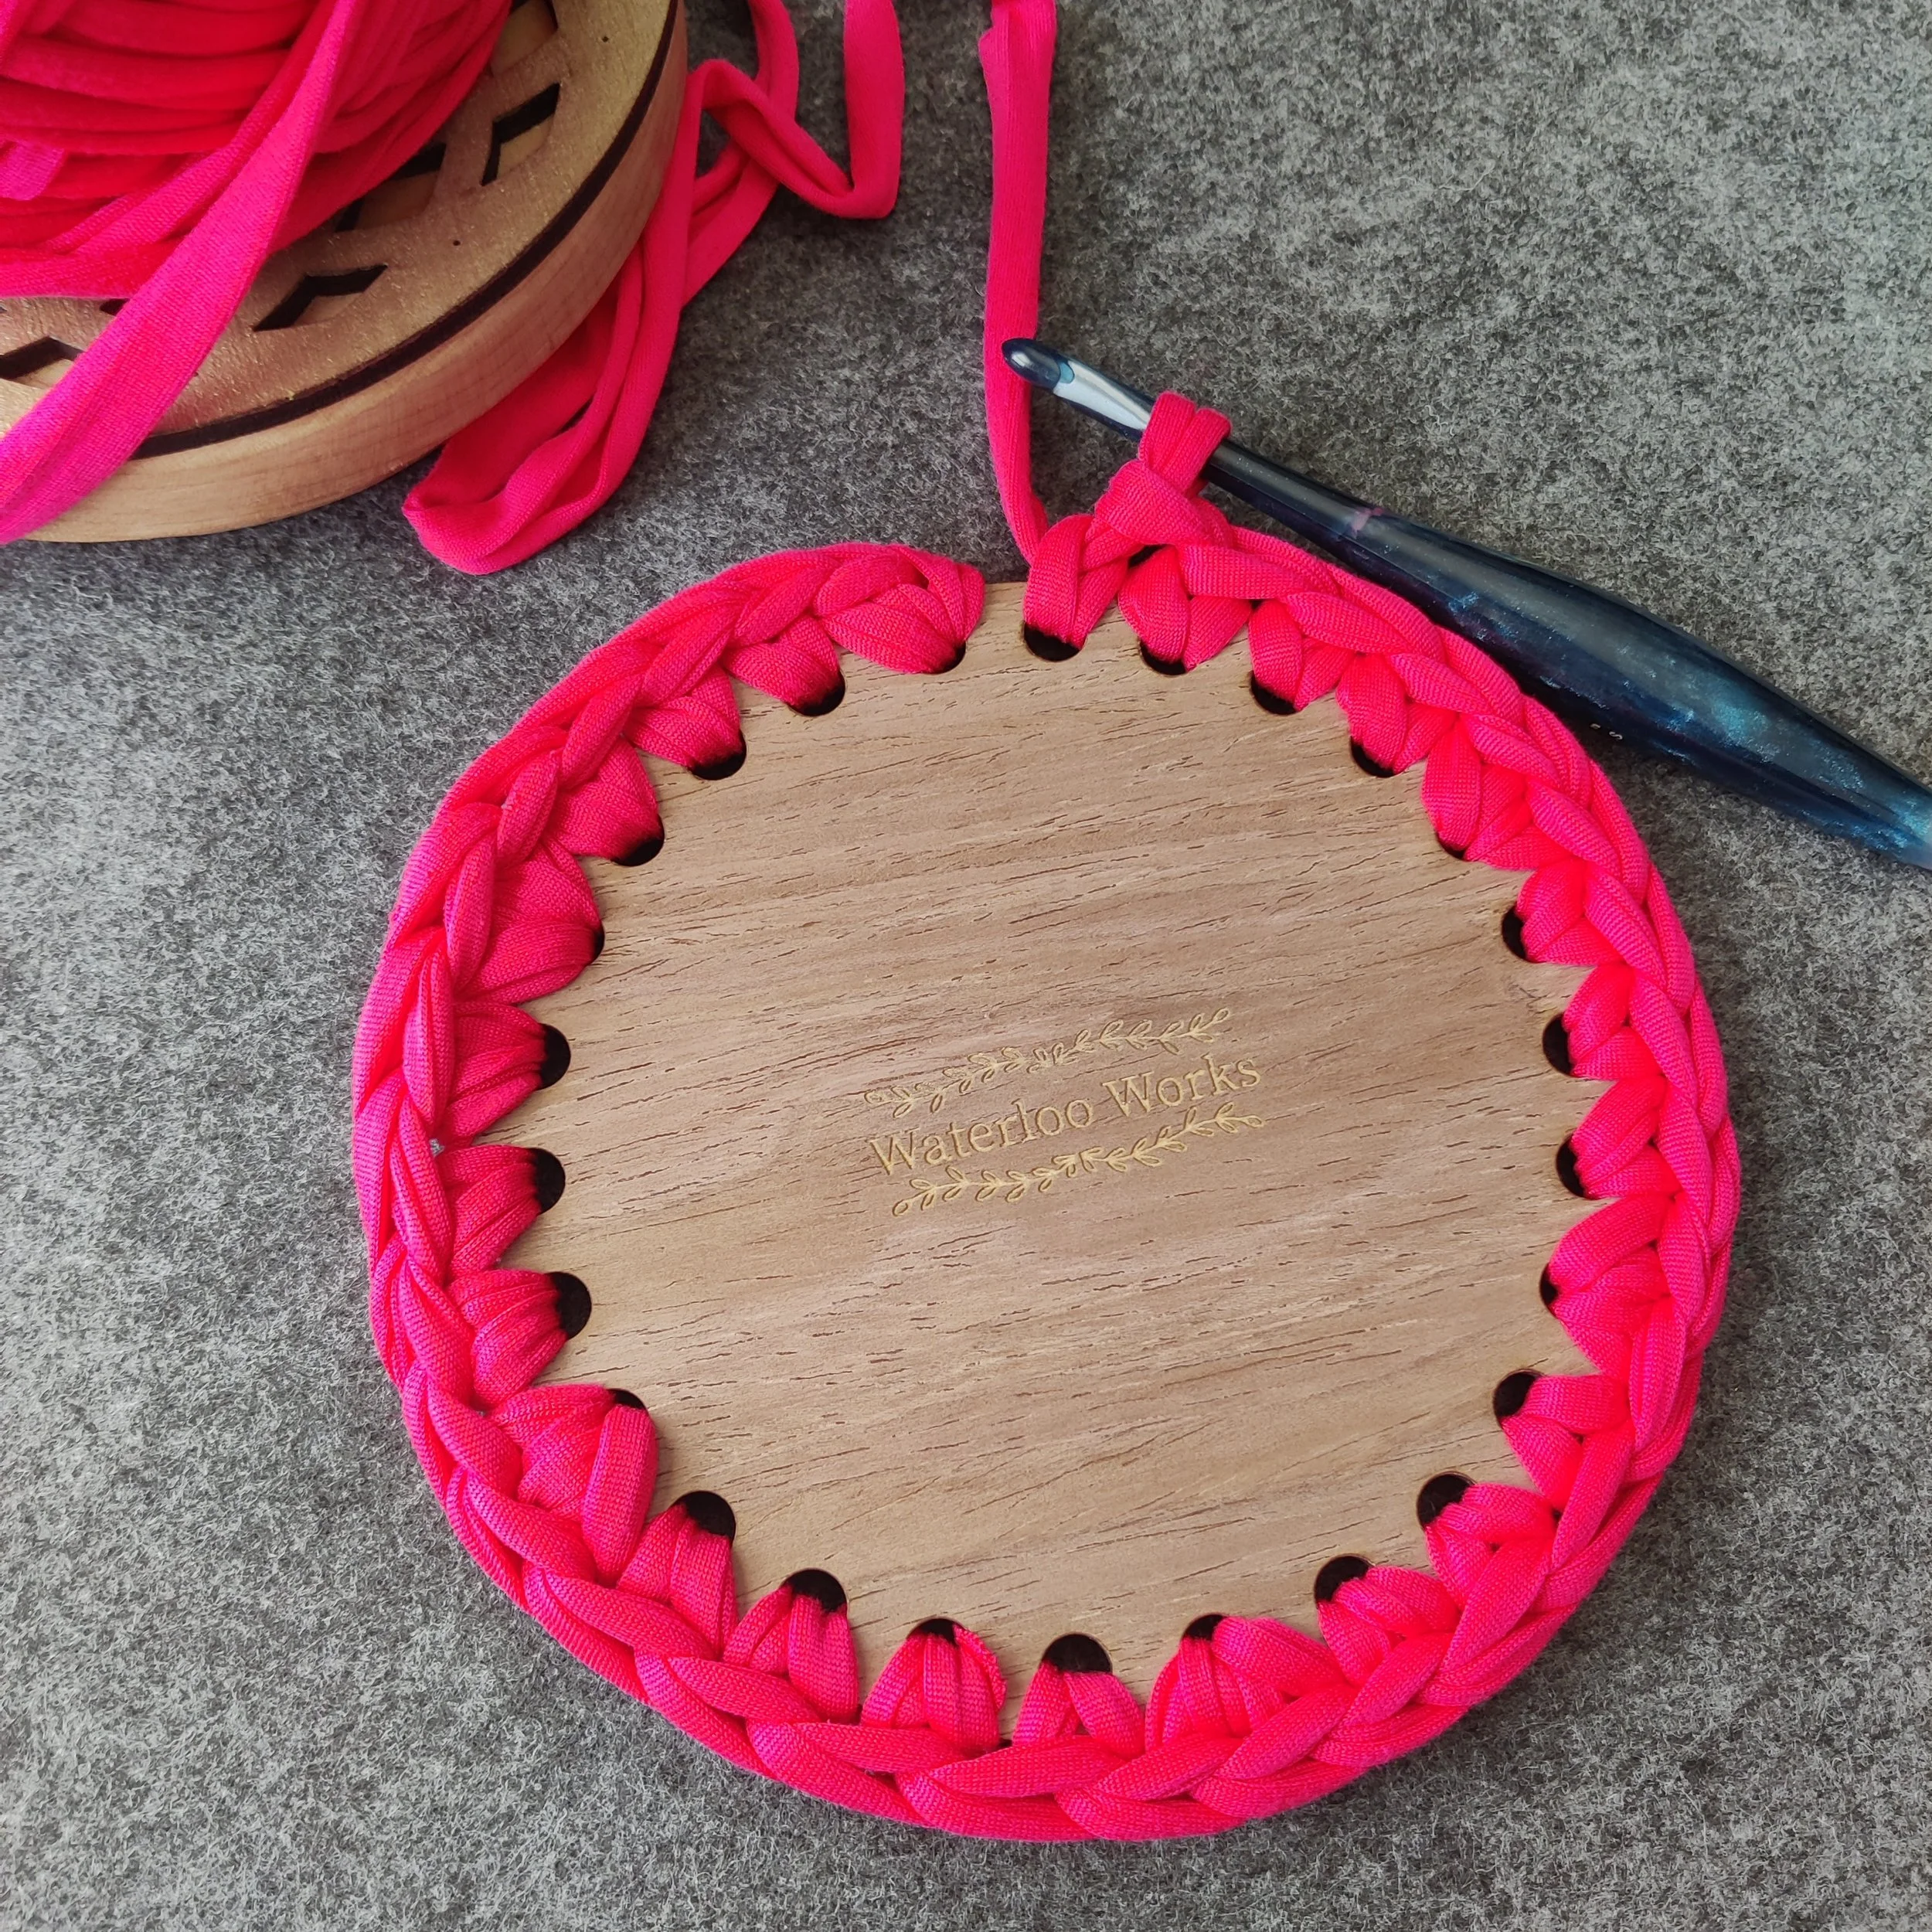
Continue all the way around until you return to your starting point.
Count your stitches to make sure you have the correct number. (Reference the base diagrams for stitch counts)
Now join with an invisible join.
How to Make an Invisible Join
At the end of each round, you'll use an Invisible Join to create a smooth finish.
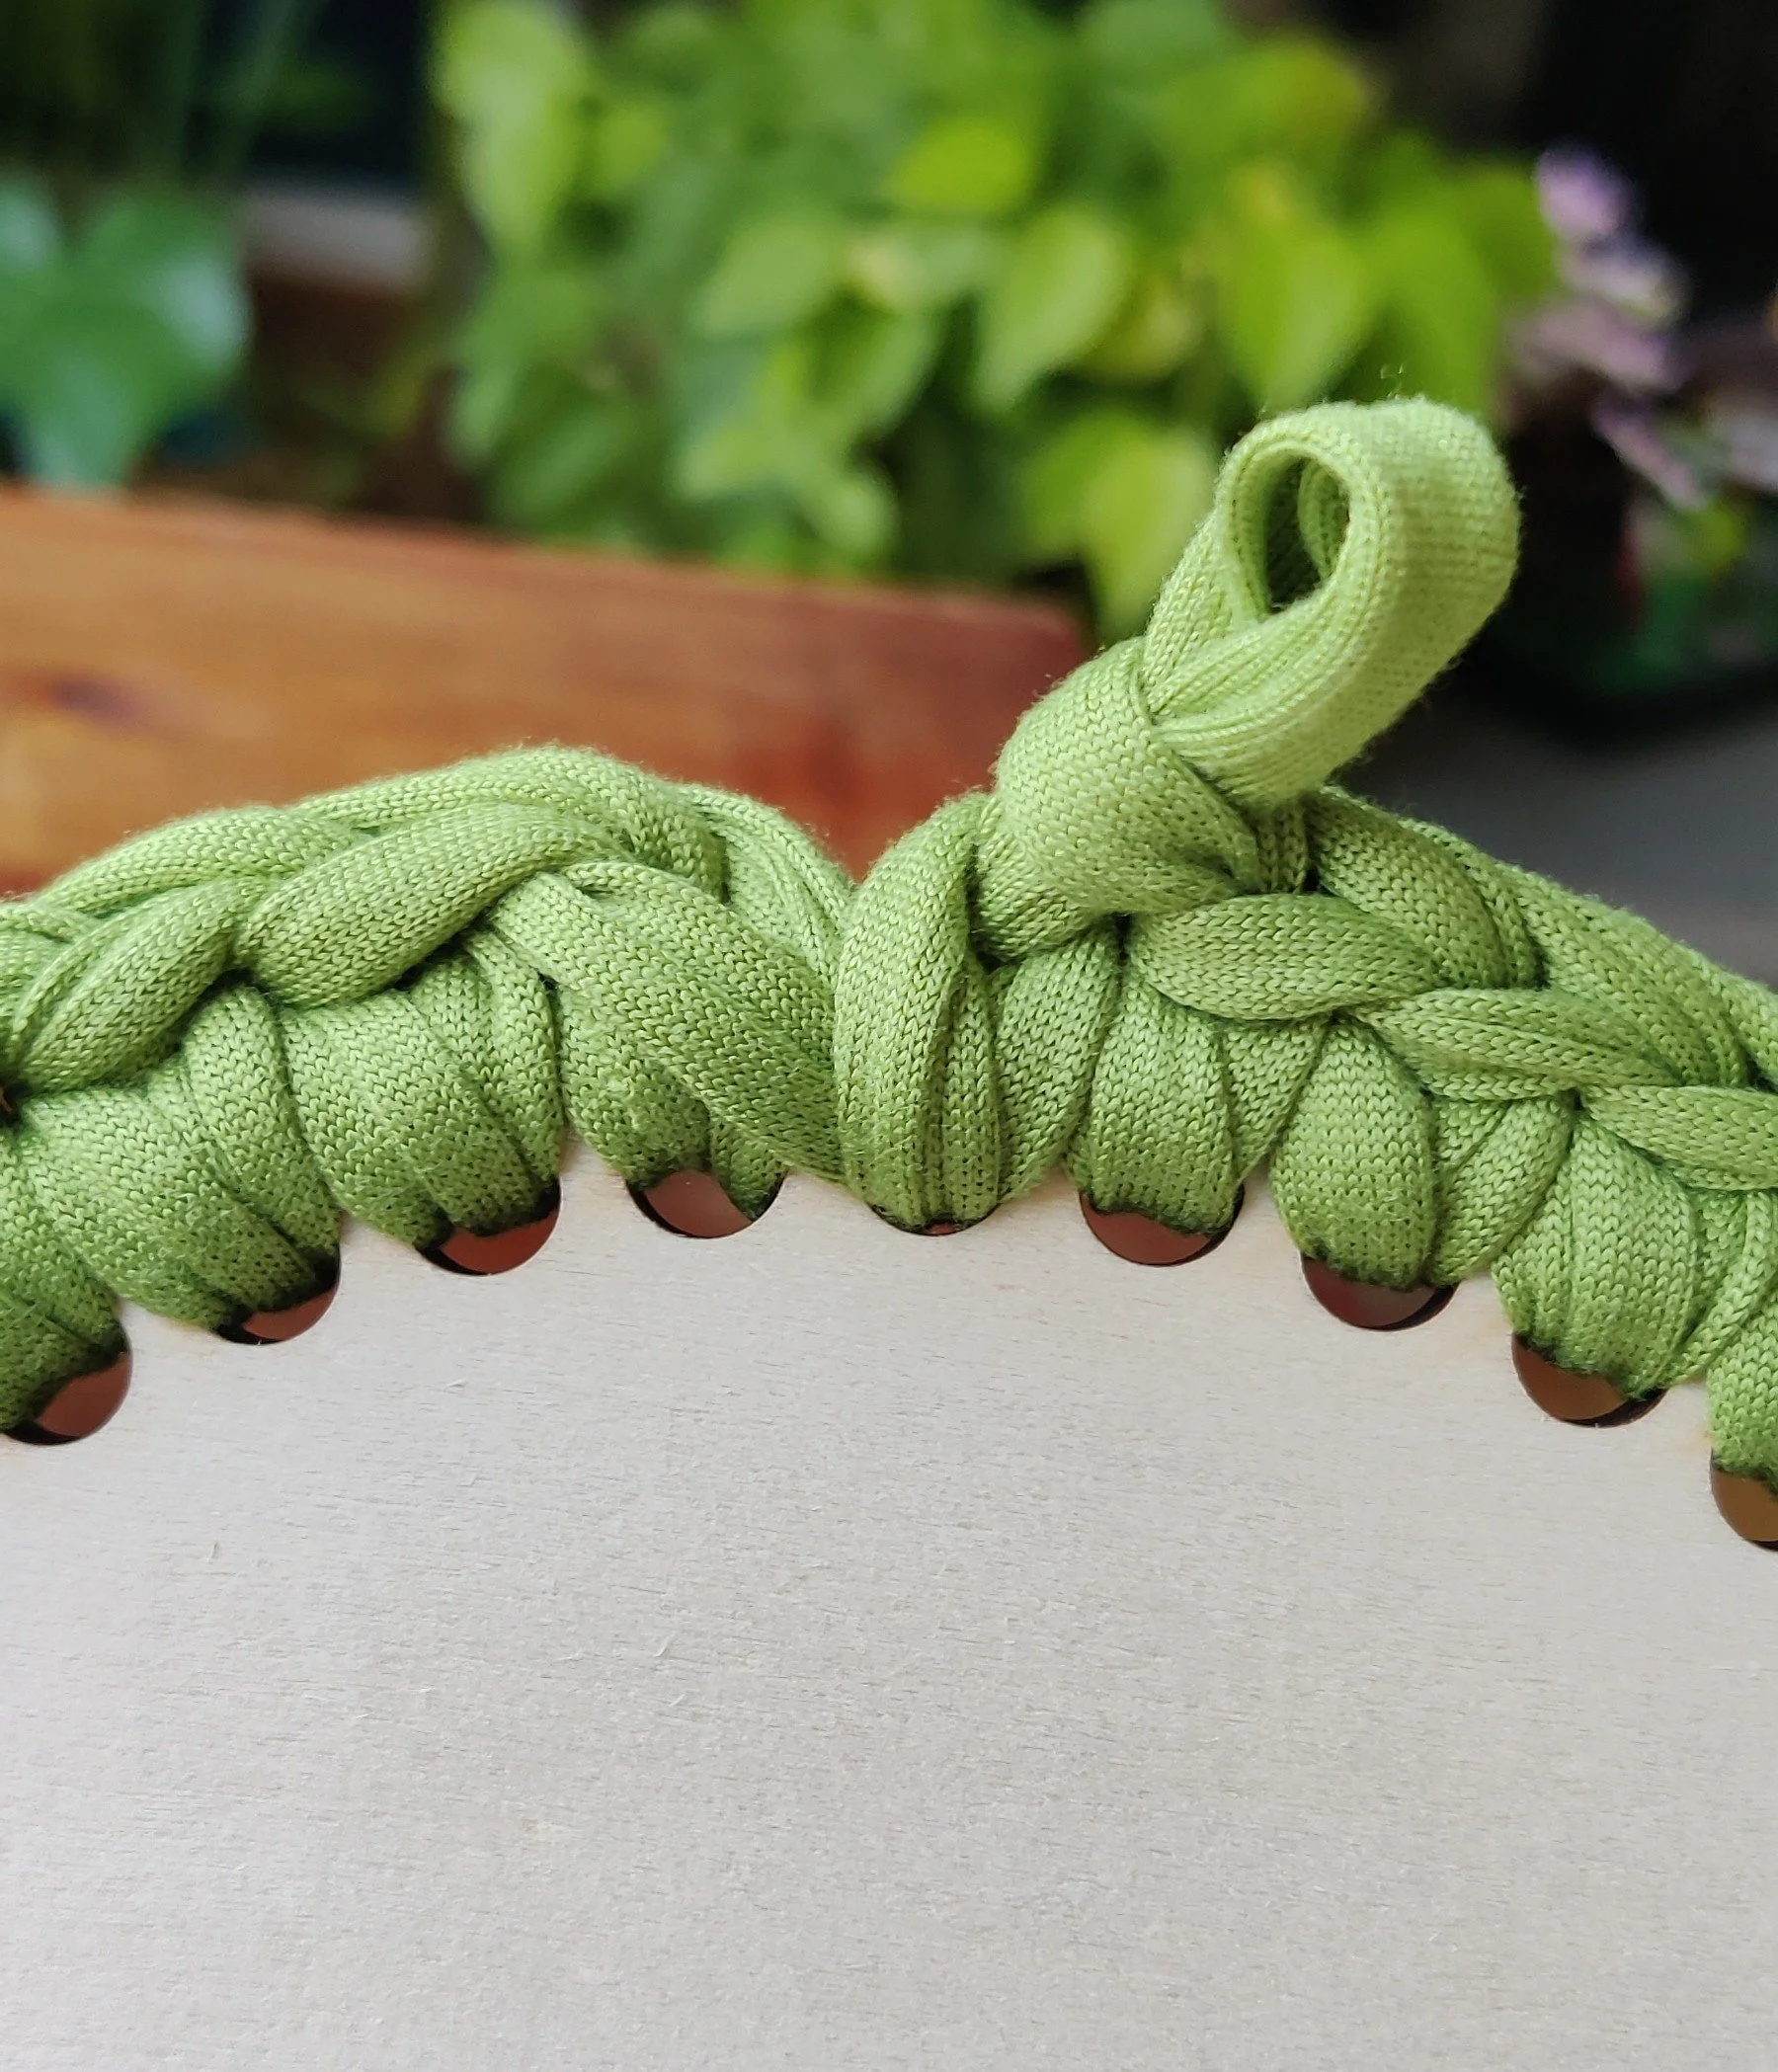
Pull up the working loop.
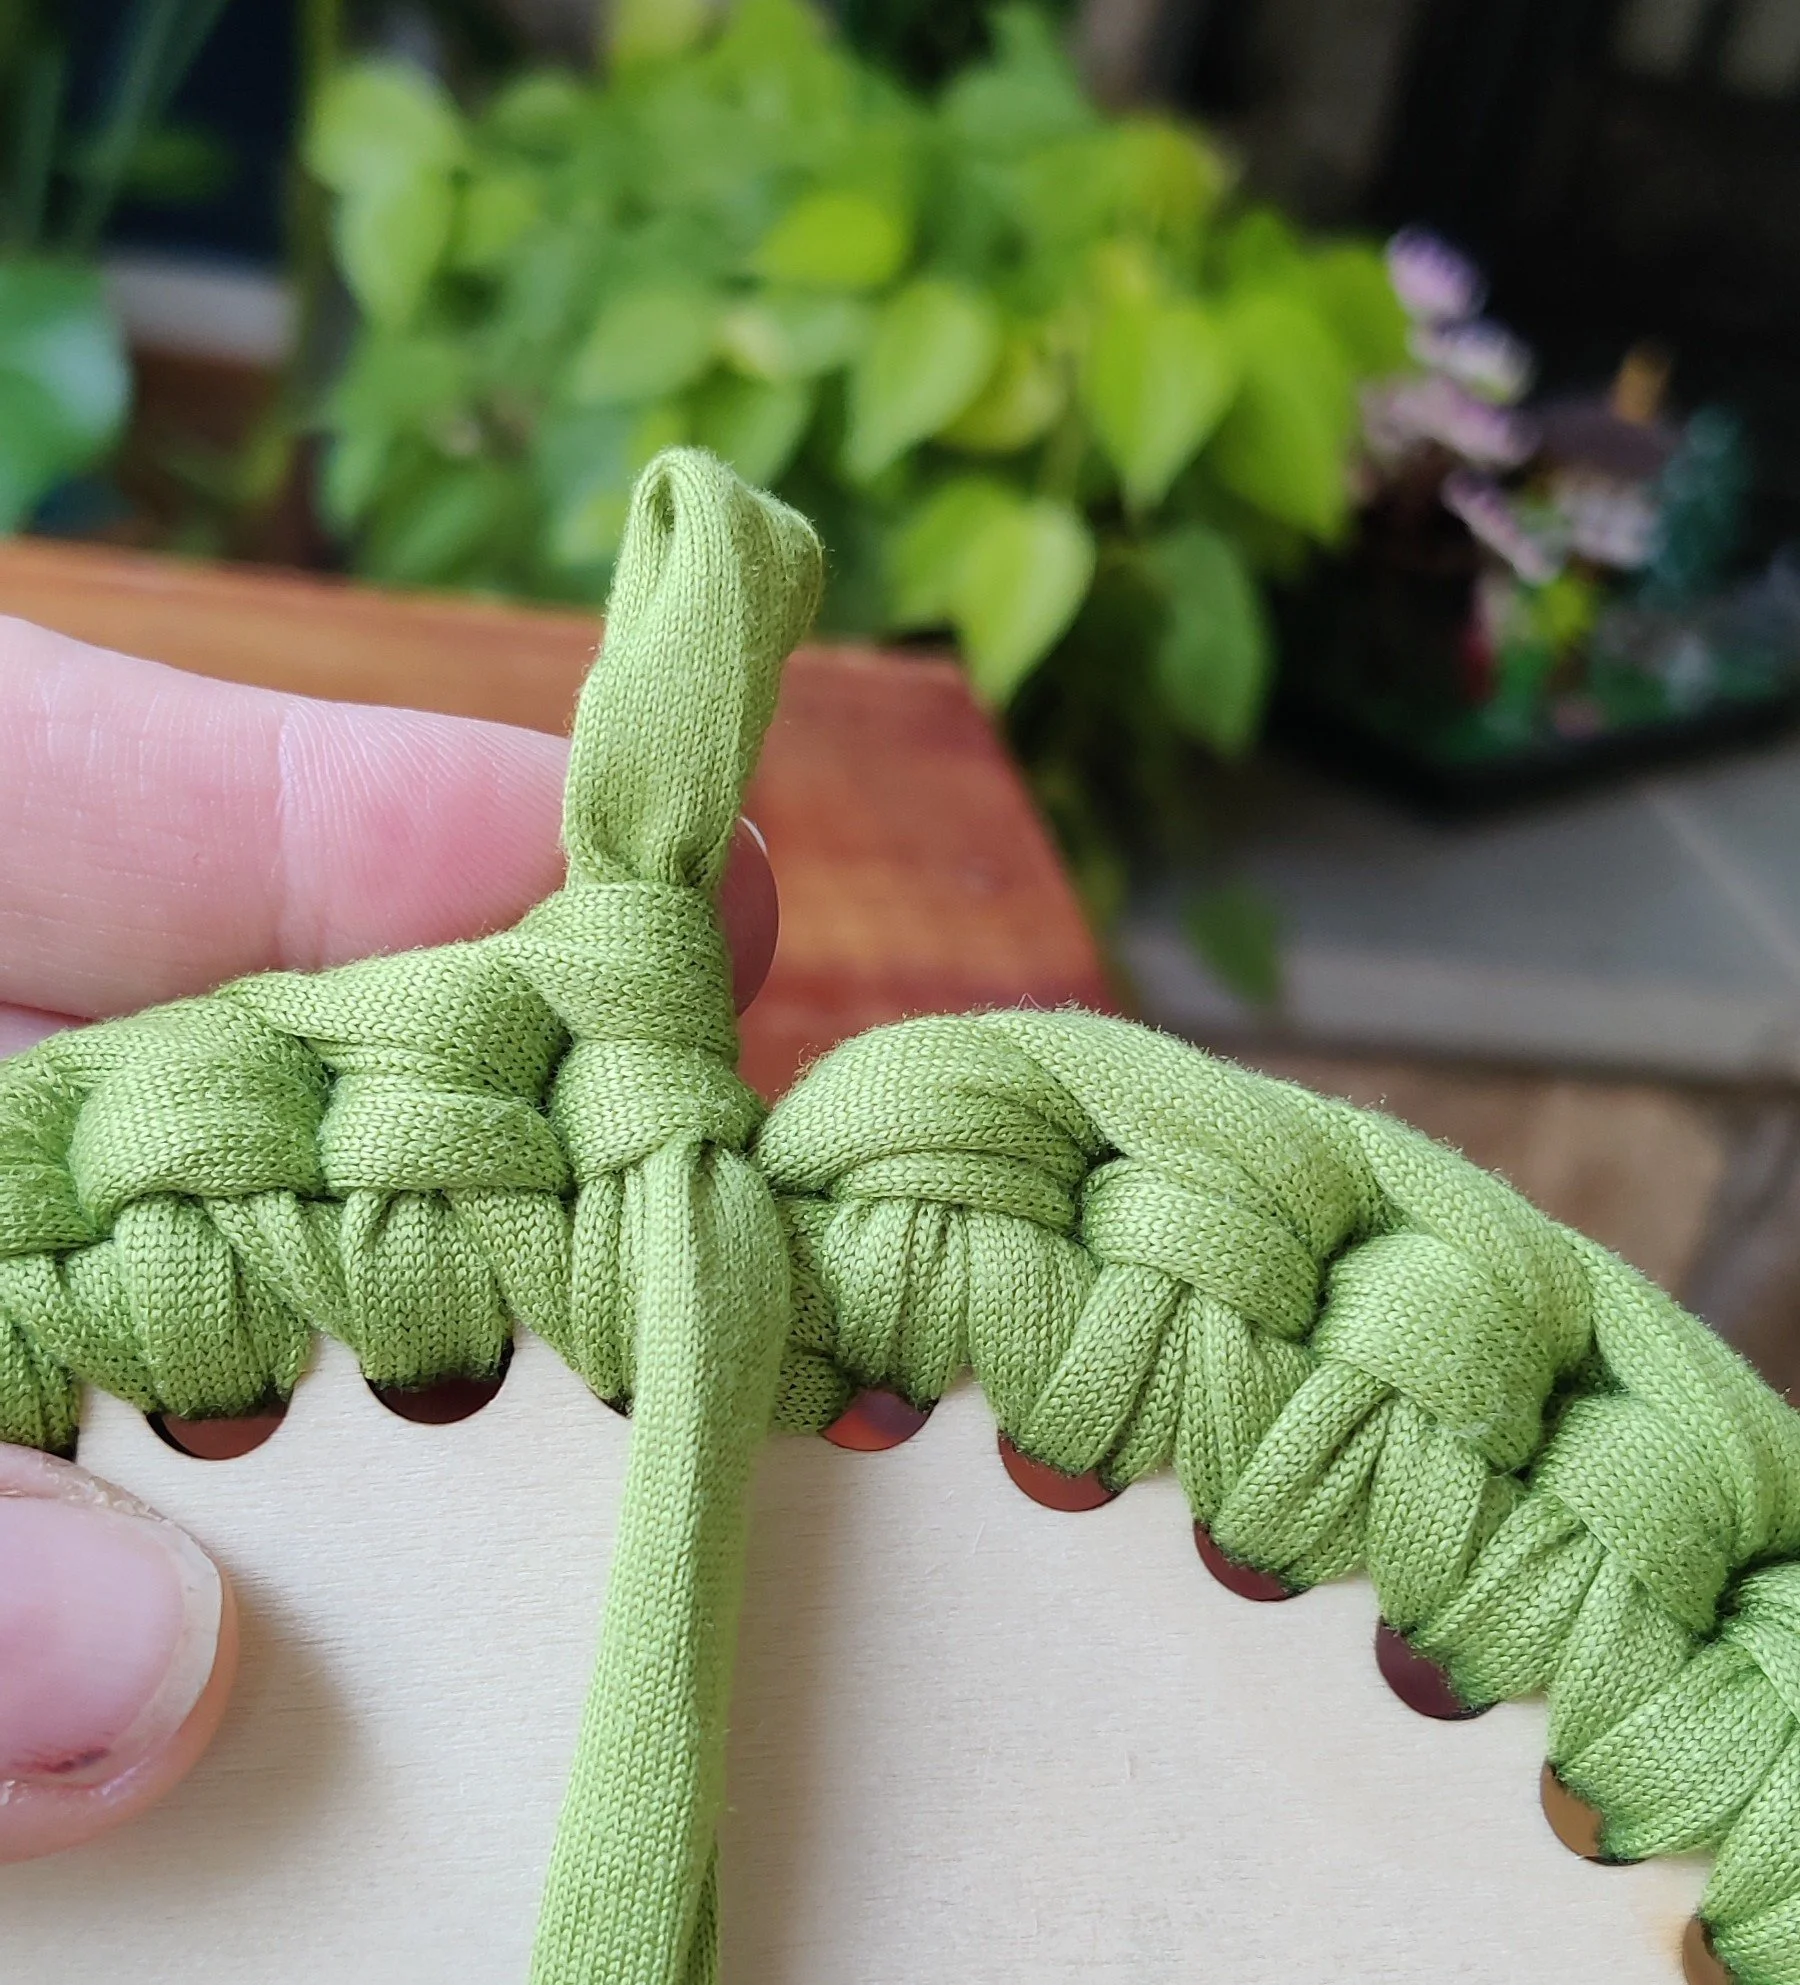
Remove your crochet hook.

Insert the hook through the back of the first stitch of the round.
Catch the working loop with your hook.

Pull the loop through to the back of the stitch.

Your round is now joined!
After completing the Invisible Join, place your working loop back on your hook and begin the next round in the first stitch, following the instructions for that round.
Repeat this technique at the end of each round unless otherwise noted.
Round 2: Start Building Your Sides
For each stitch:
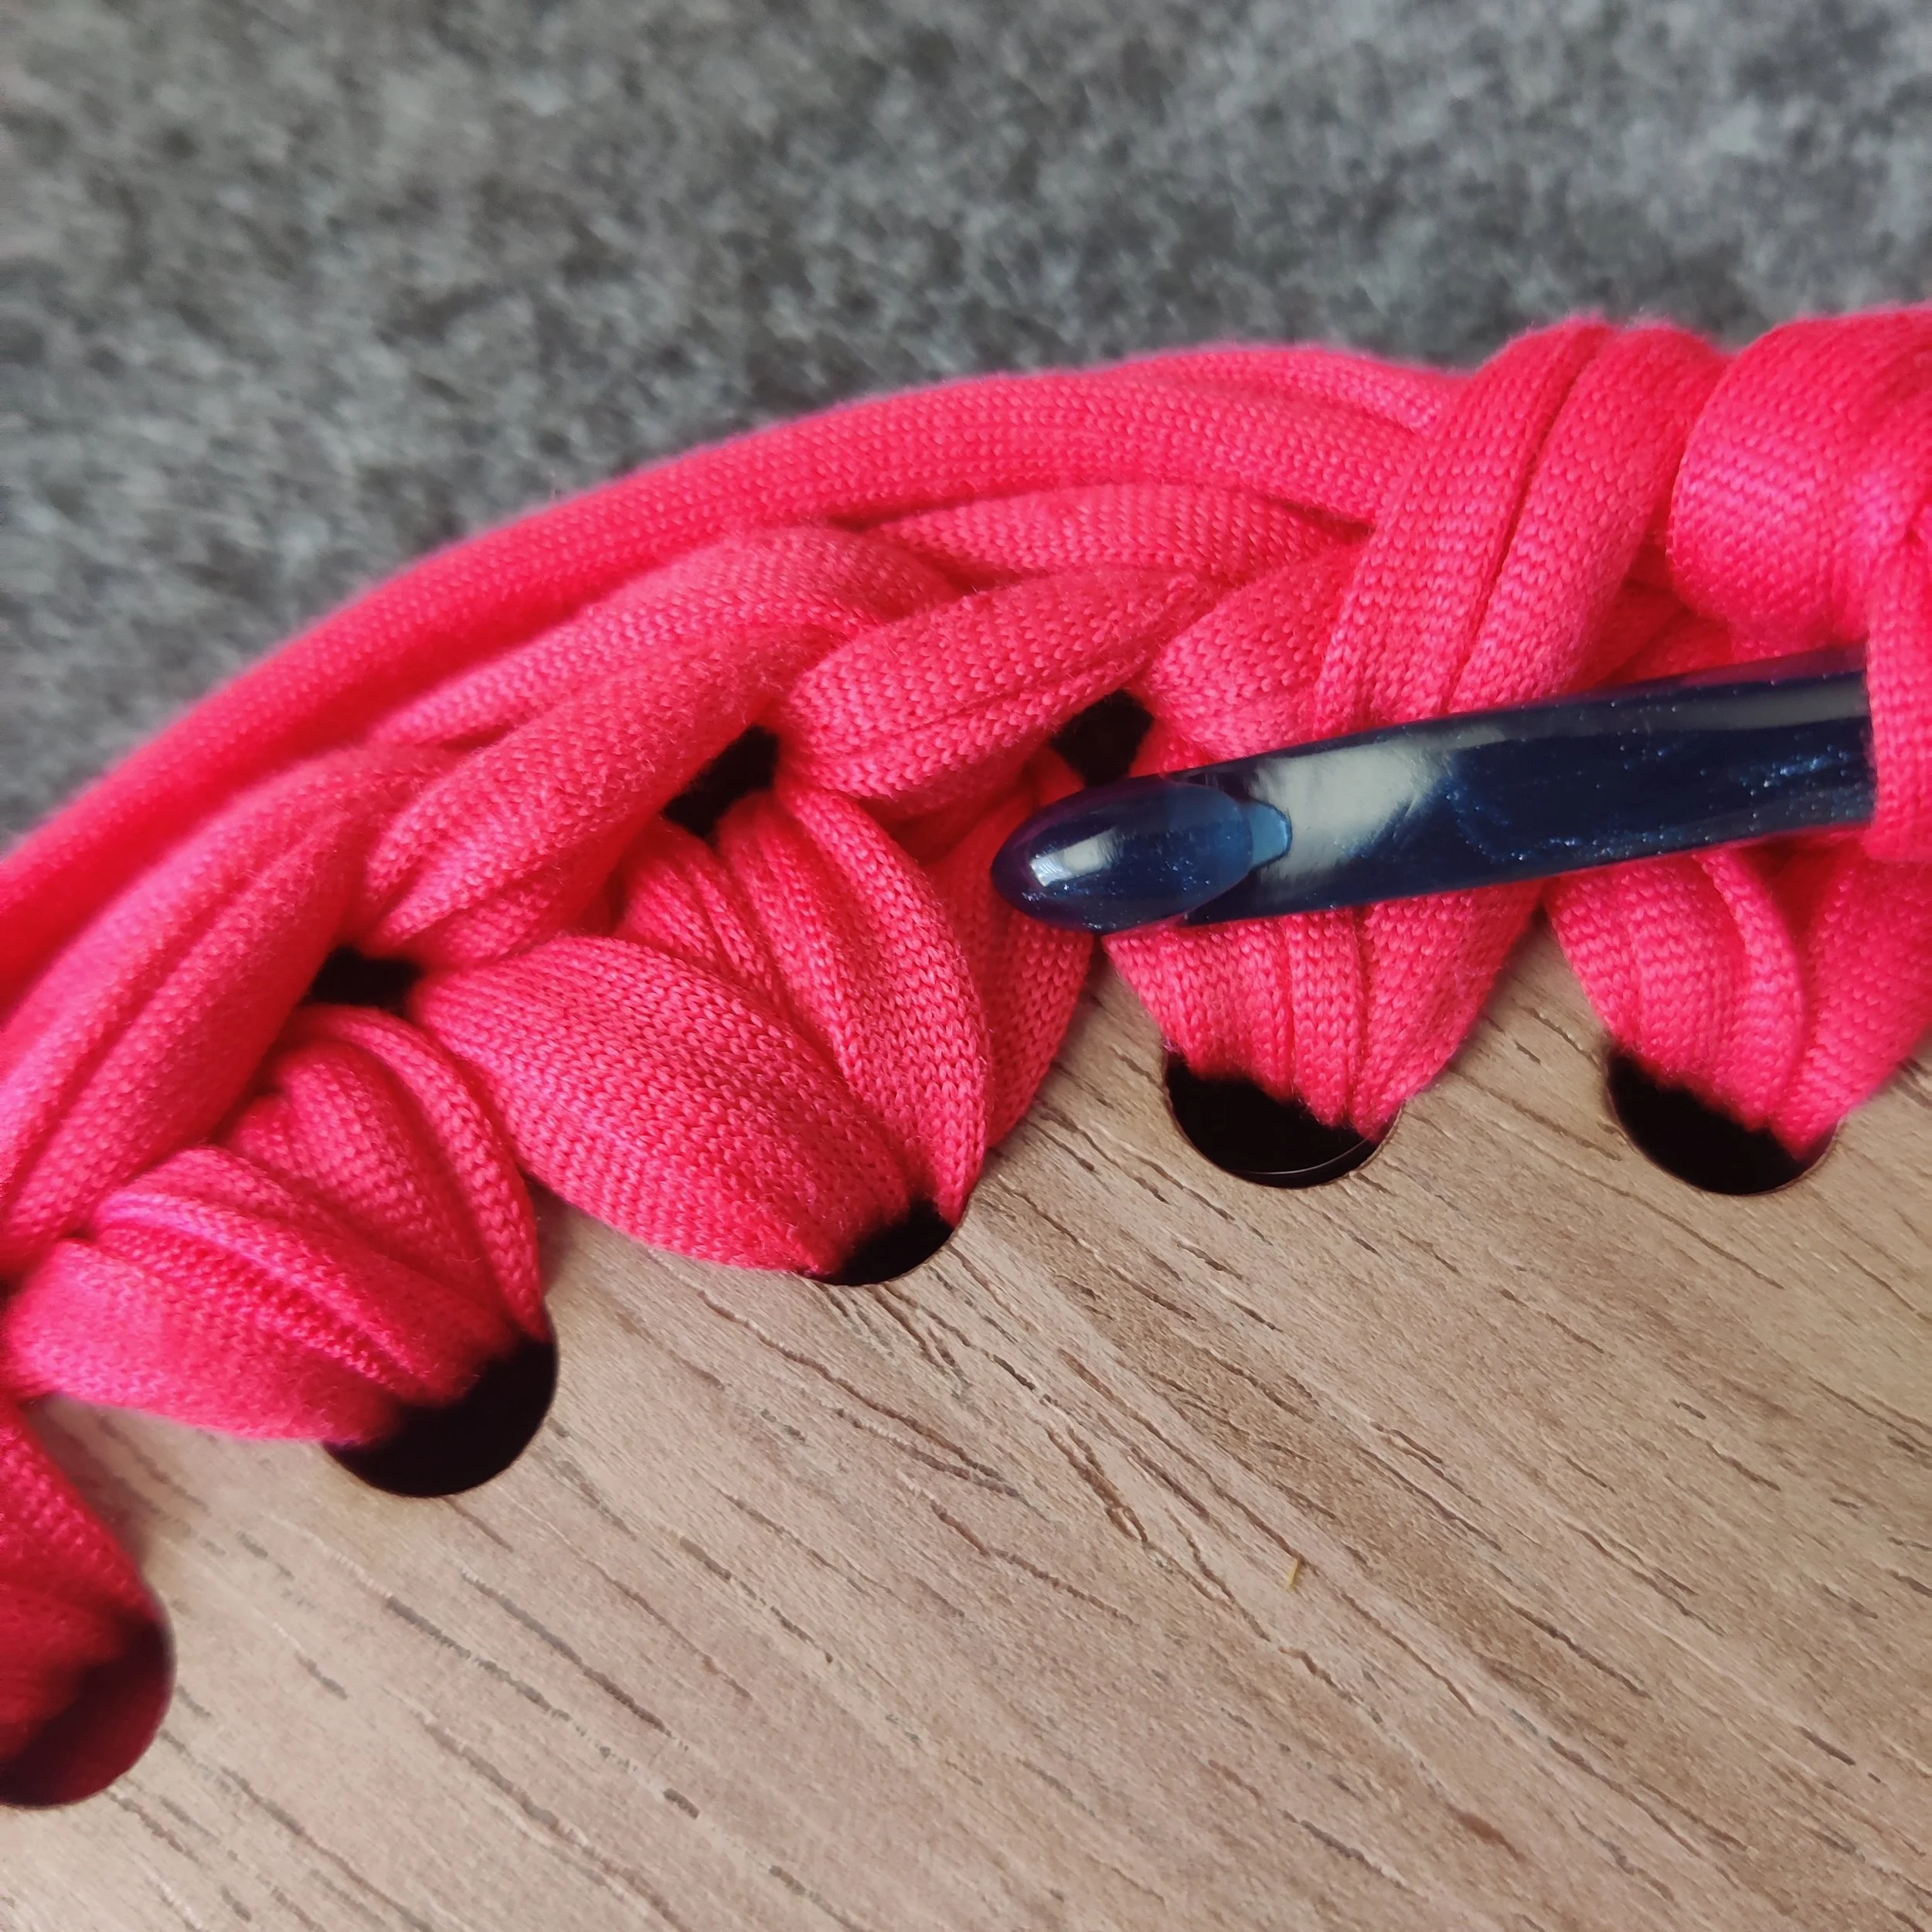
Each stitch from the previous round forms a "V" at the top.
Insert the hook into the top of the "V."
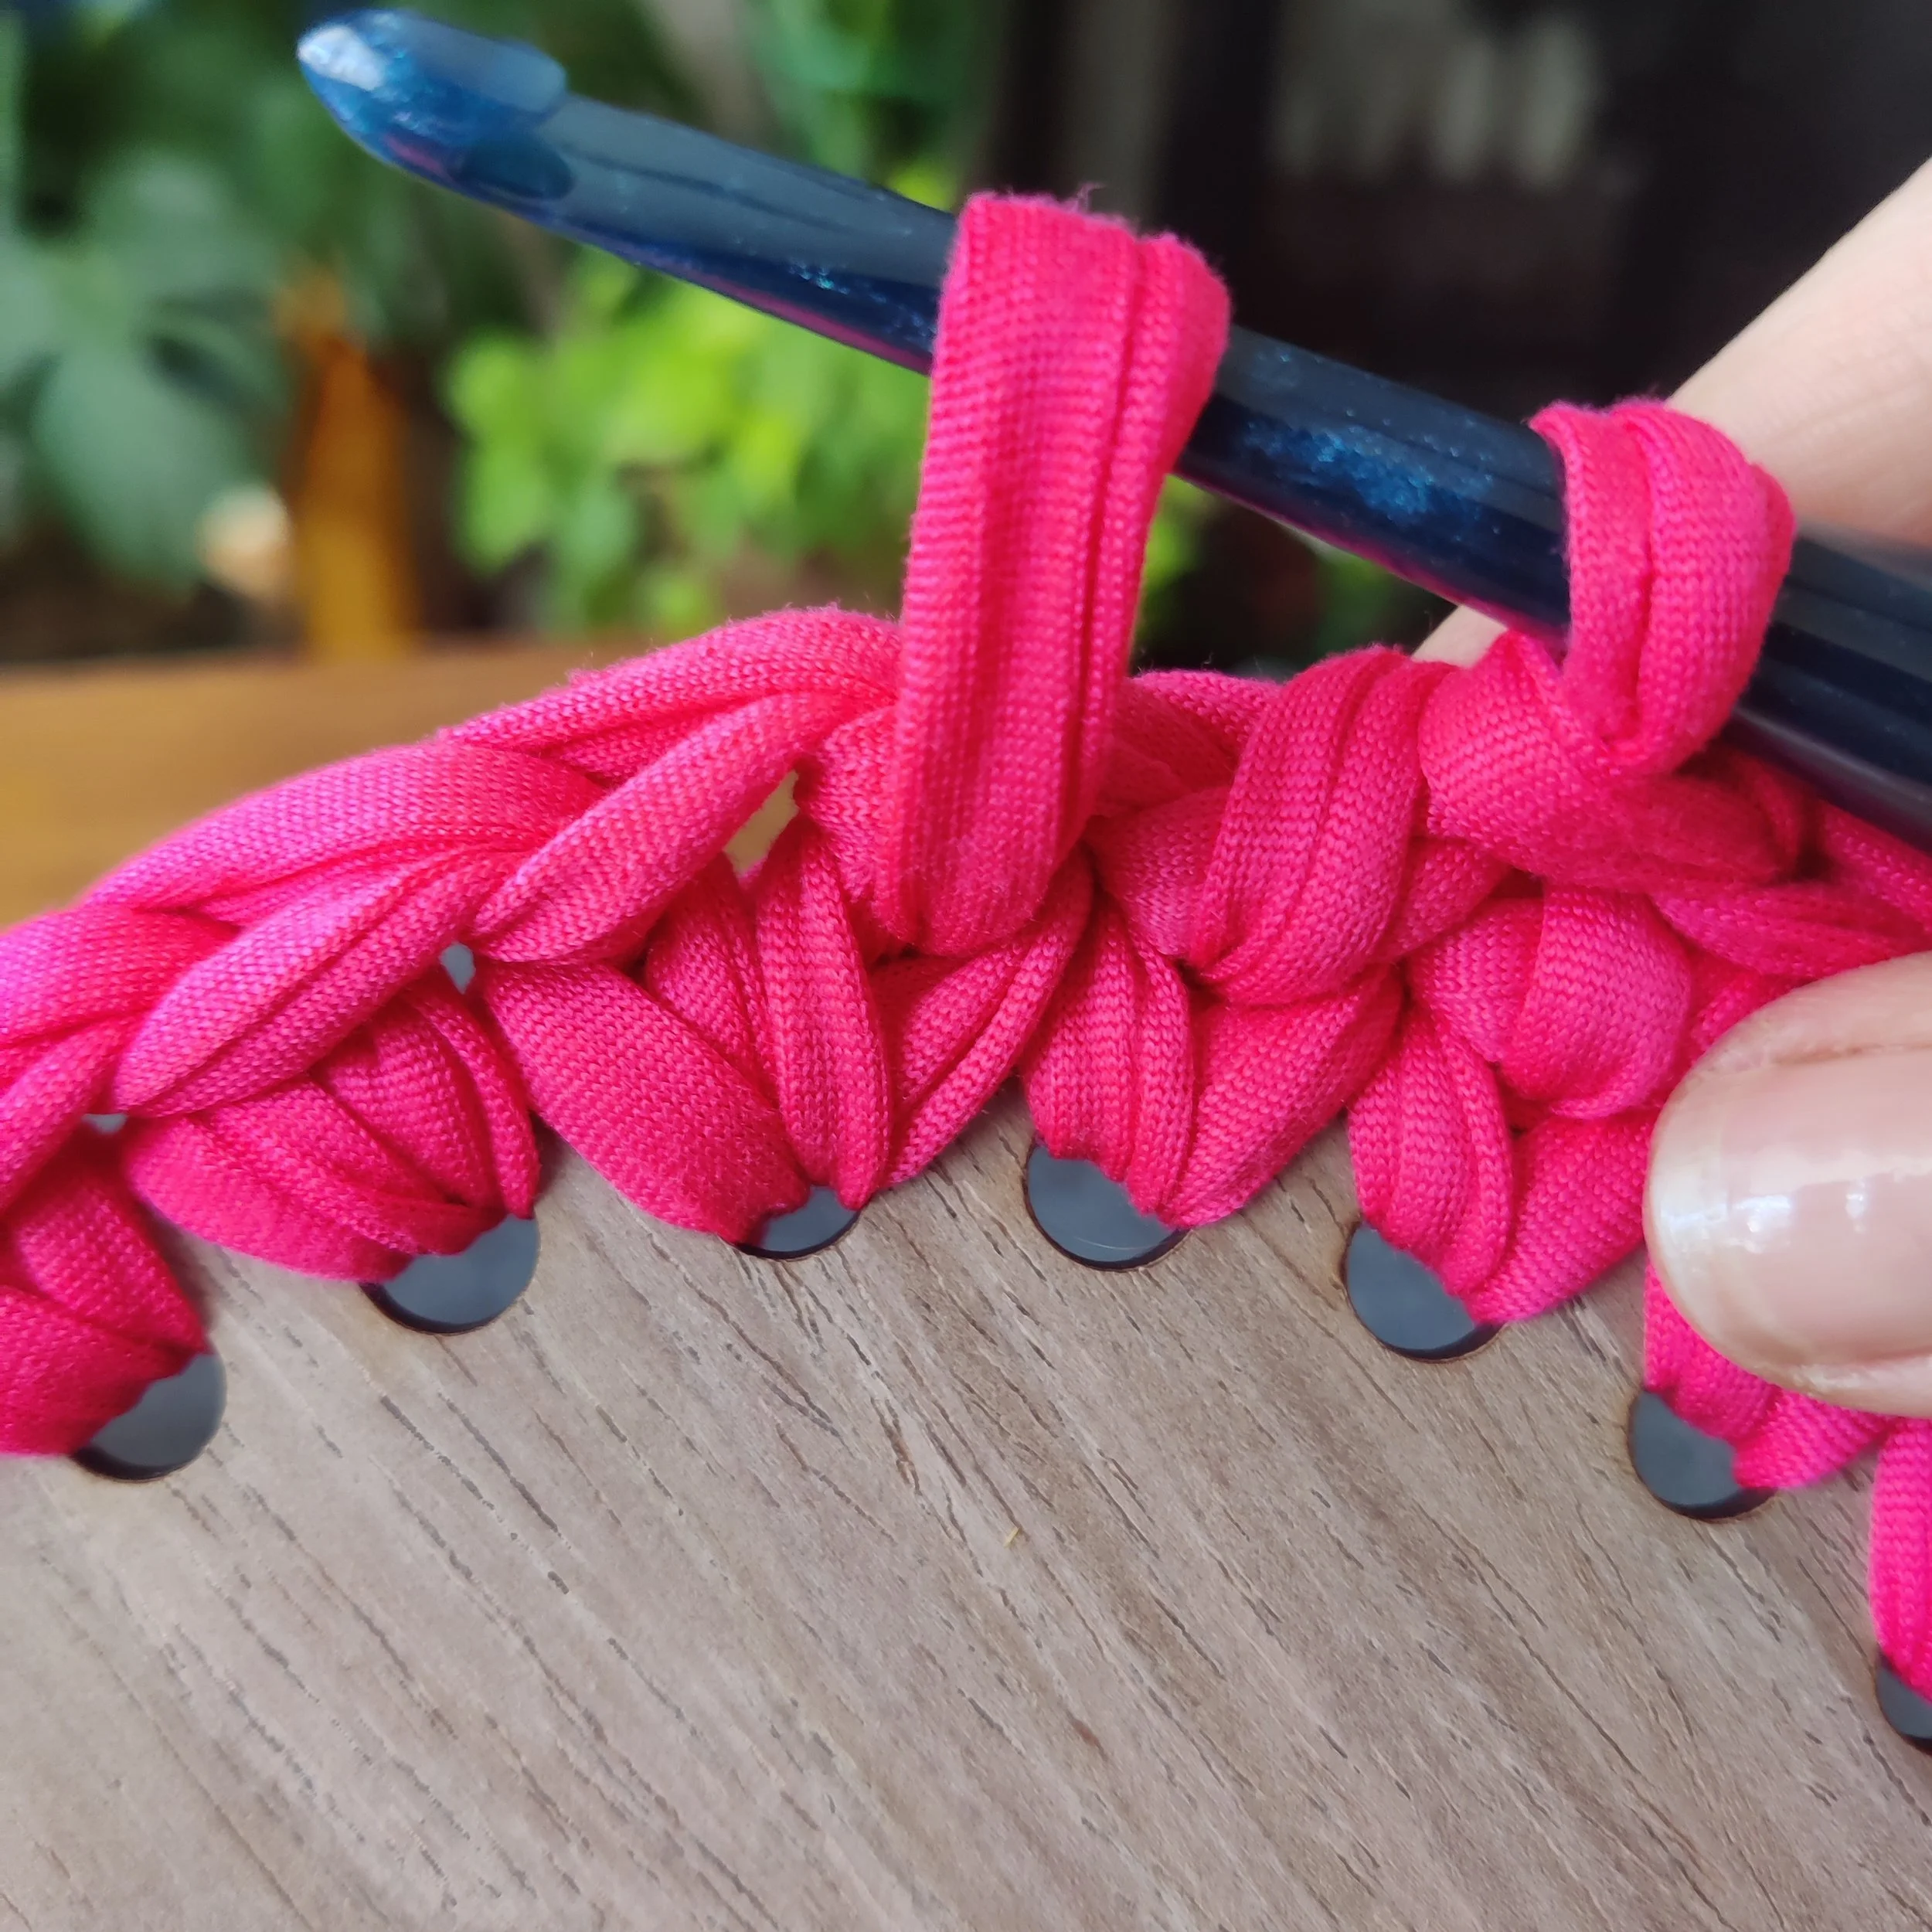
Pull up a loop
Yarn over
Pull through both loops on the hook
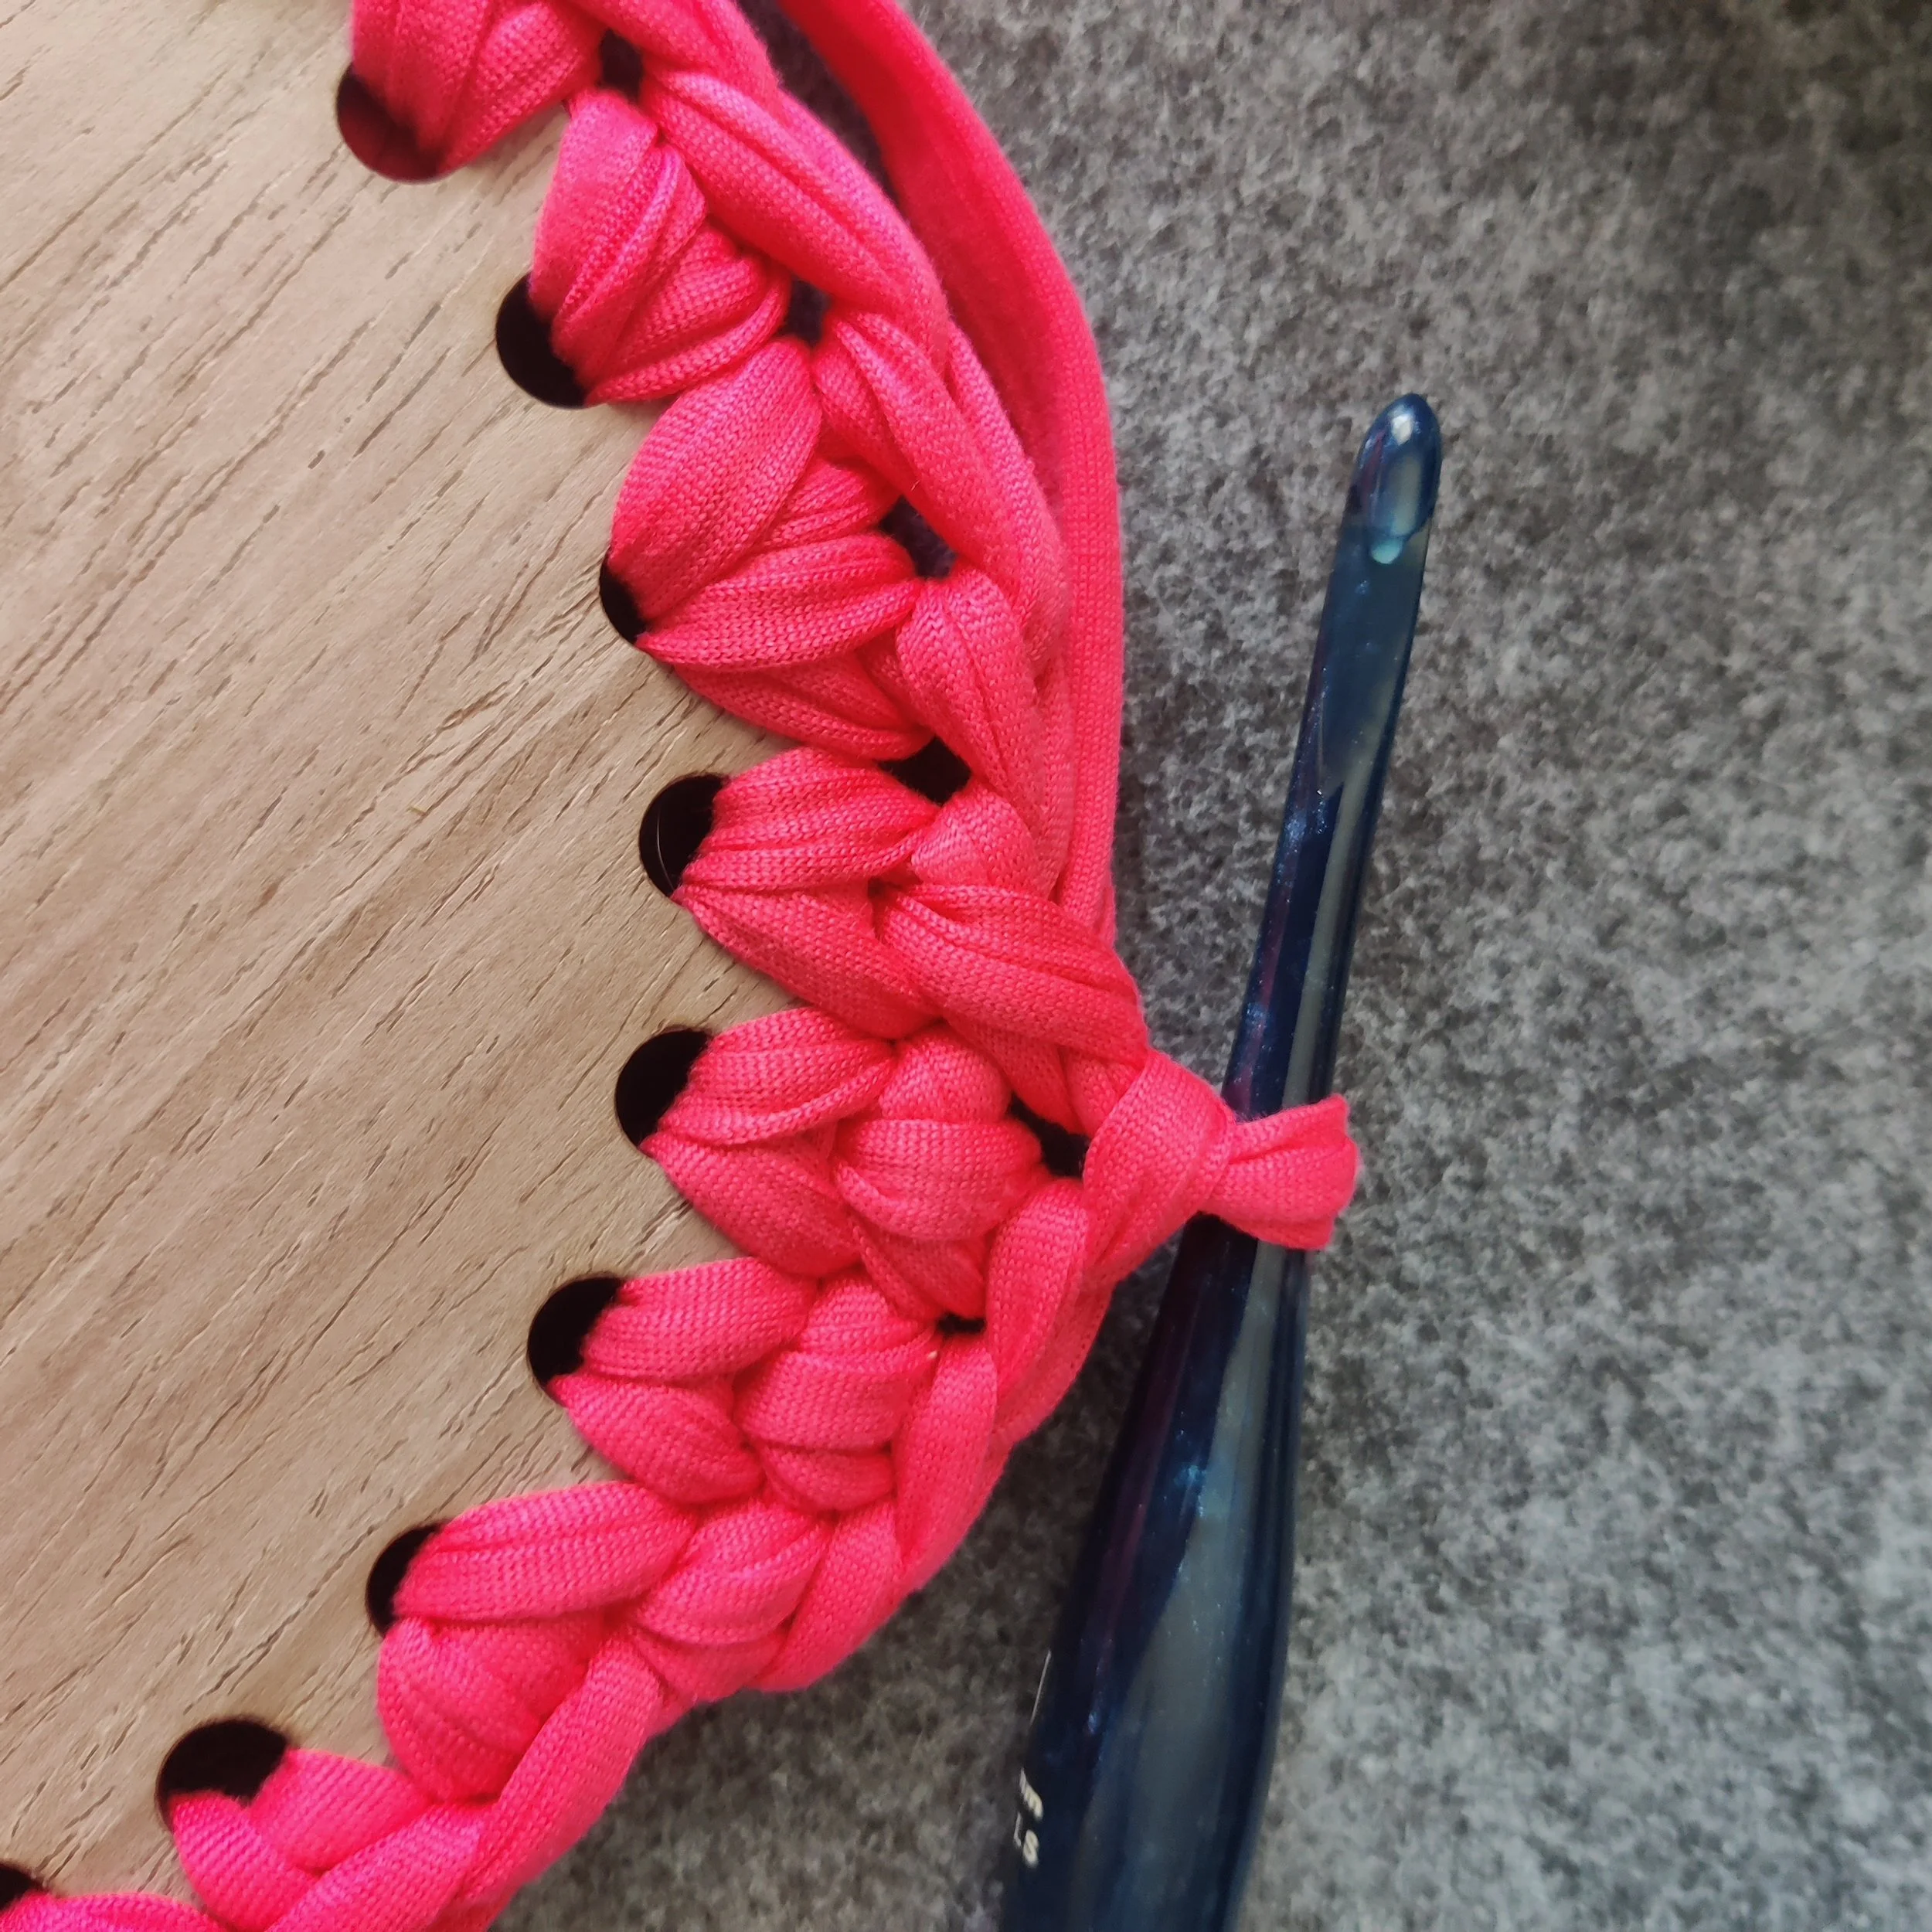
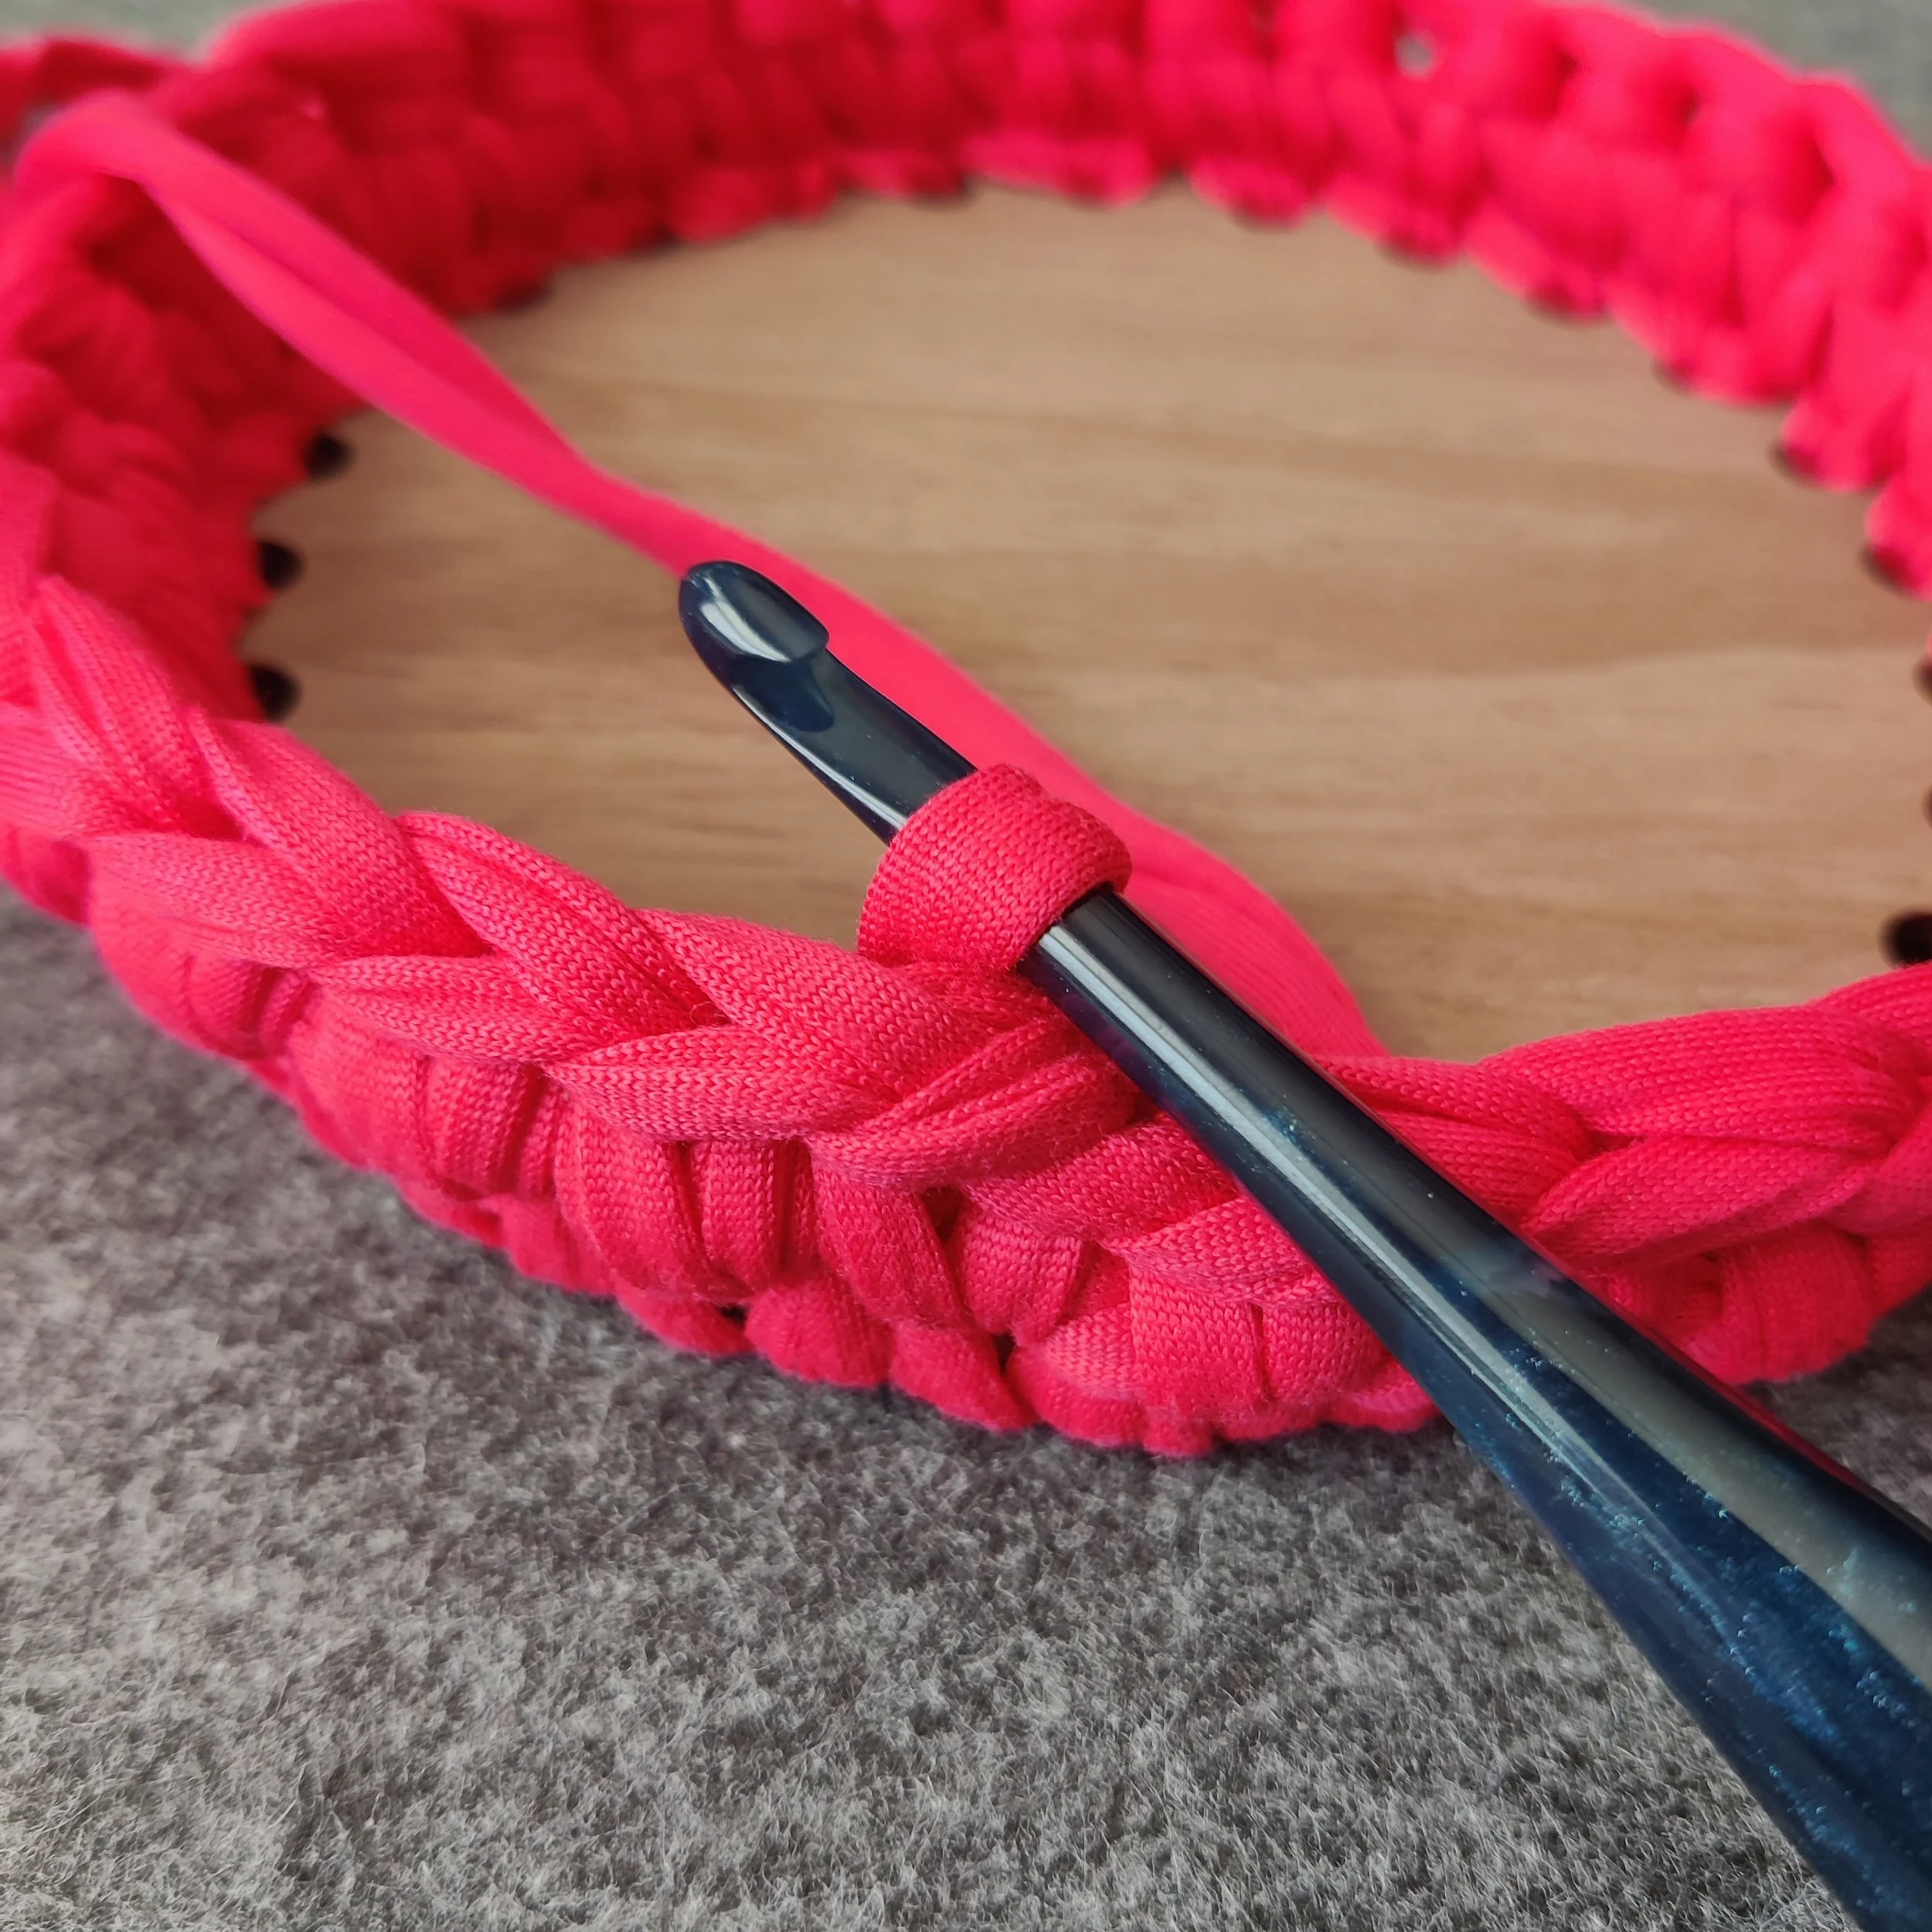
Work one single crochet into each stitch in this round.
Keep your tension even as you work.
Complete the round using the Invisible Join.
Round 3 and Beyond: Build Your Sides
Now we'll switch to half double crochet stitches to build the sides of your yarn bowl or bucket bag.
To make a half double crochet:
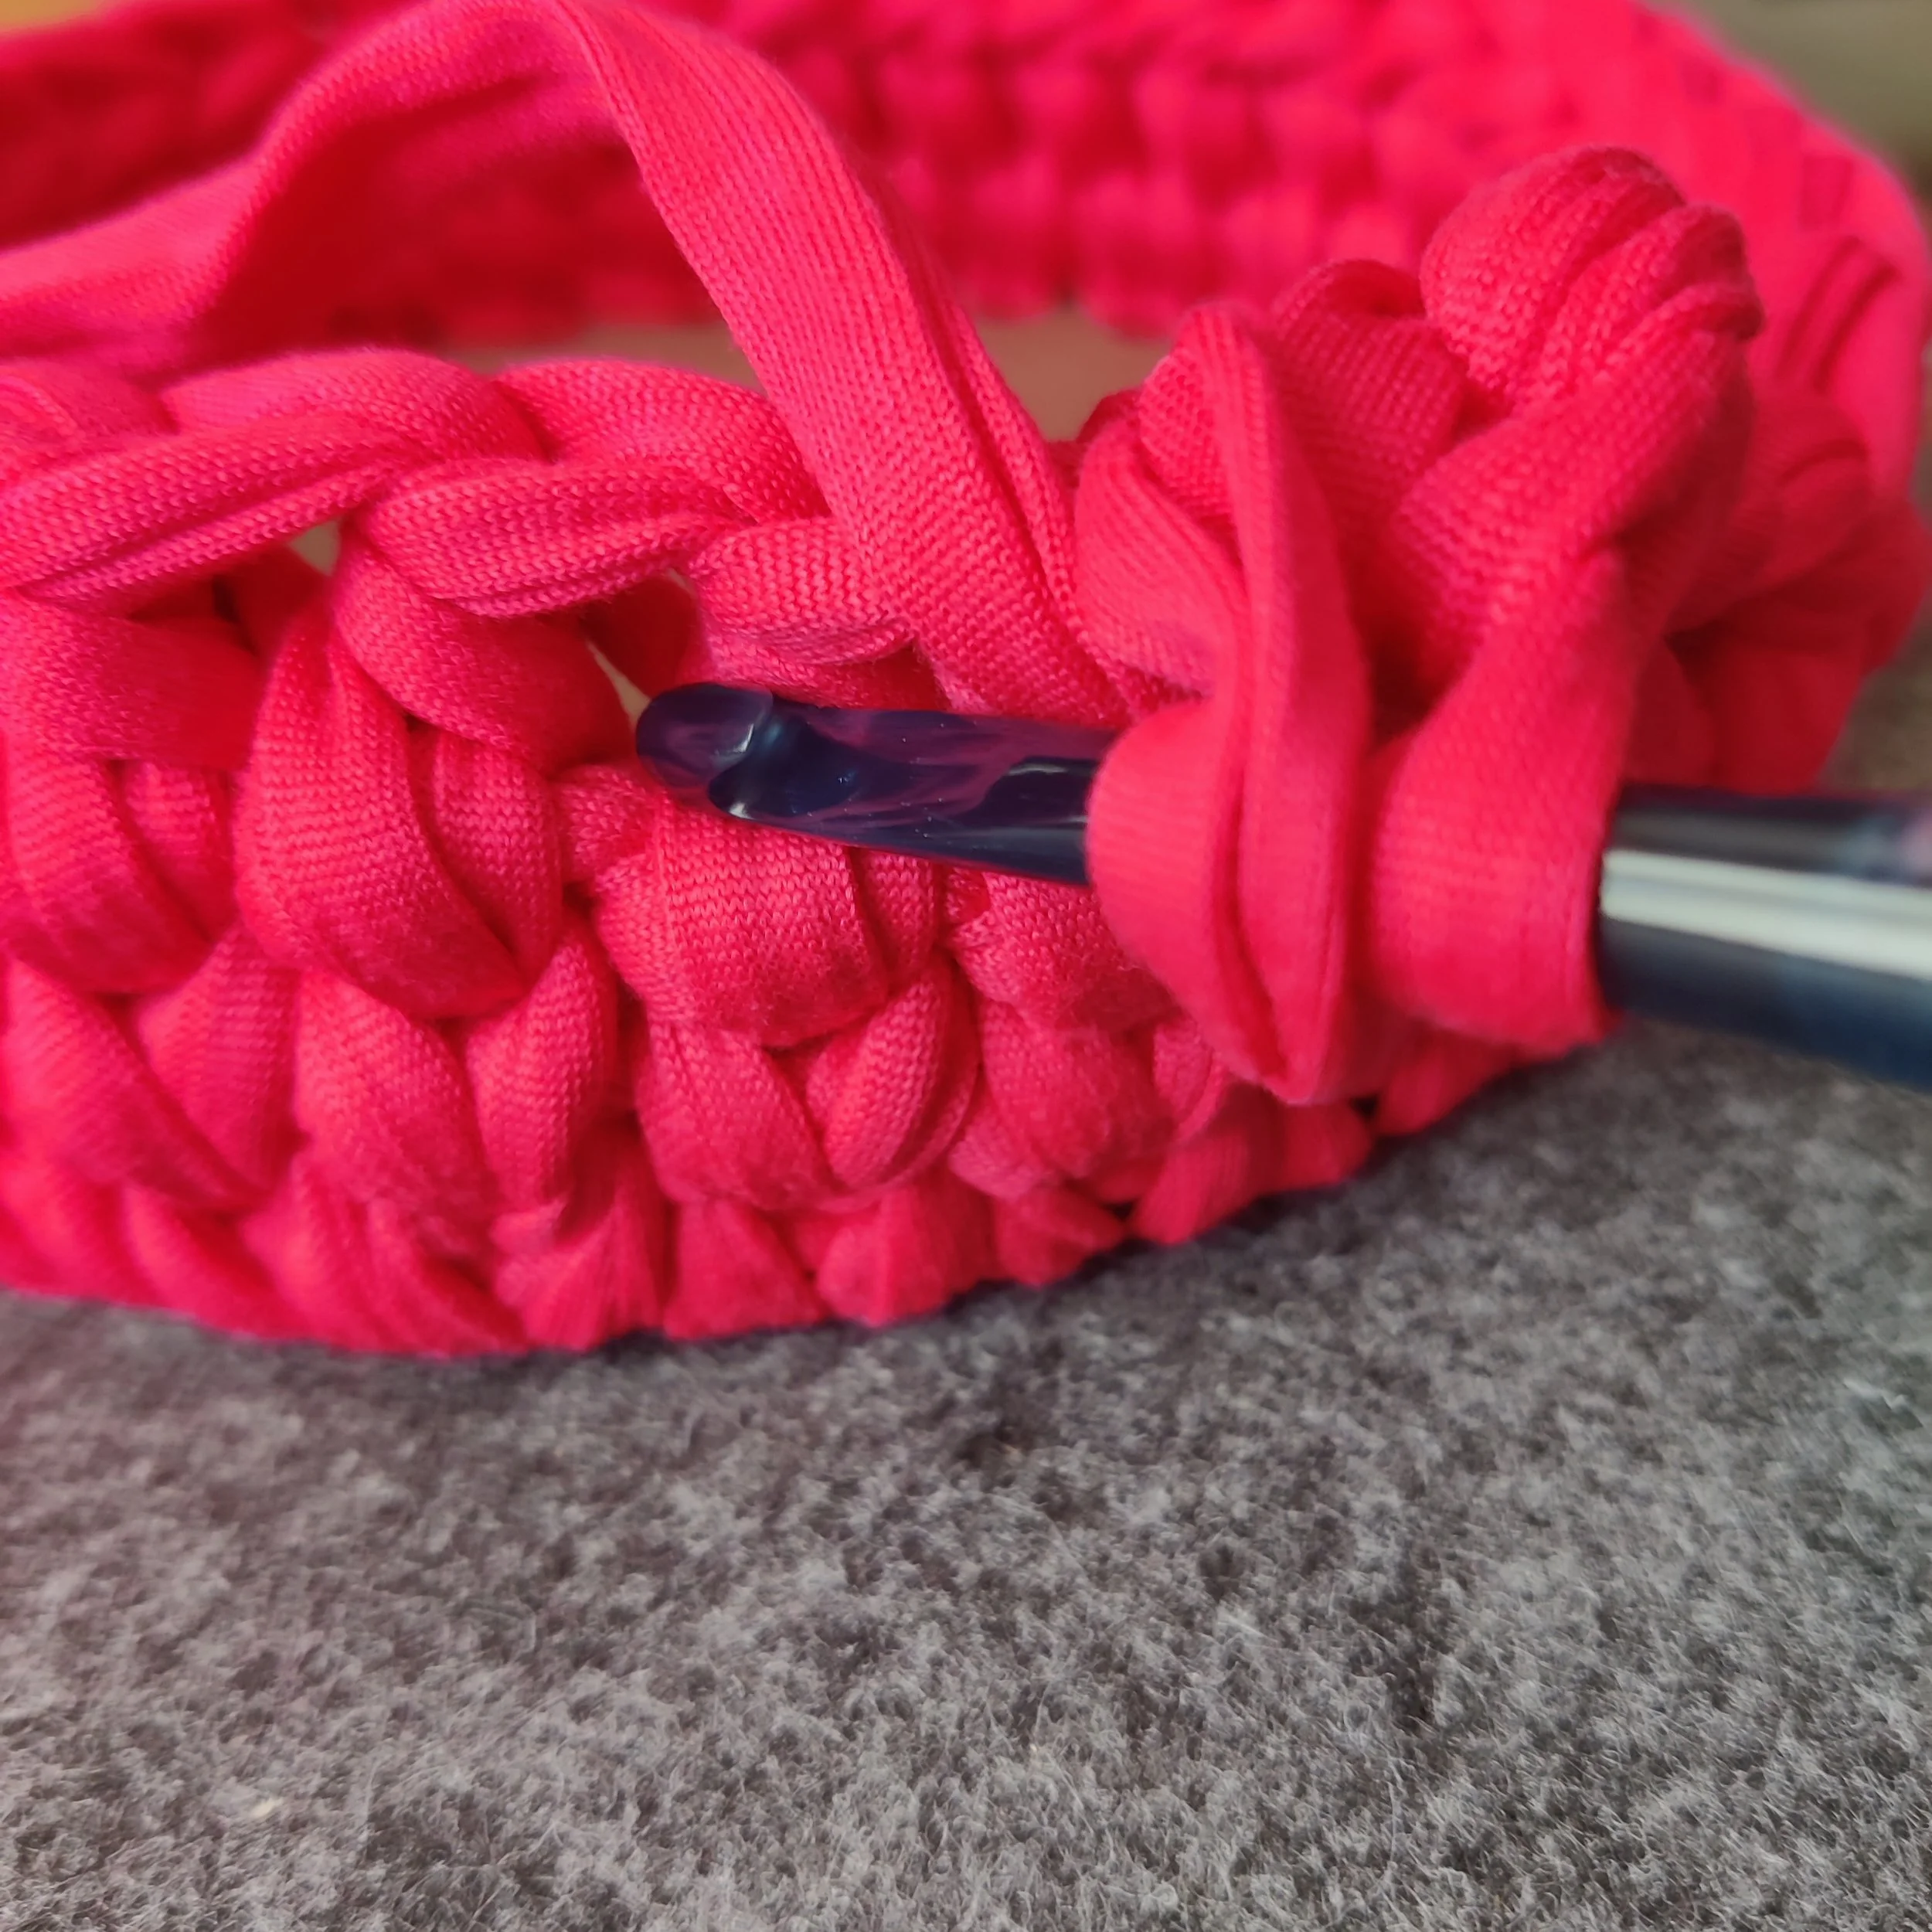
Wrap your yarn over the hook.
Insert your hook under both loops of the "V" at the top of the next stitch.
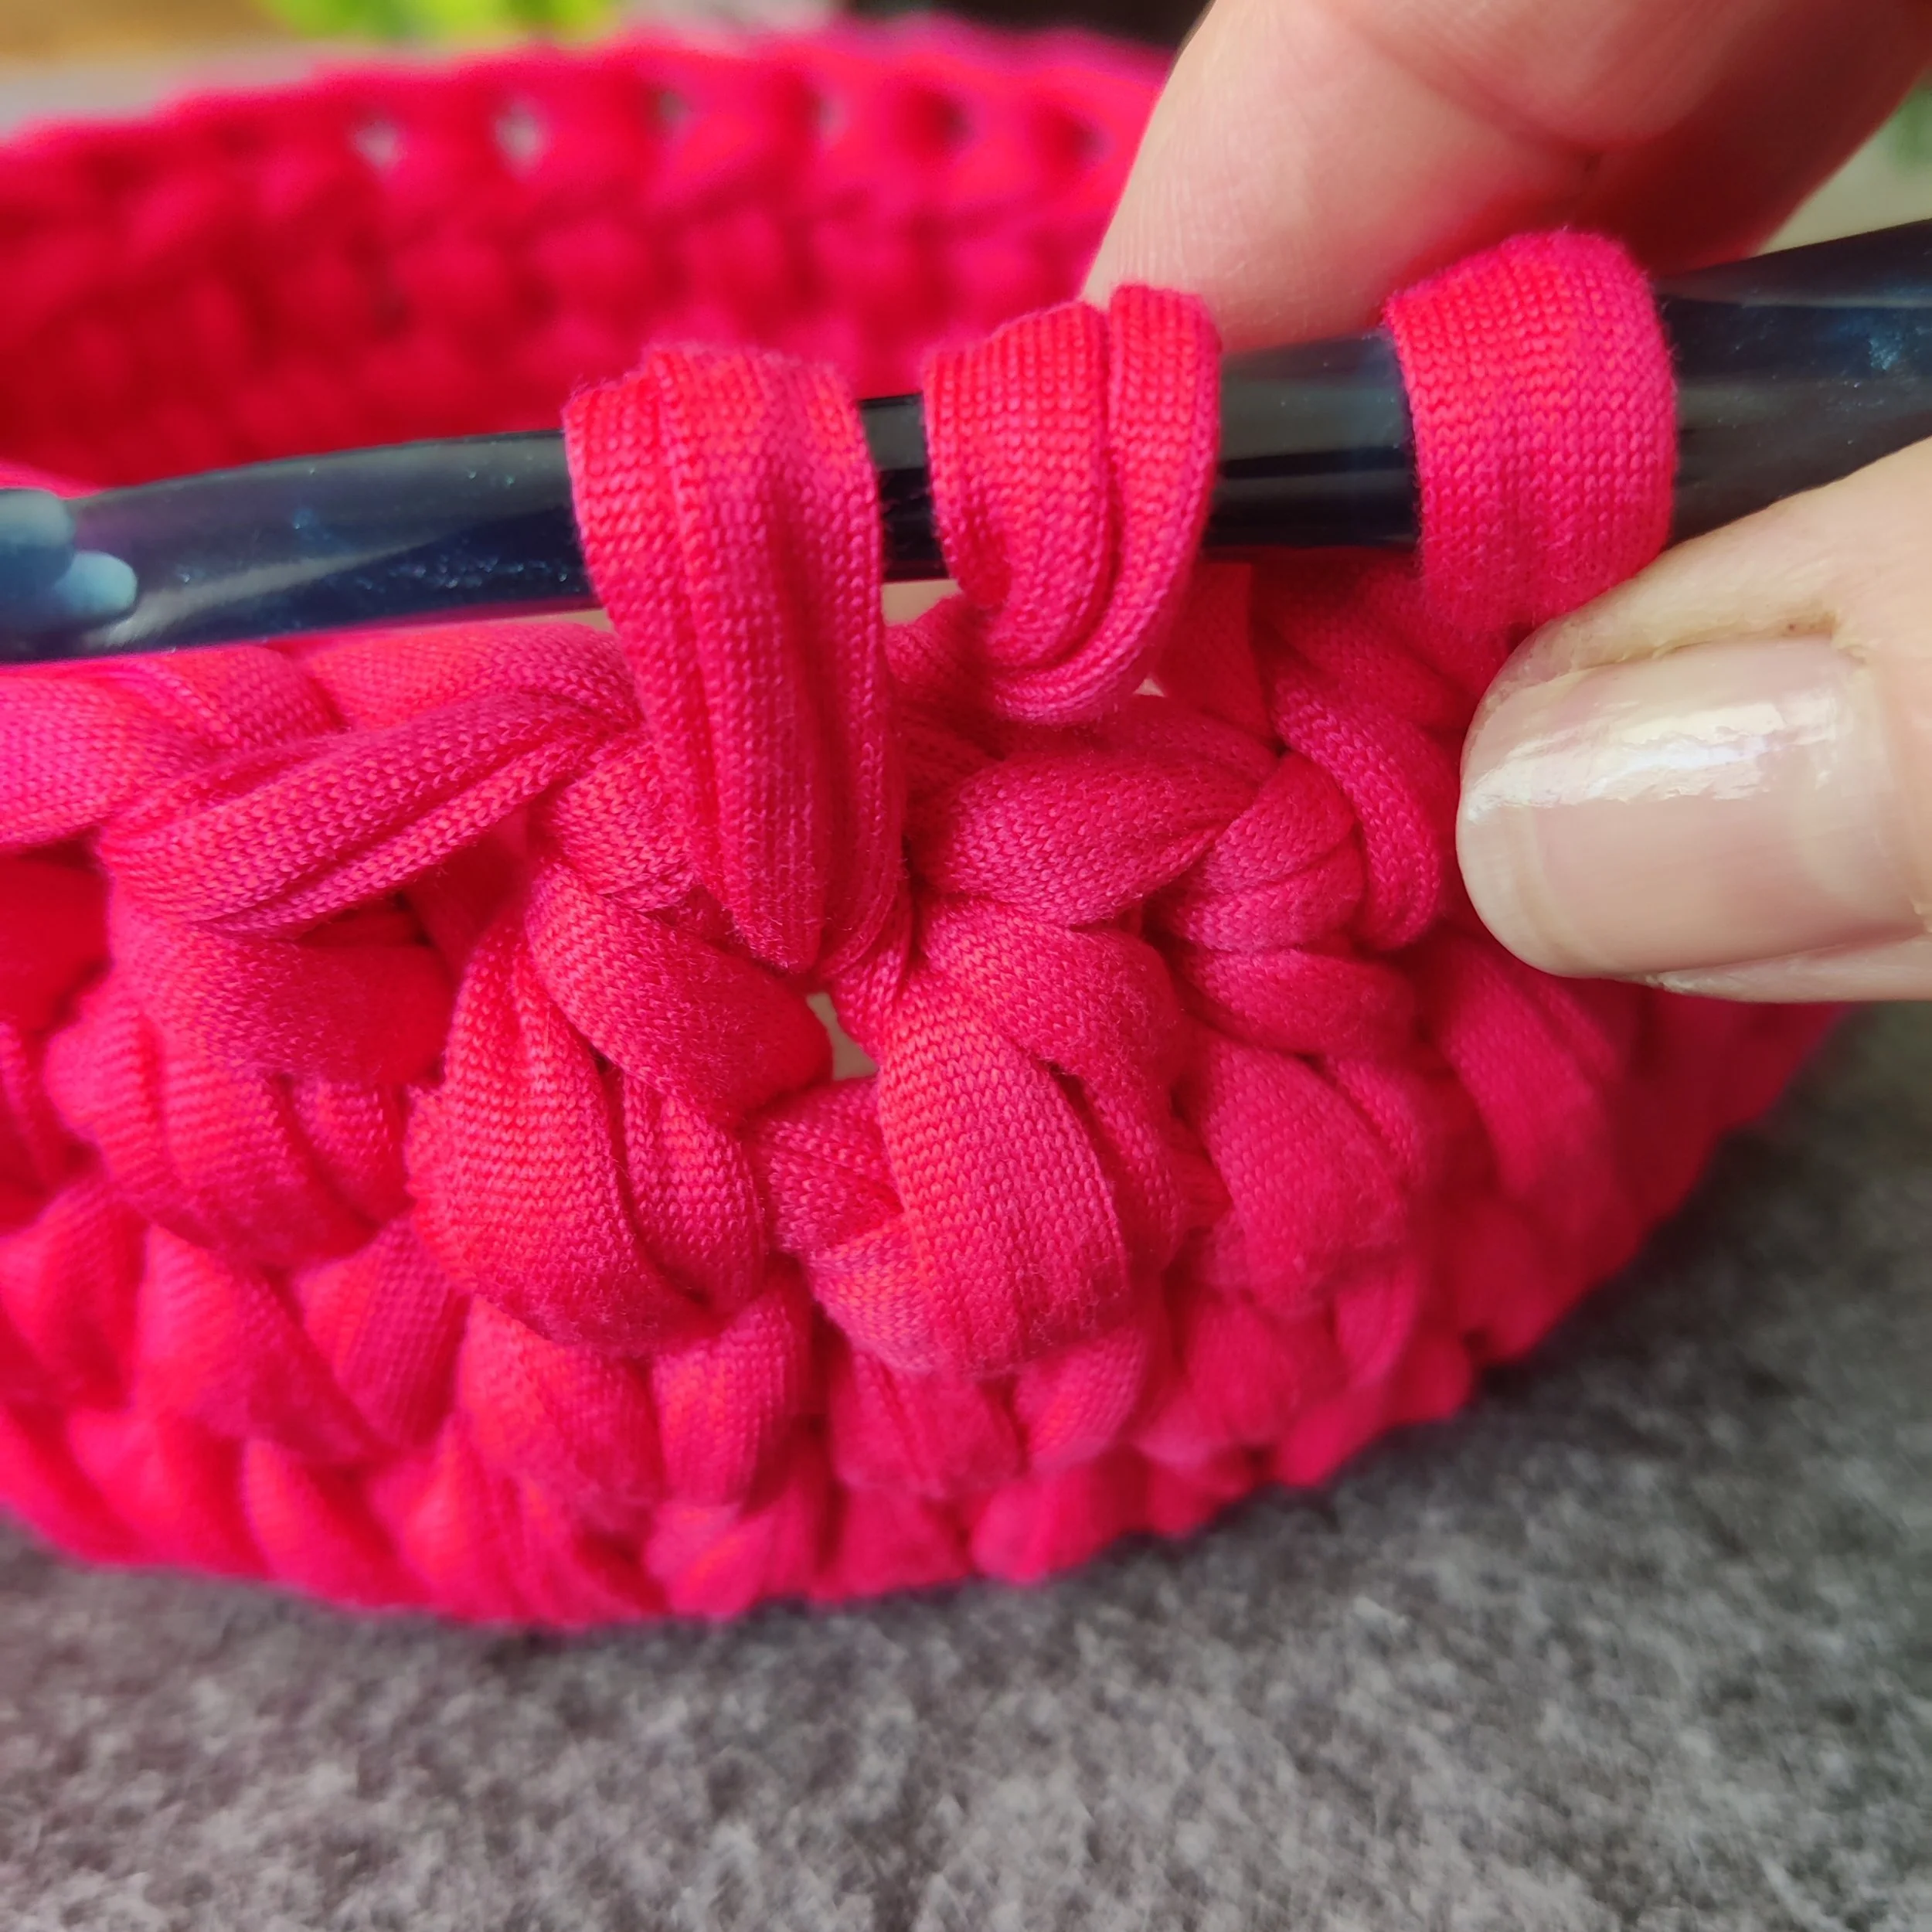
Yarn over and pull up a loop. You should now have three loops on your hook.
Yarn over again and pull through all three loops.
Work one half double crochet into each stitch around.
Complete the round using the Invisible Join.
Repeat these rounds until your project reaches your desired height.
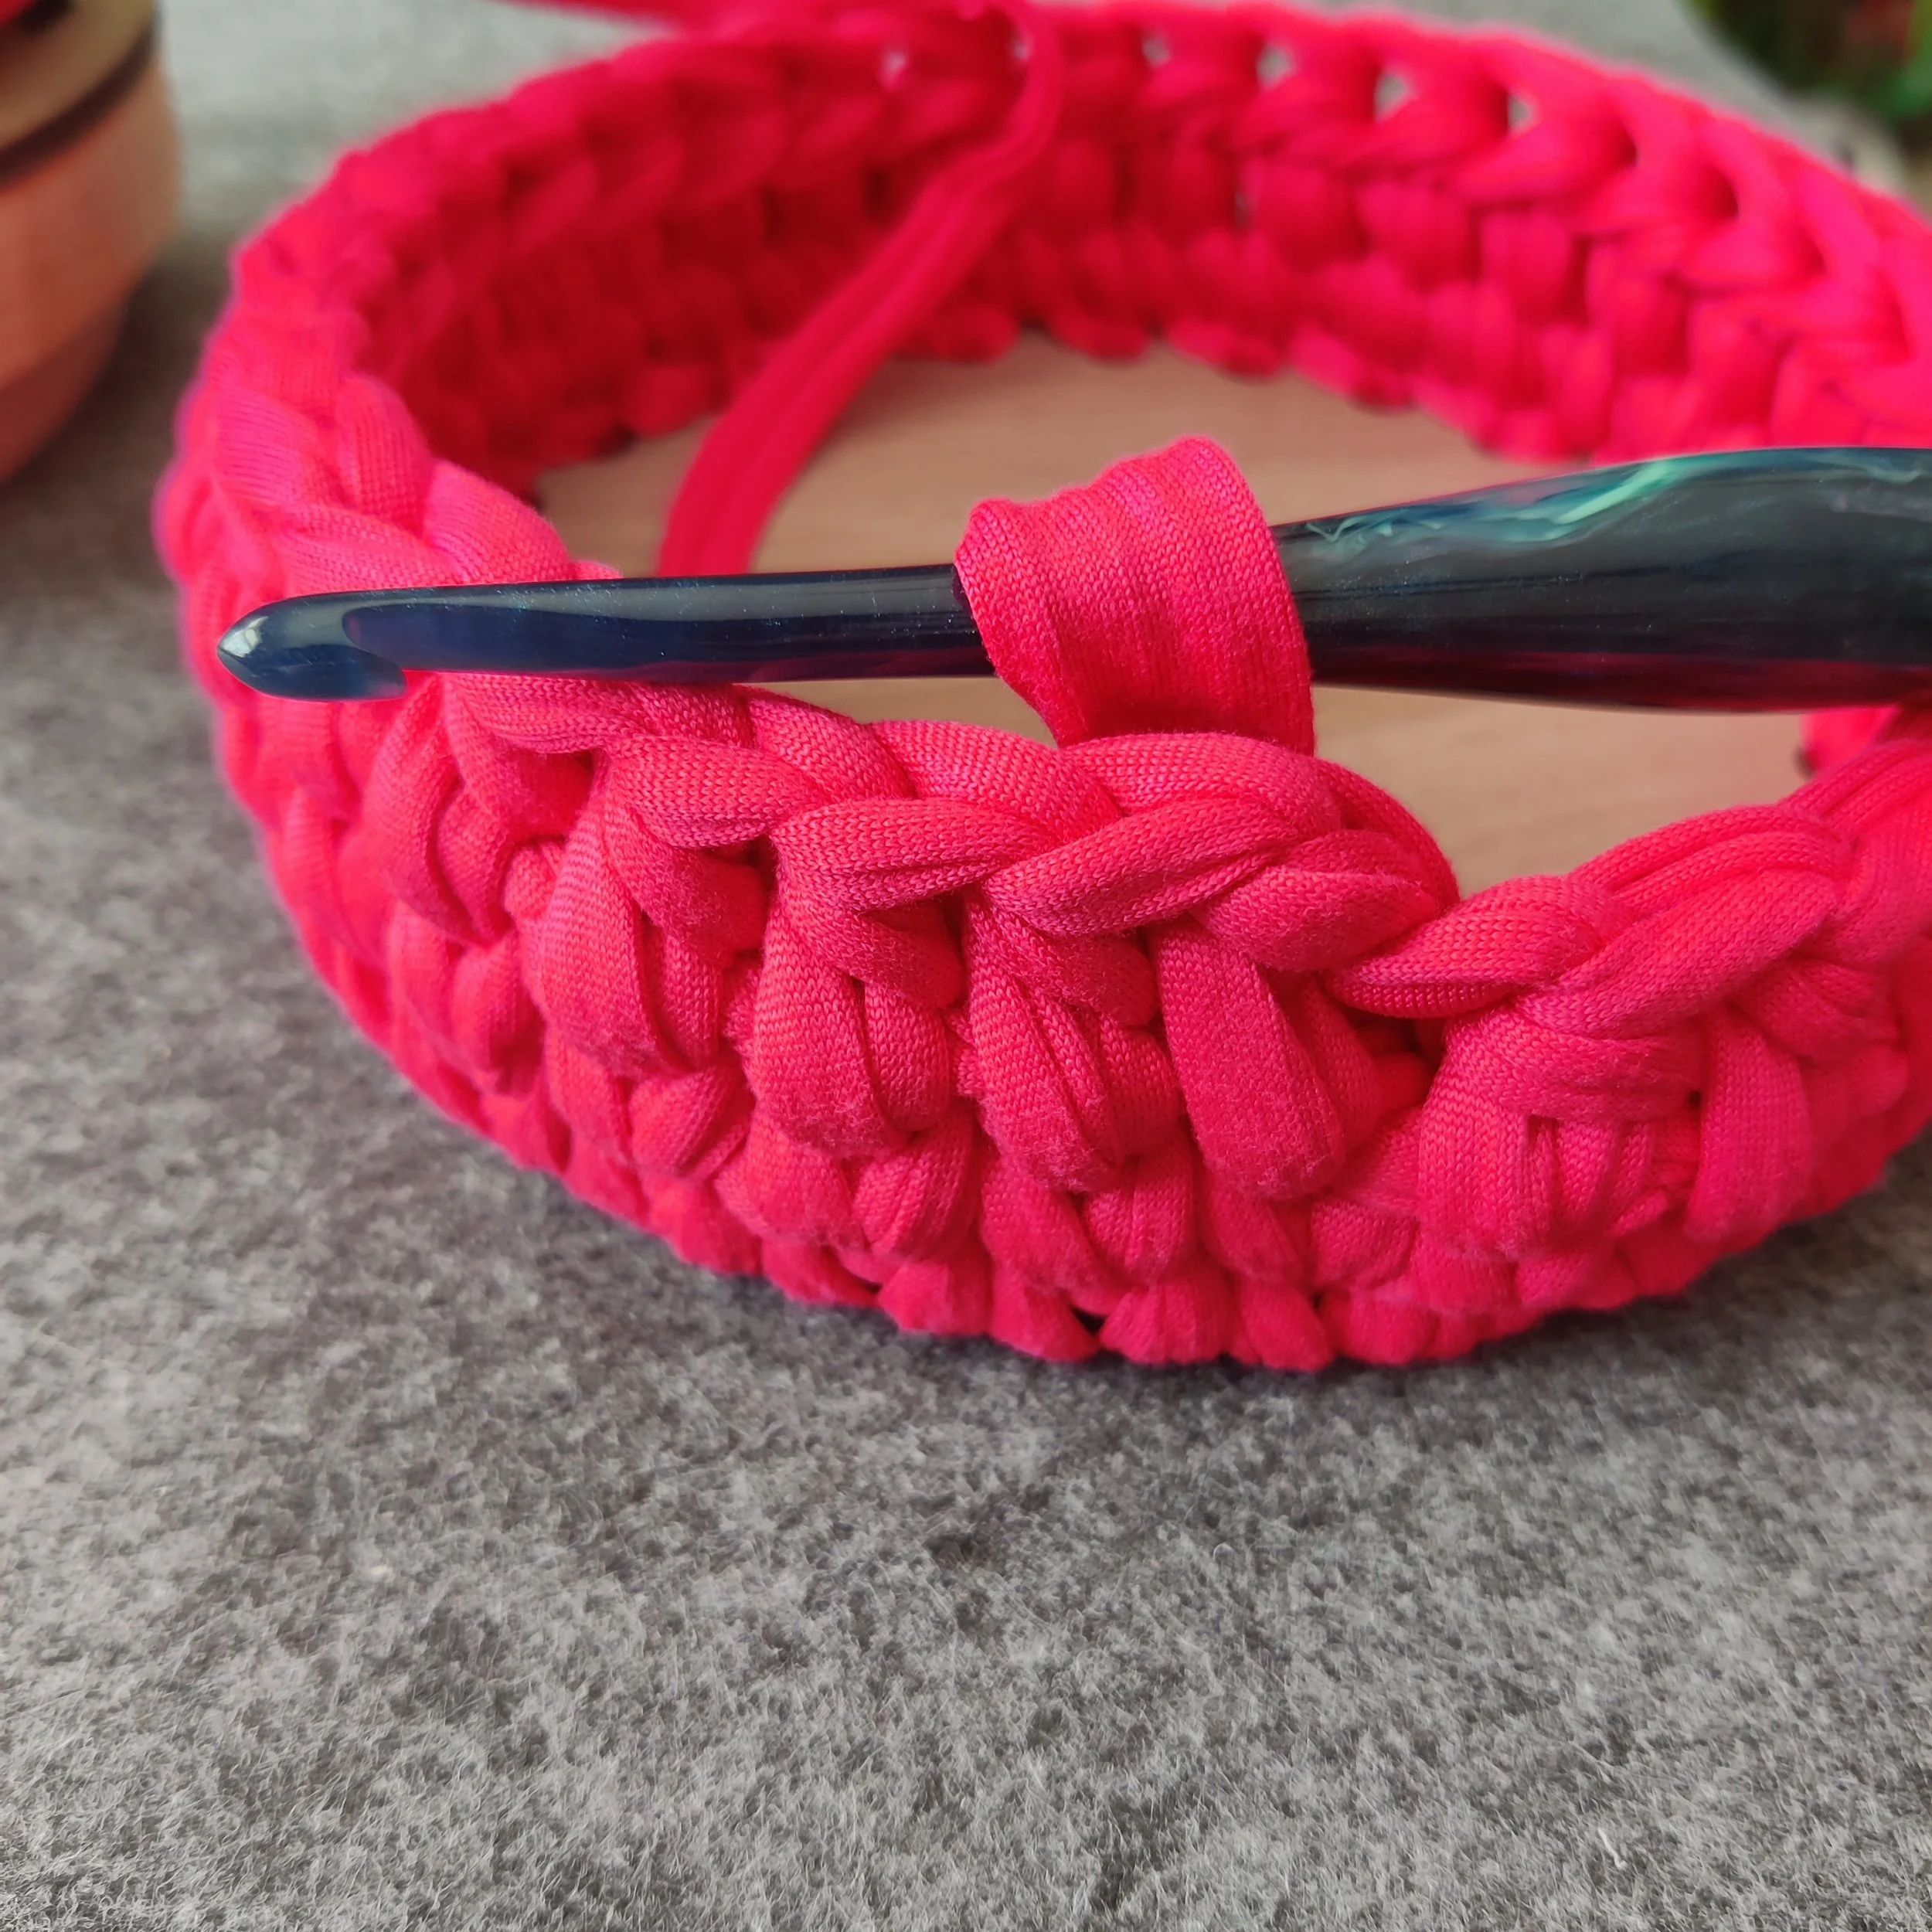
Your First Stopping Point: The Yarn Bowl
Want a yarn bowl instead of a bucket bag?
You can stop here!
Once your project reaches your preferred yarn bowl height:
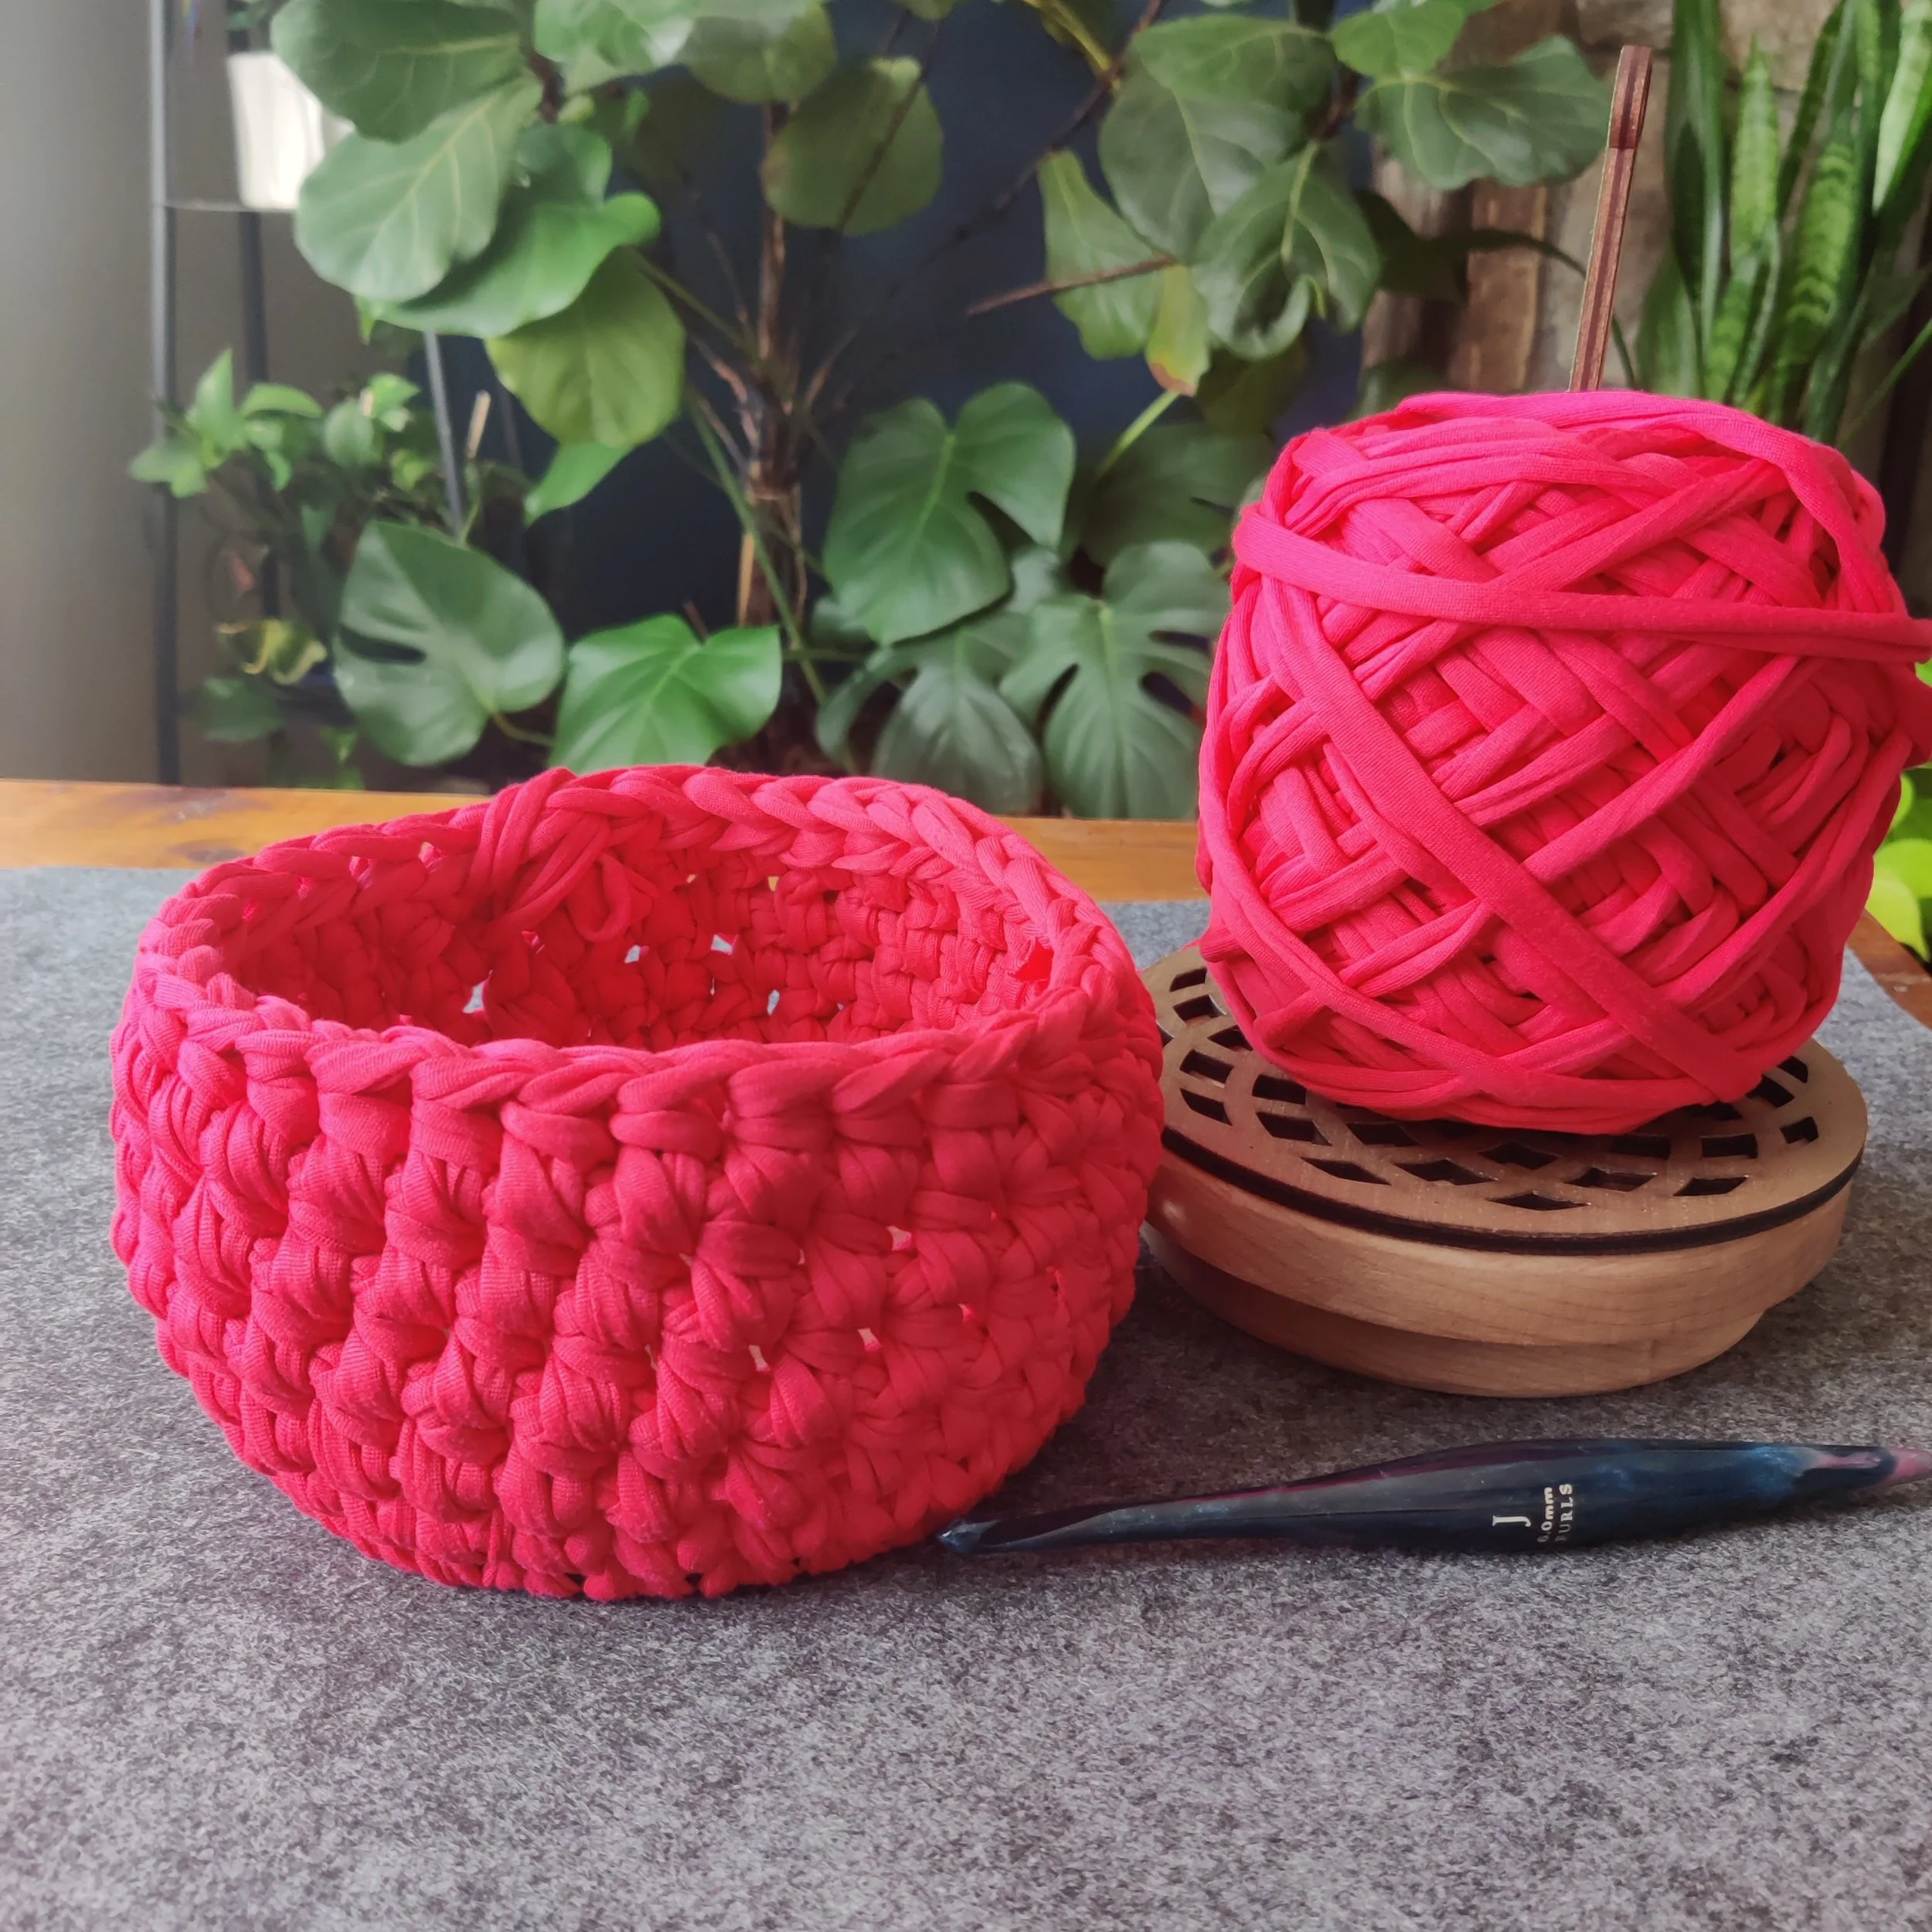
Complete your current round using the Invisible Join.
Work one additional round of single crochet stitches to create a neat, sturdy top edge.
Complete the final round using the Invisible Join.
Secure your yarn and weave in any loose ends.
Your new yarn bowl is ready to hold your favorite yarn while you work!
Keep Going: Make a Project Bucket Bag!
Want something taller that can hold your yarn, tools, and current work in progress?
Keep crocheting!
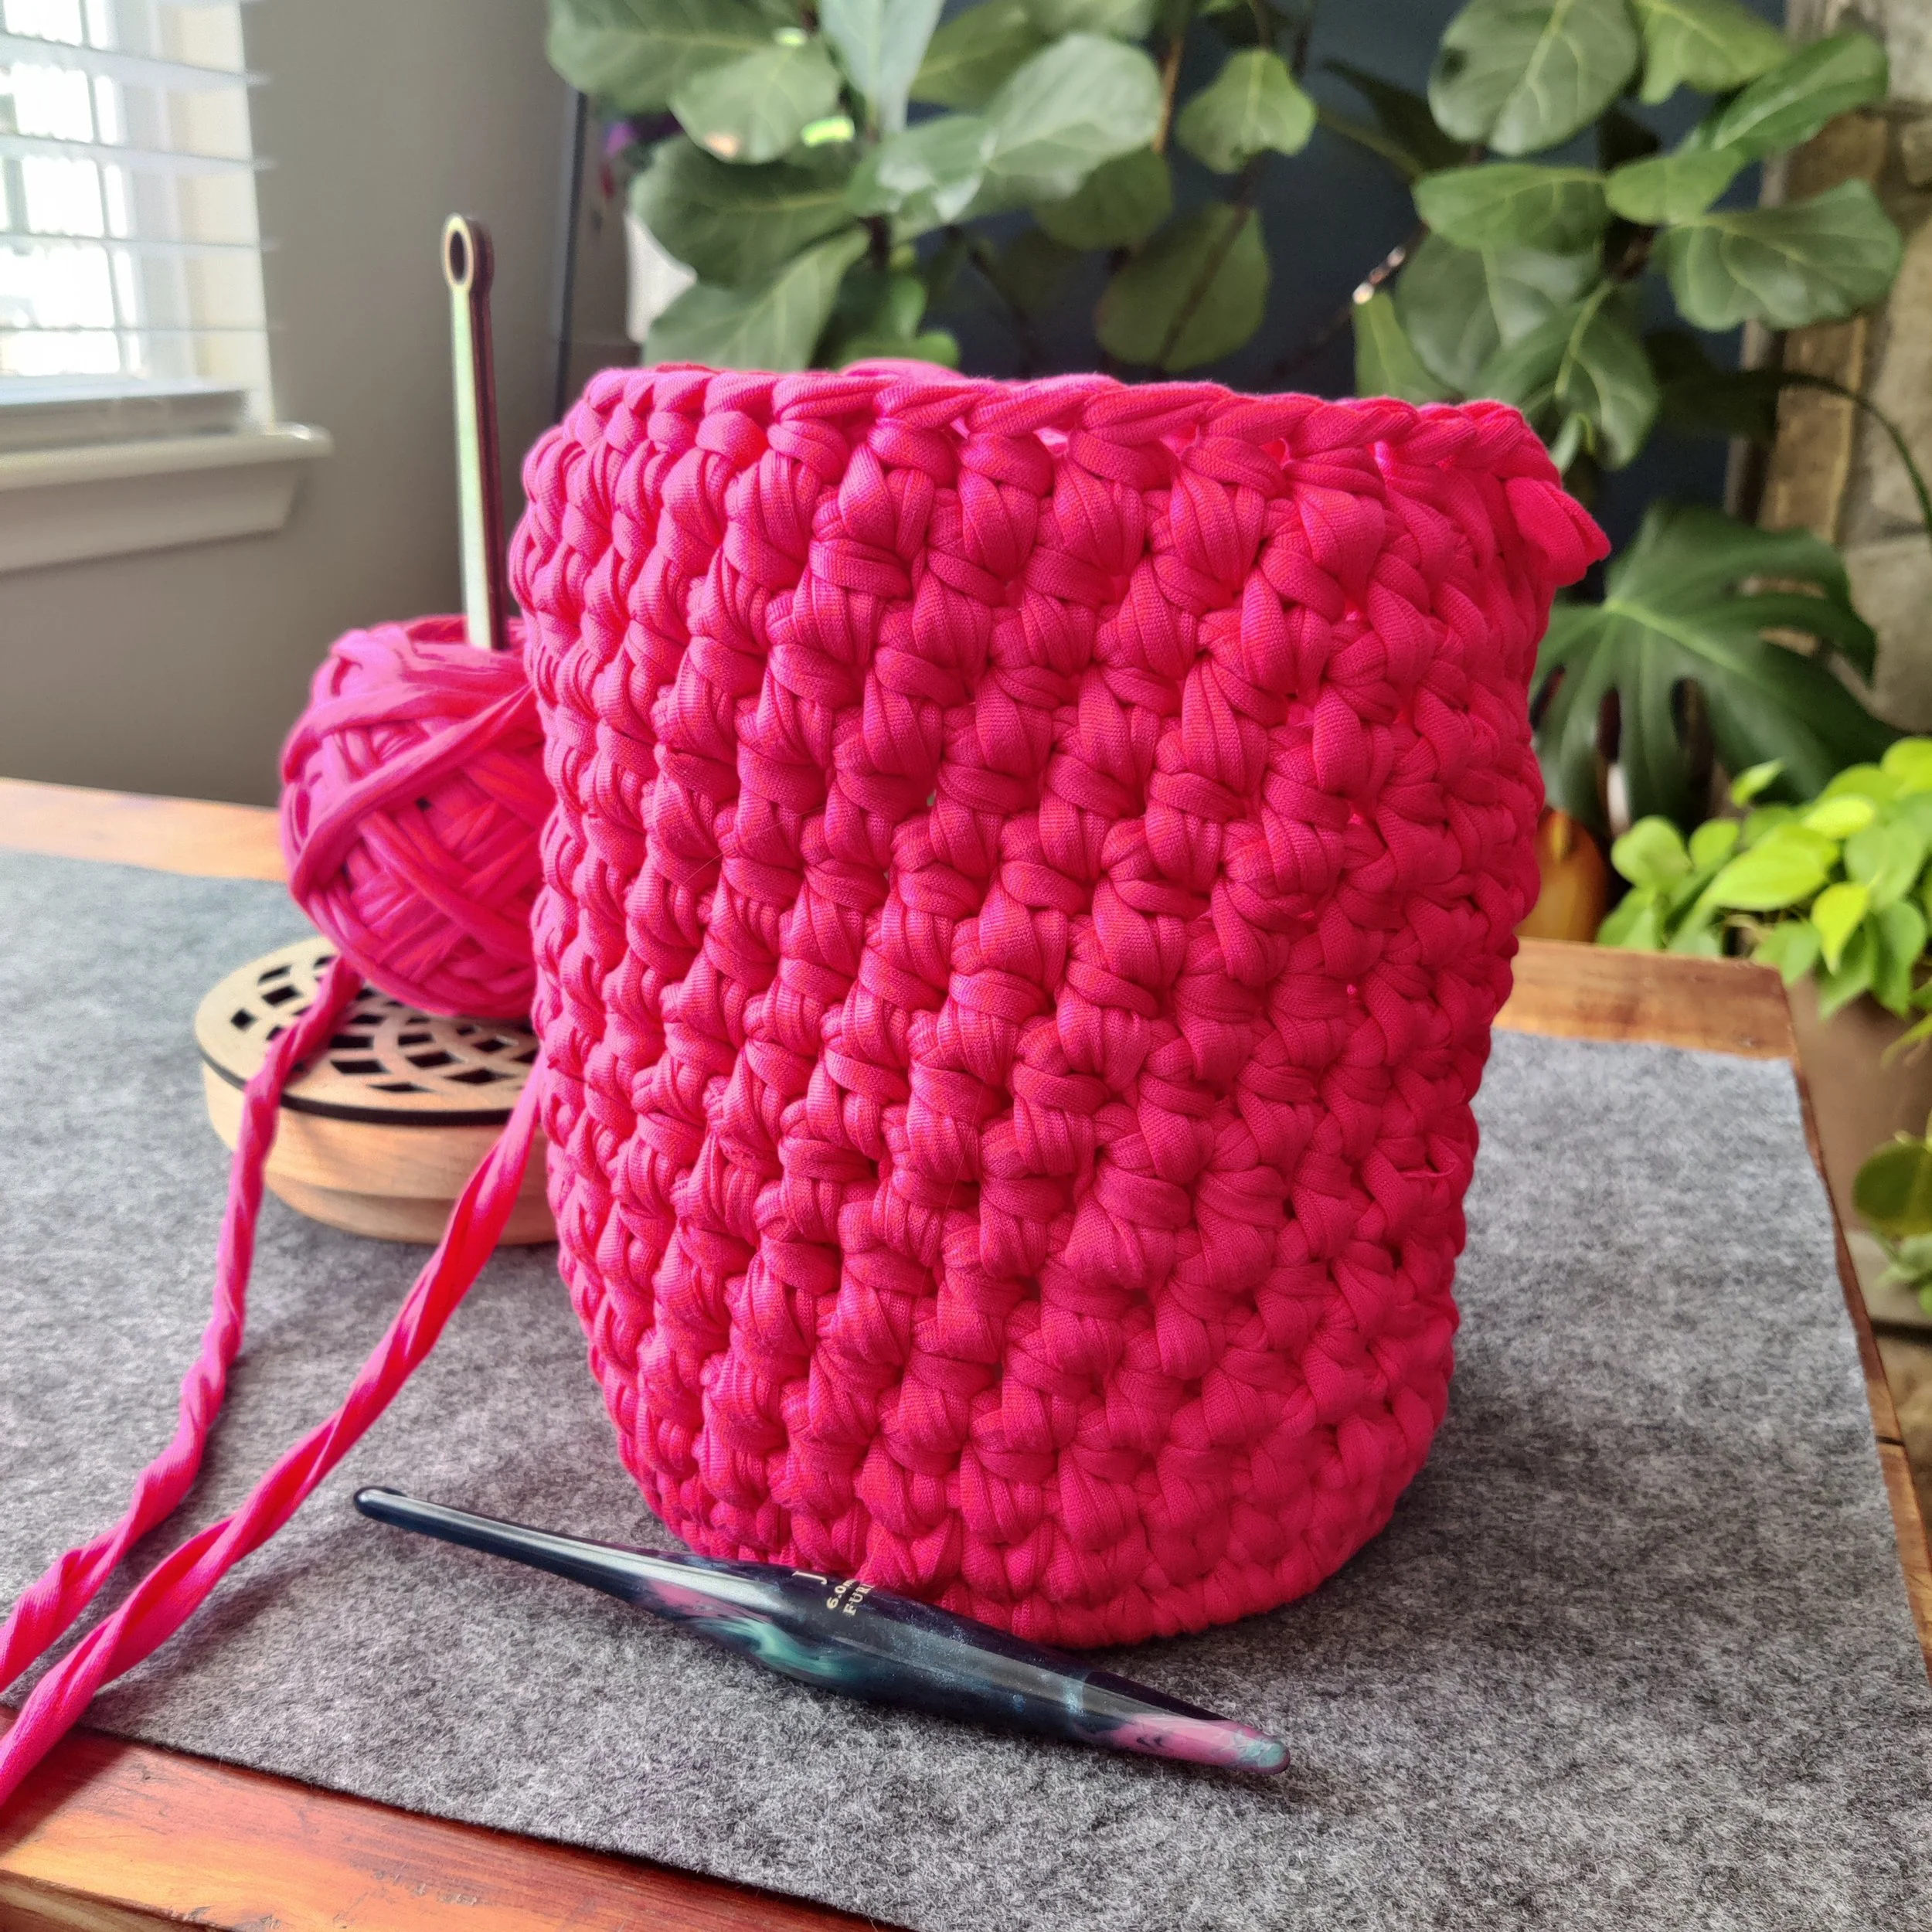
Continue working half double crochet rounds until your bucket bag reaches your desired height.
Complete your current round using the Invisible Join.
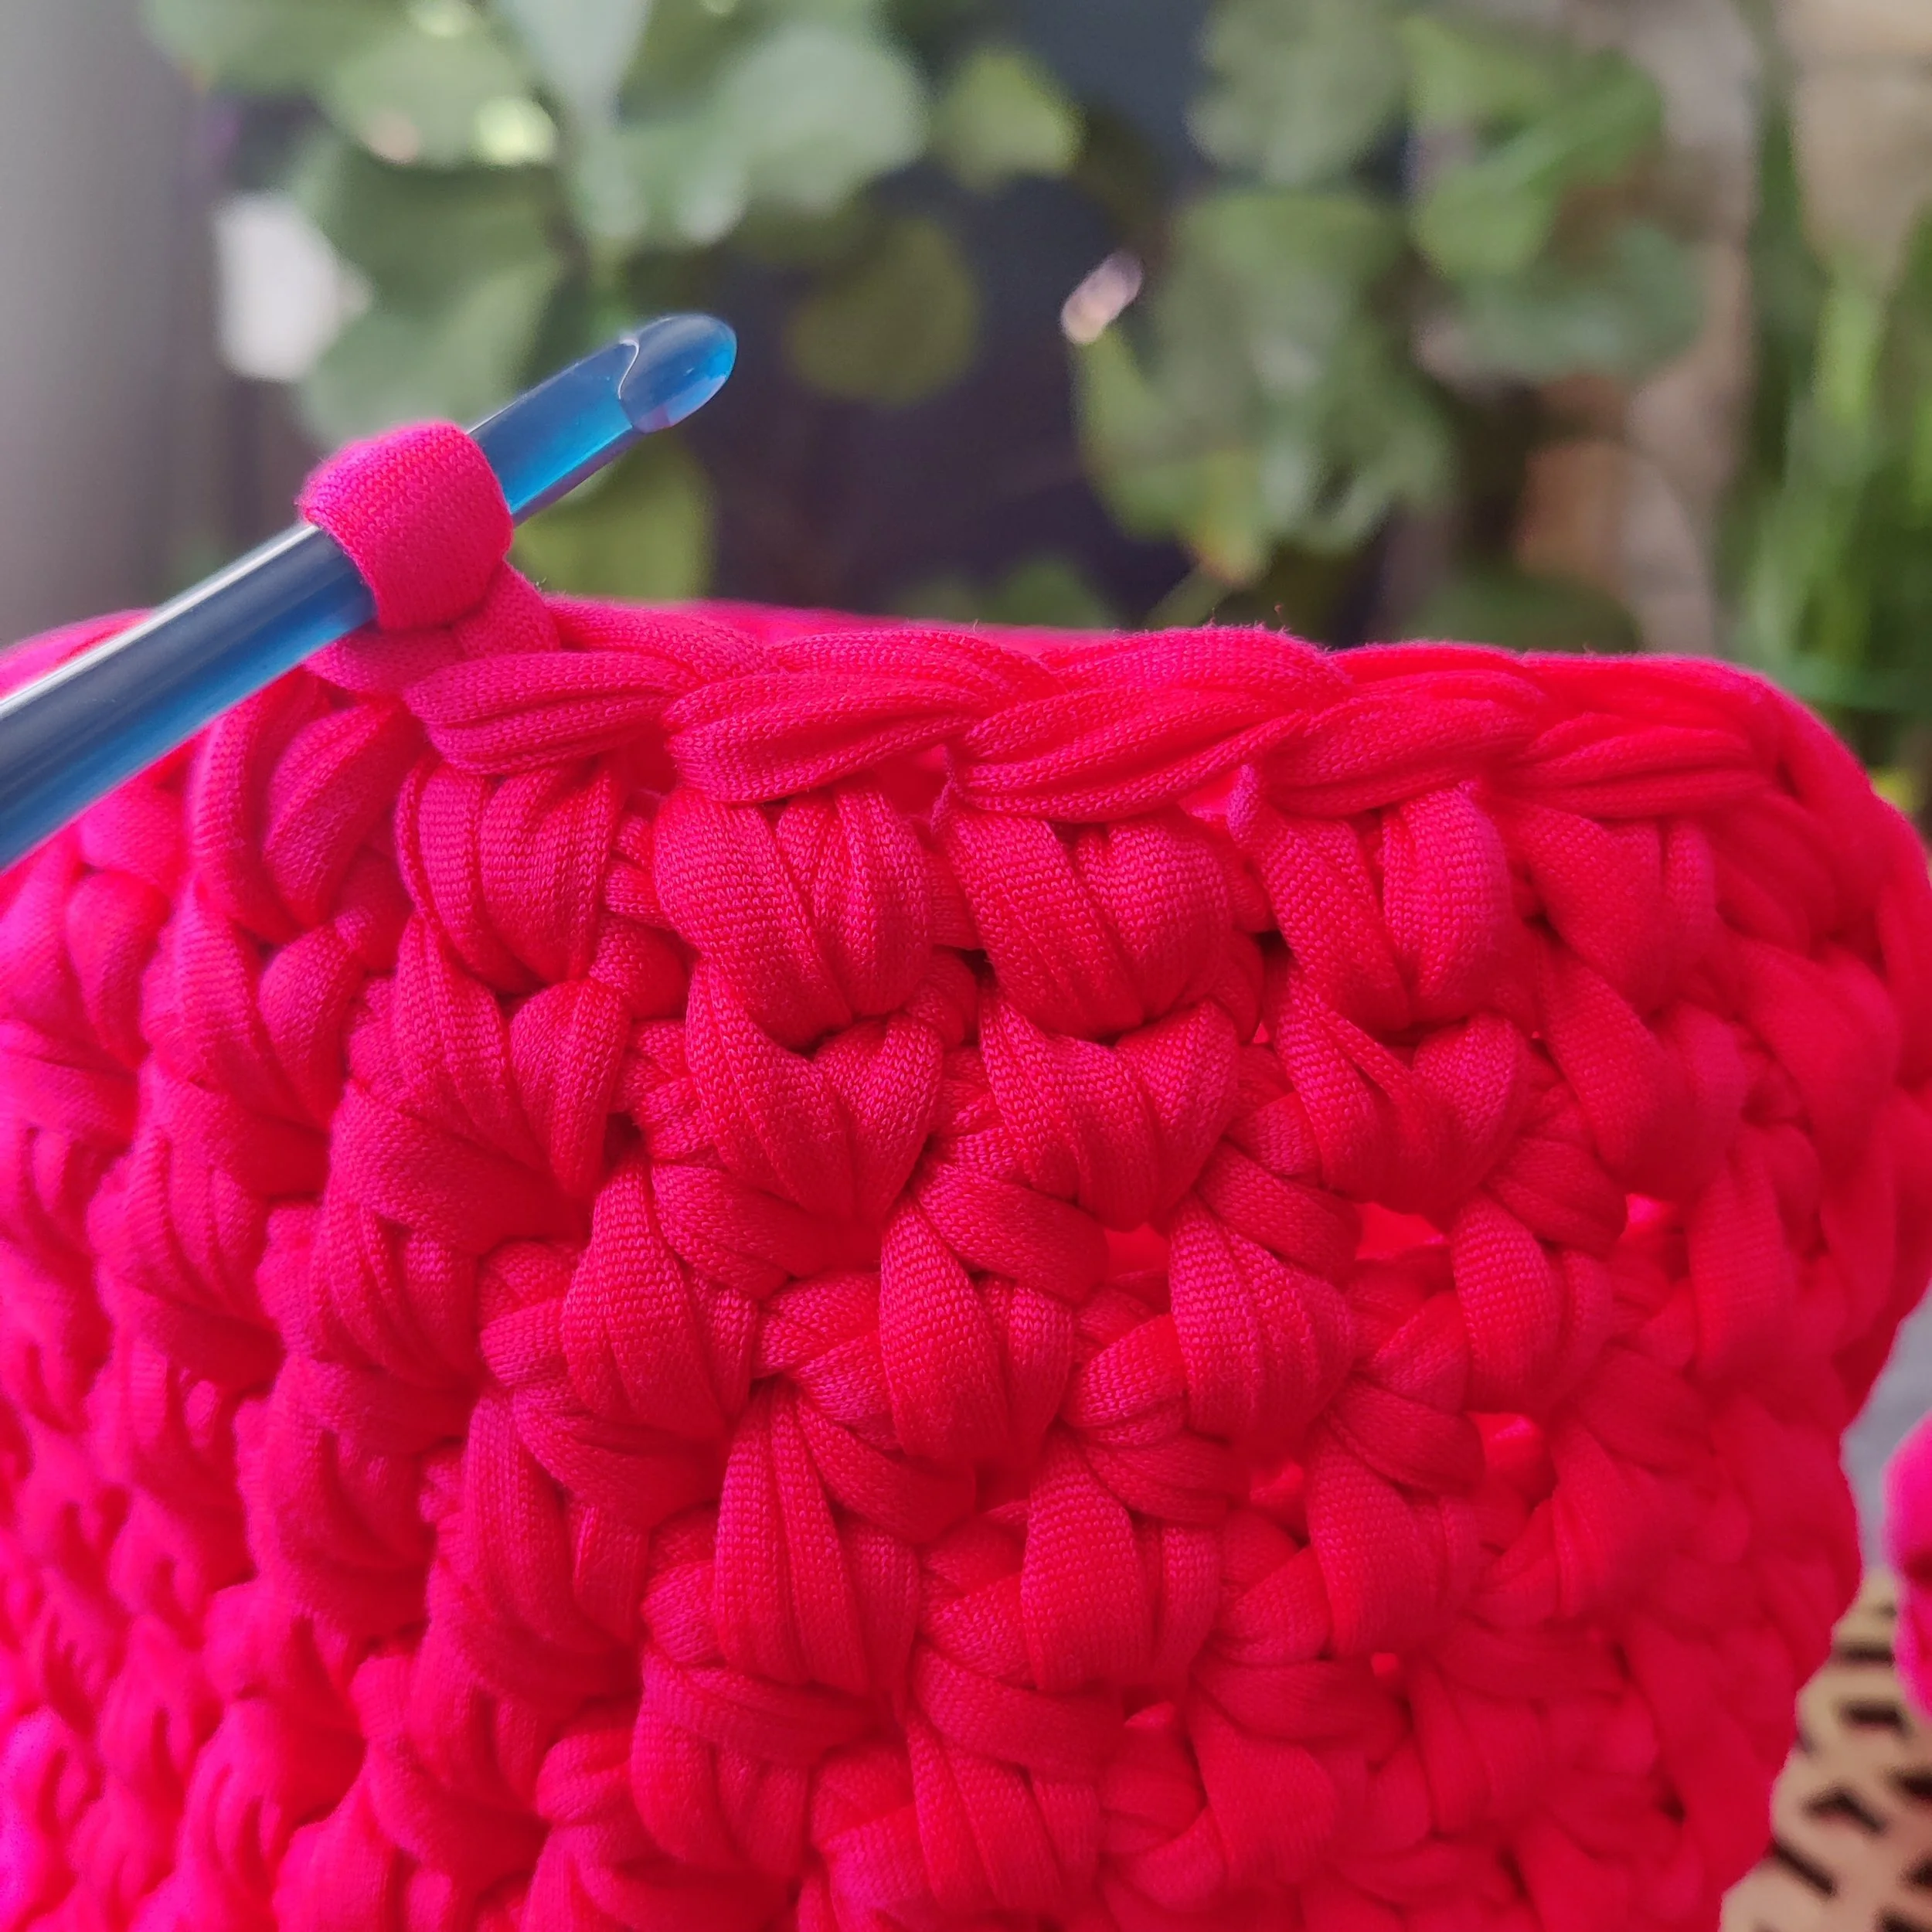
Work one additional round of single crochet stitches to create a neat top edge.
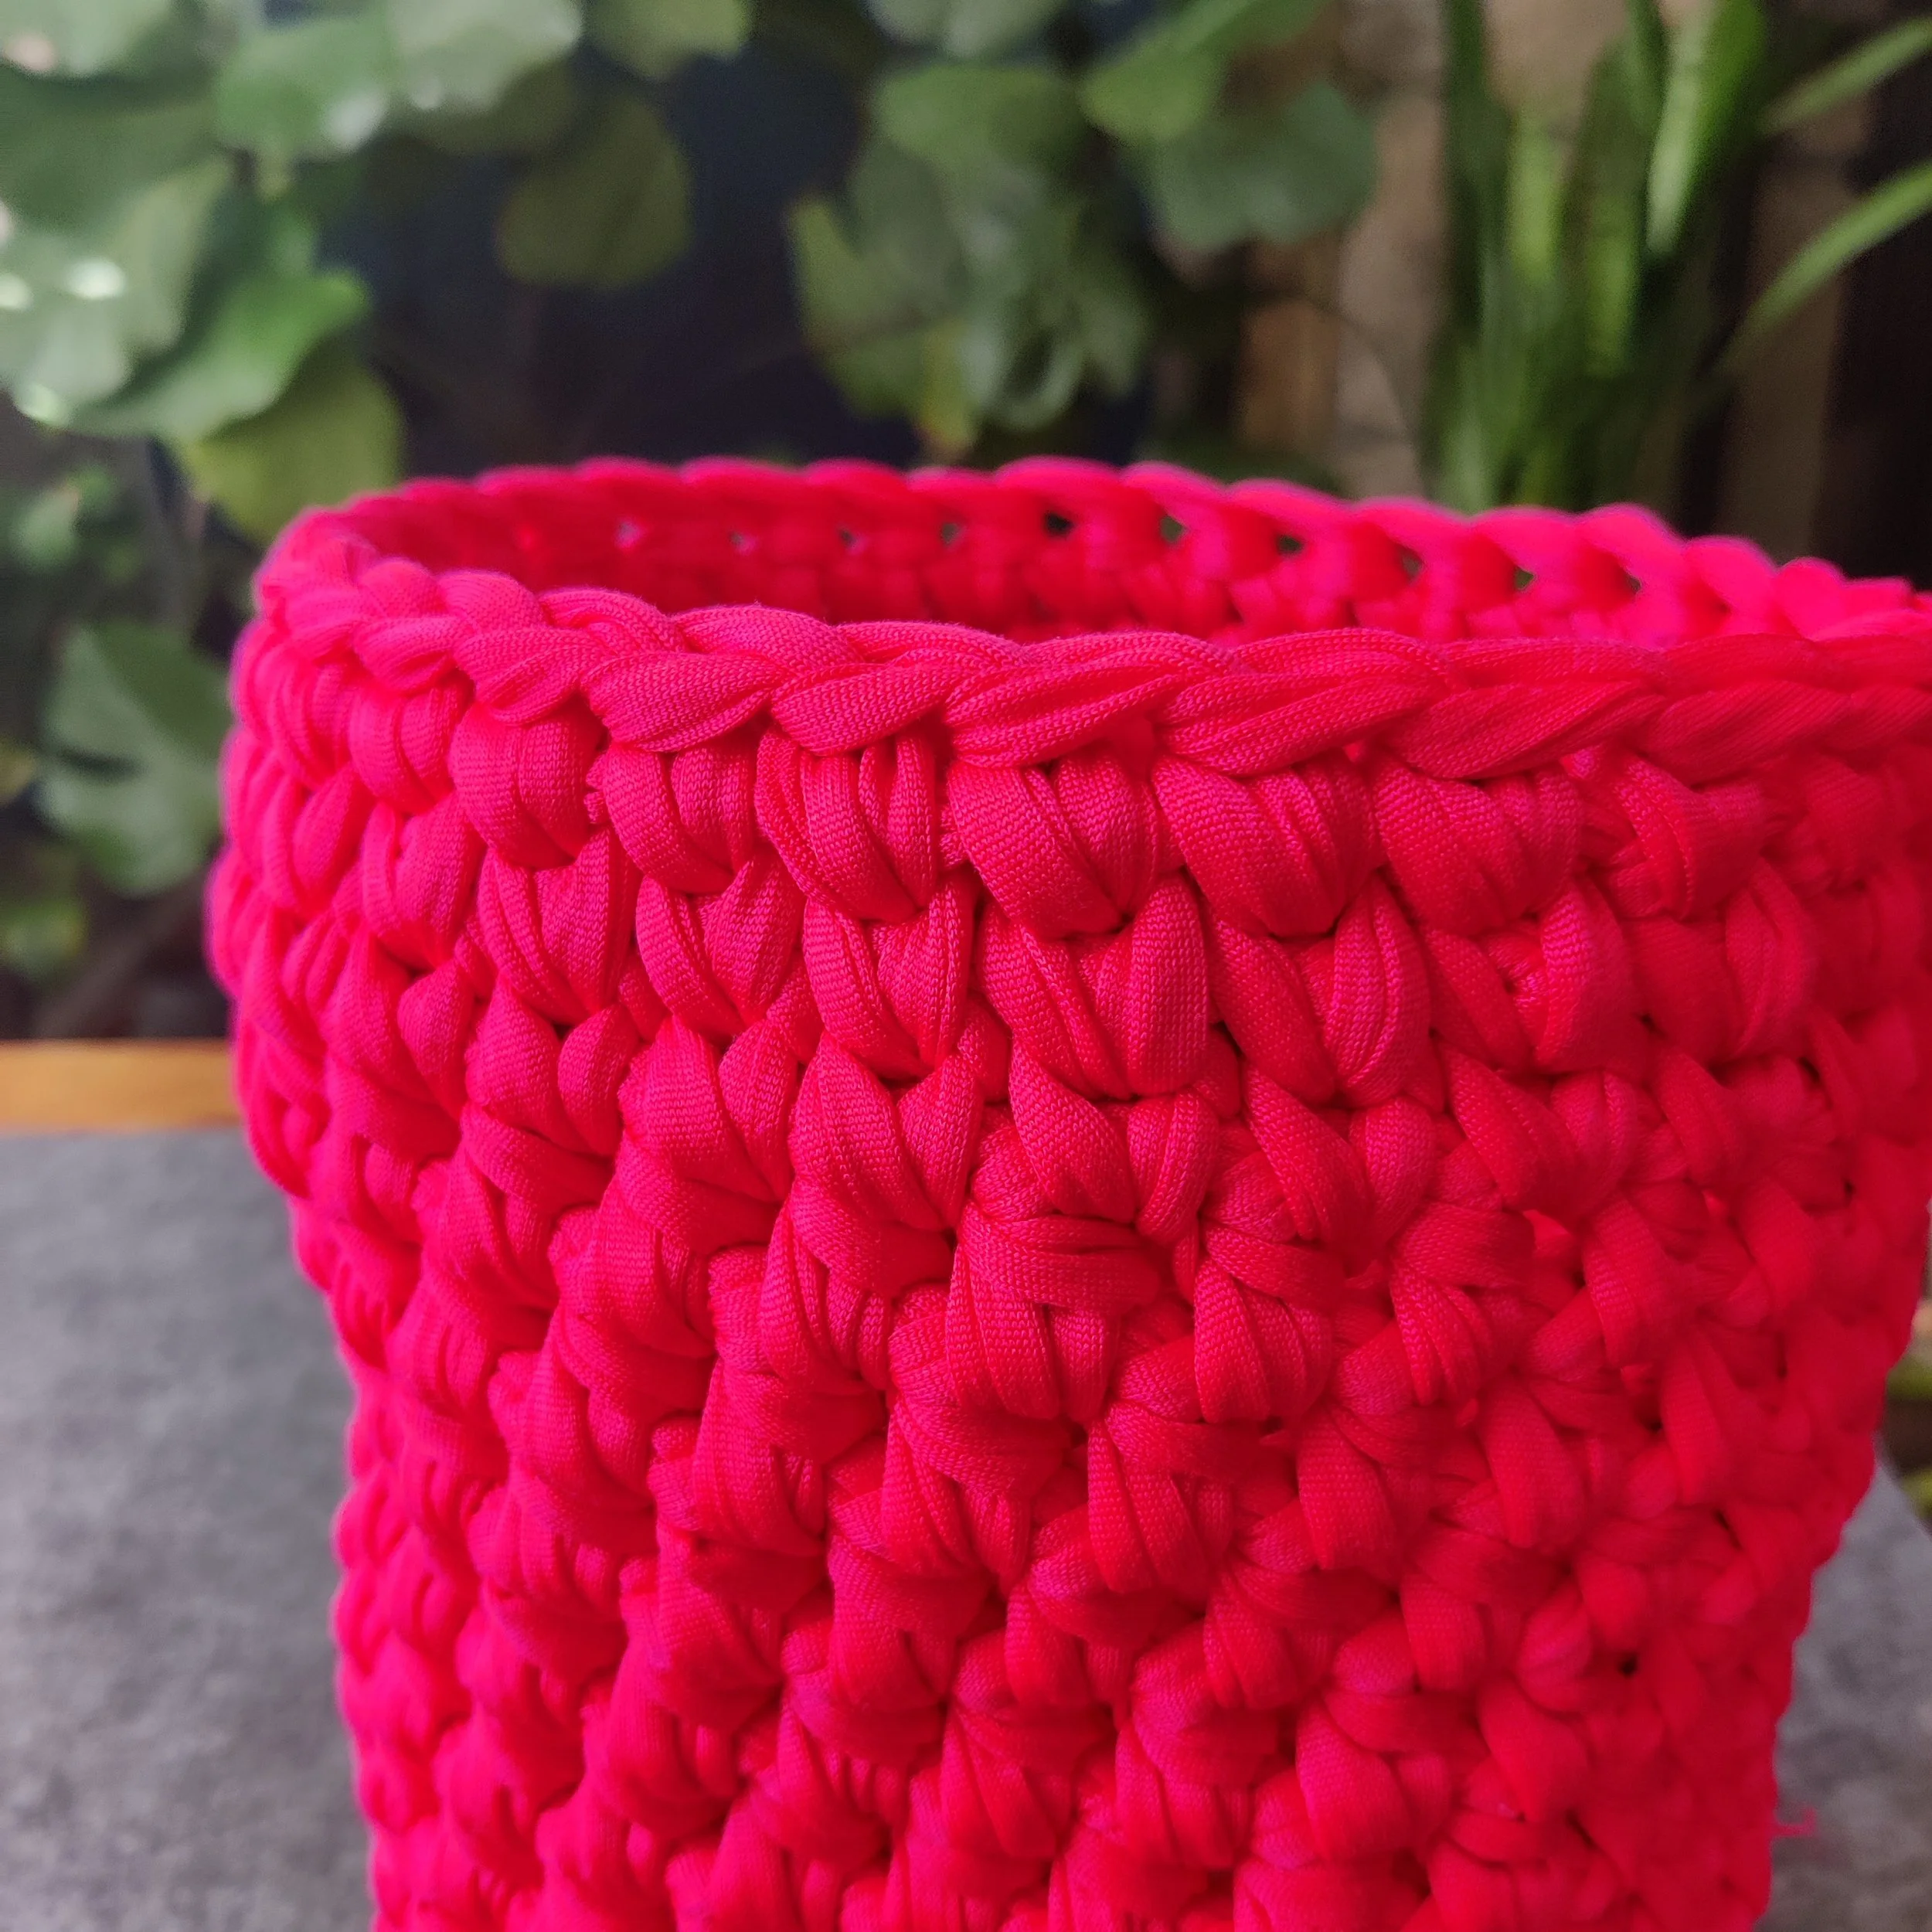
Complete your current round using the Invisible Join.
Secure your yarn and weave in any loose ends.
Now you're ready to make the drawstring that will turn your project into a bucket bag!
Make Your Drawstring
Now it's time to make the cord that will close your bucket bag!
We'll be using a technique called a Double Chain Cord, sometimes called a Half I-Cord. This creates a thicker, sturdy cord that resists curling.
You can use any yarn you like. For my project, I used two different worsted weight yarns held together and a 5.5 mm (US I-9) crochet hook.
Step 1: Prepare Your Yarn
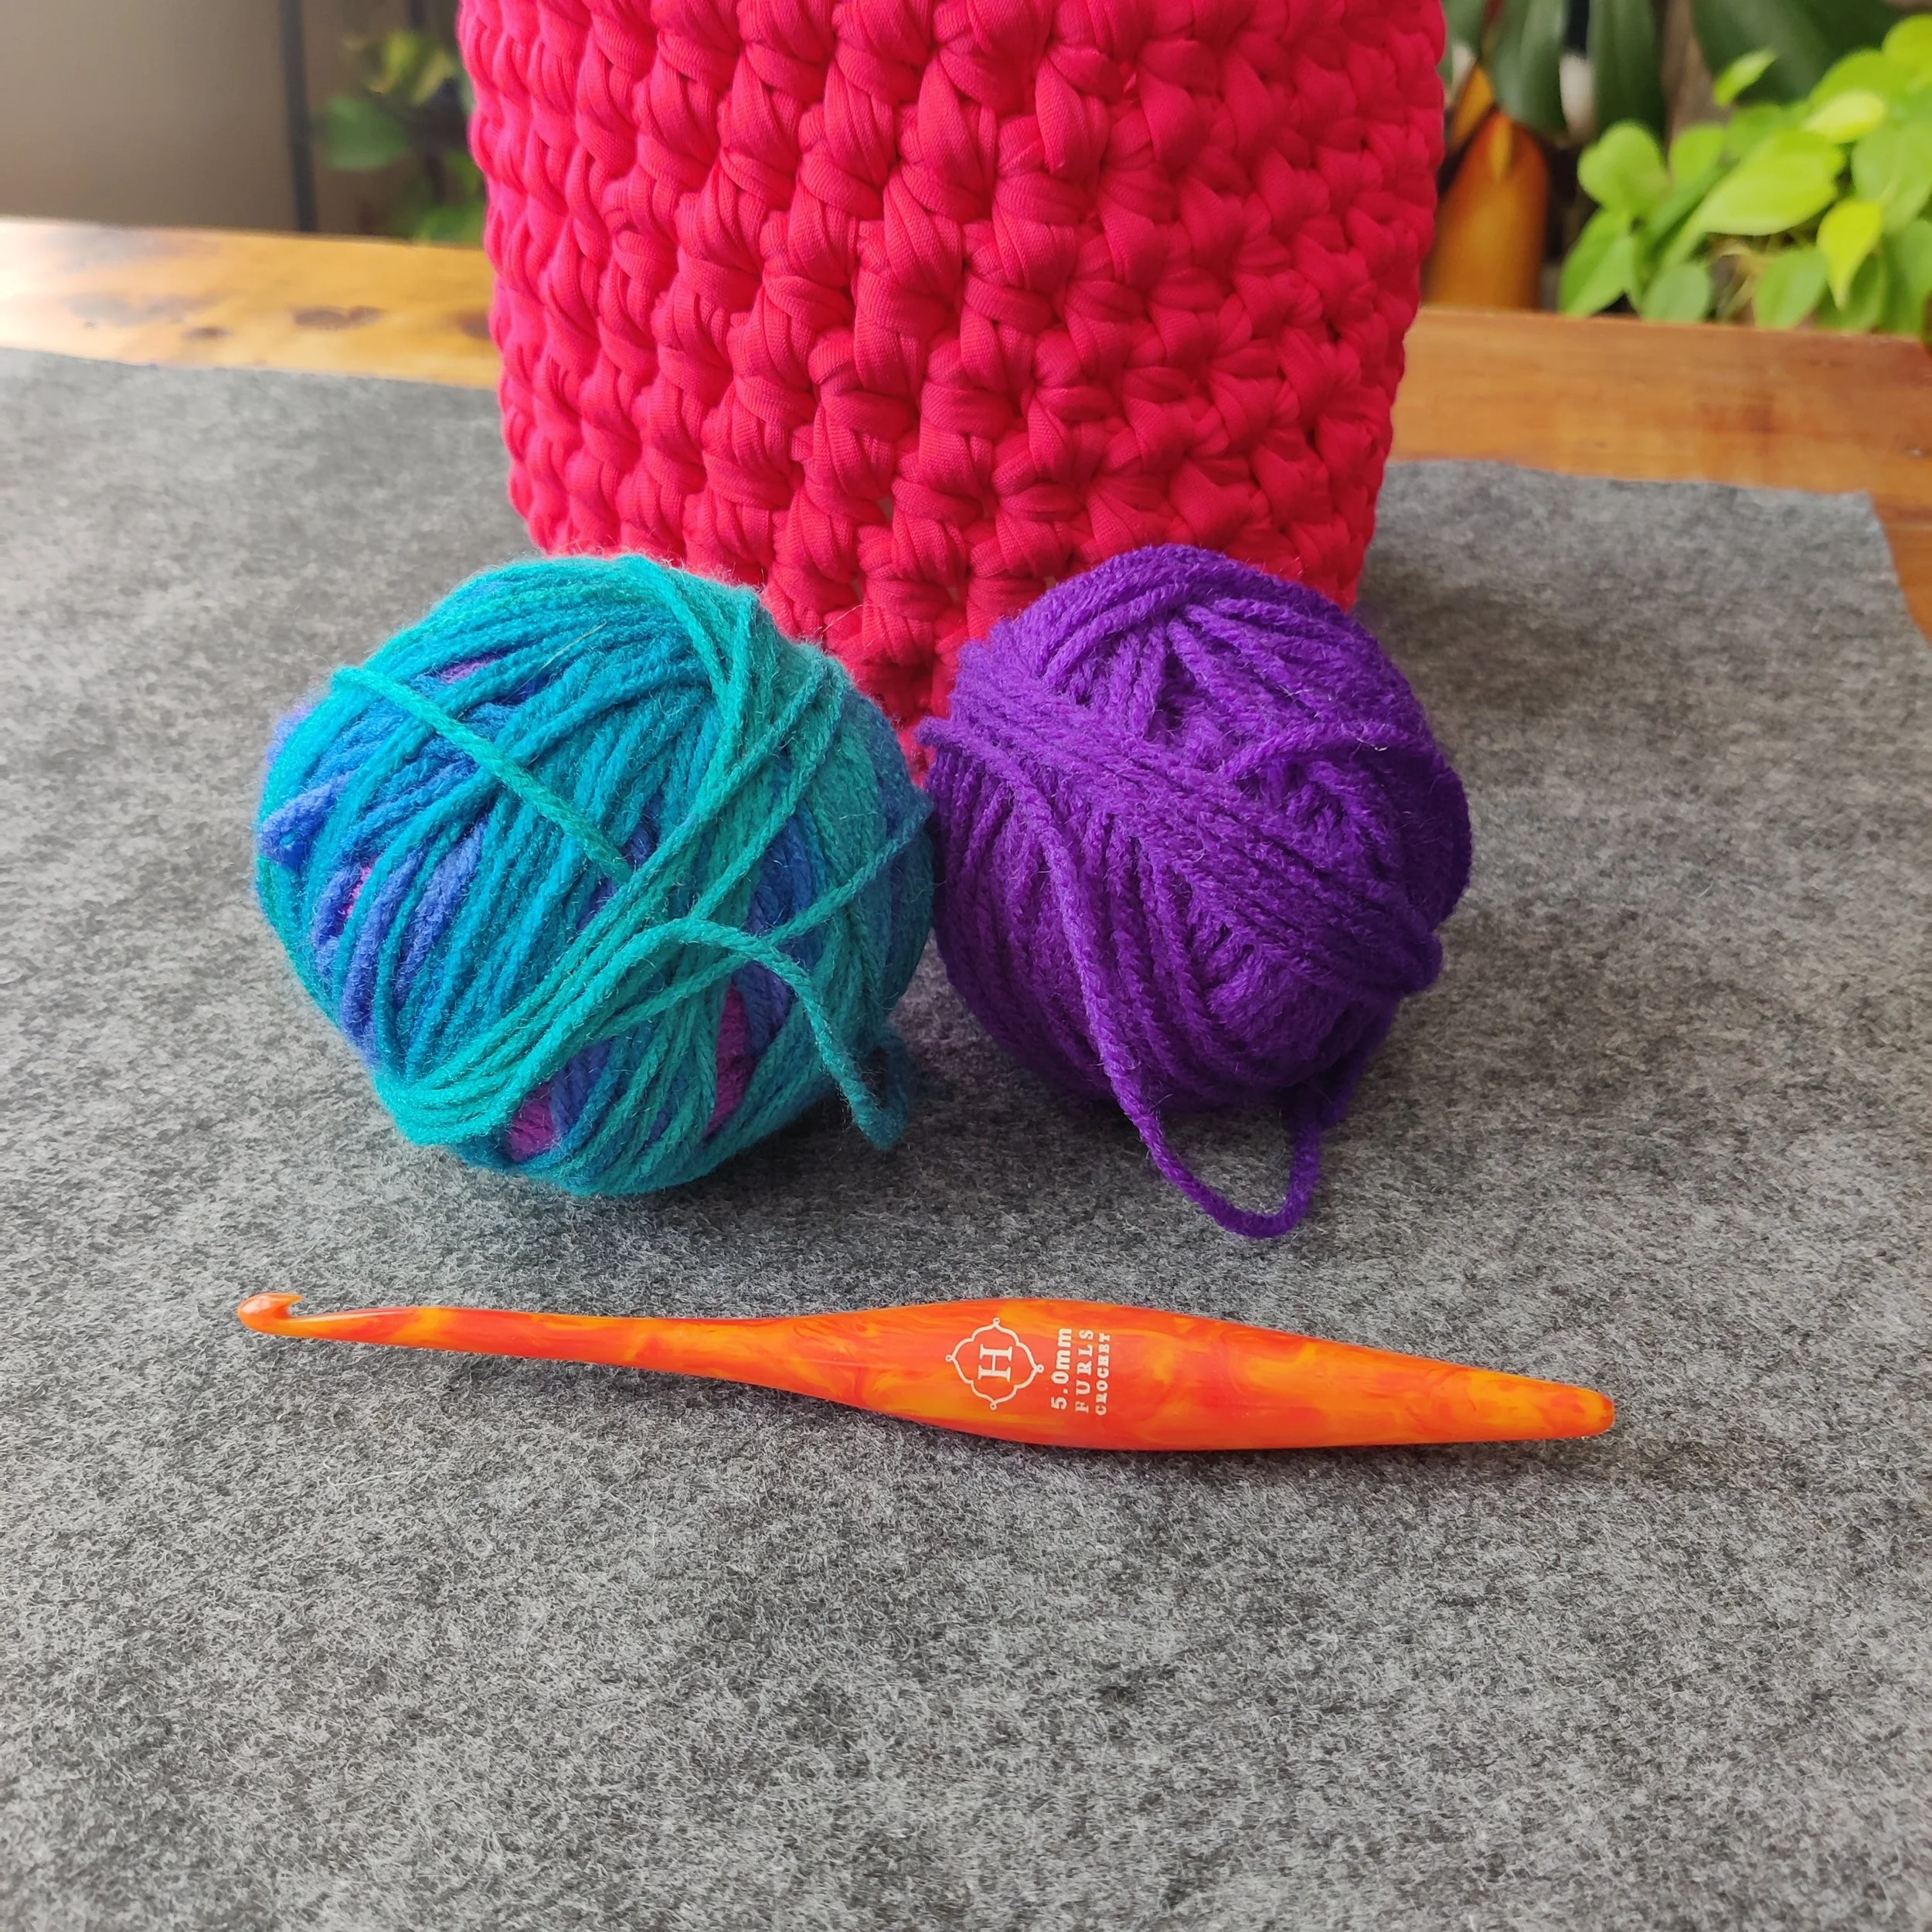
Choose two yarns for your cord. You can use matching colors or mix things up to create your own look!
Hold one strand from each yarn together.
Step 2: Make a Slip Knot
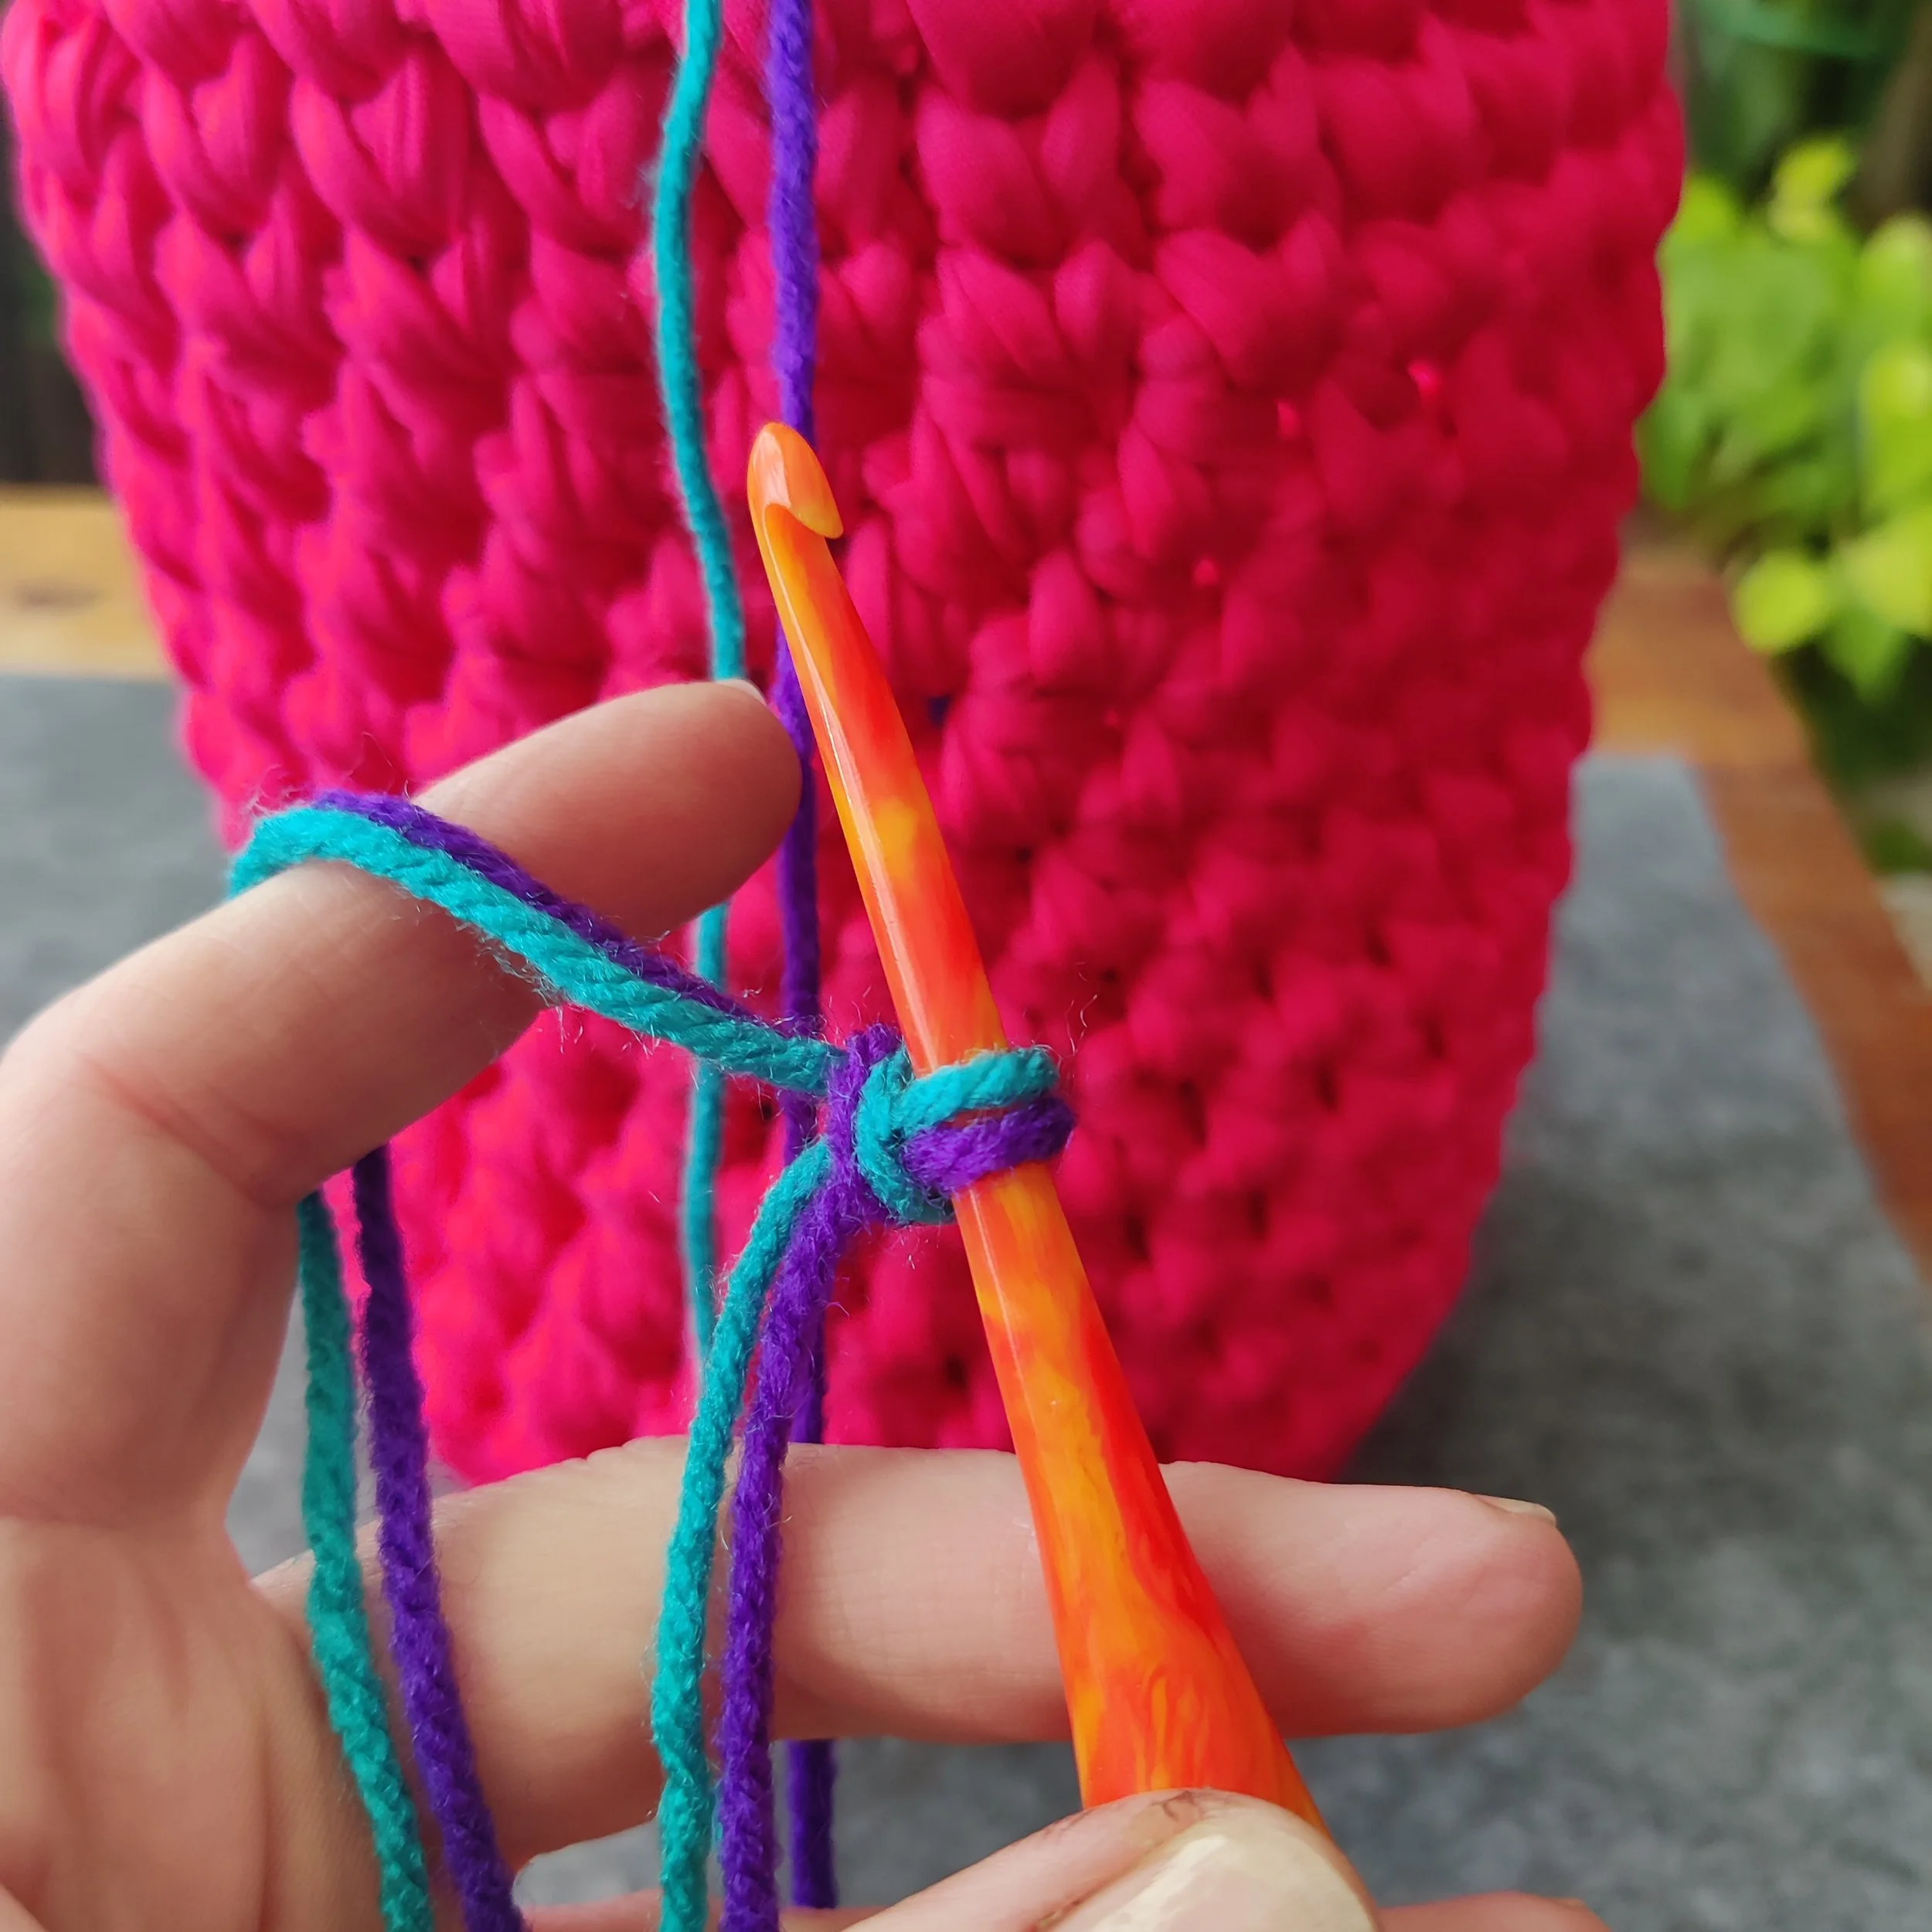
Using both strands together, make a slip knot and place it on your crochet hook.
Step 3: Begin Your Cord
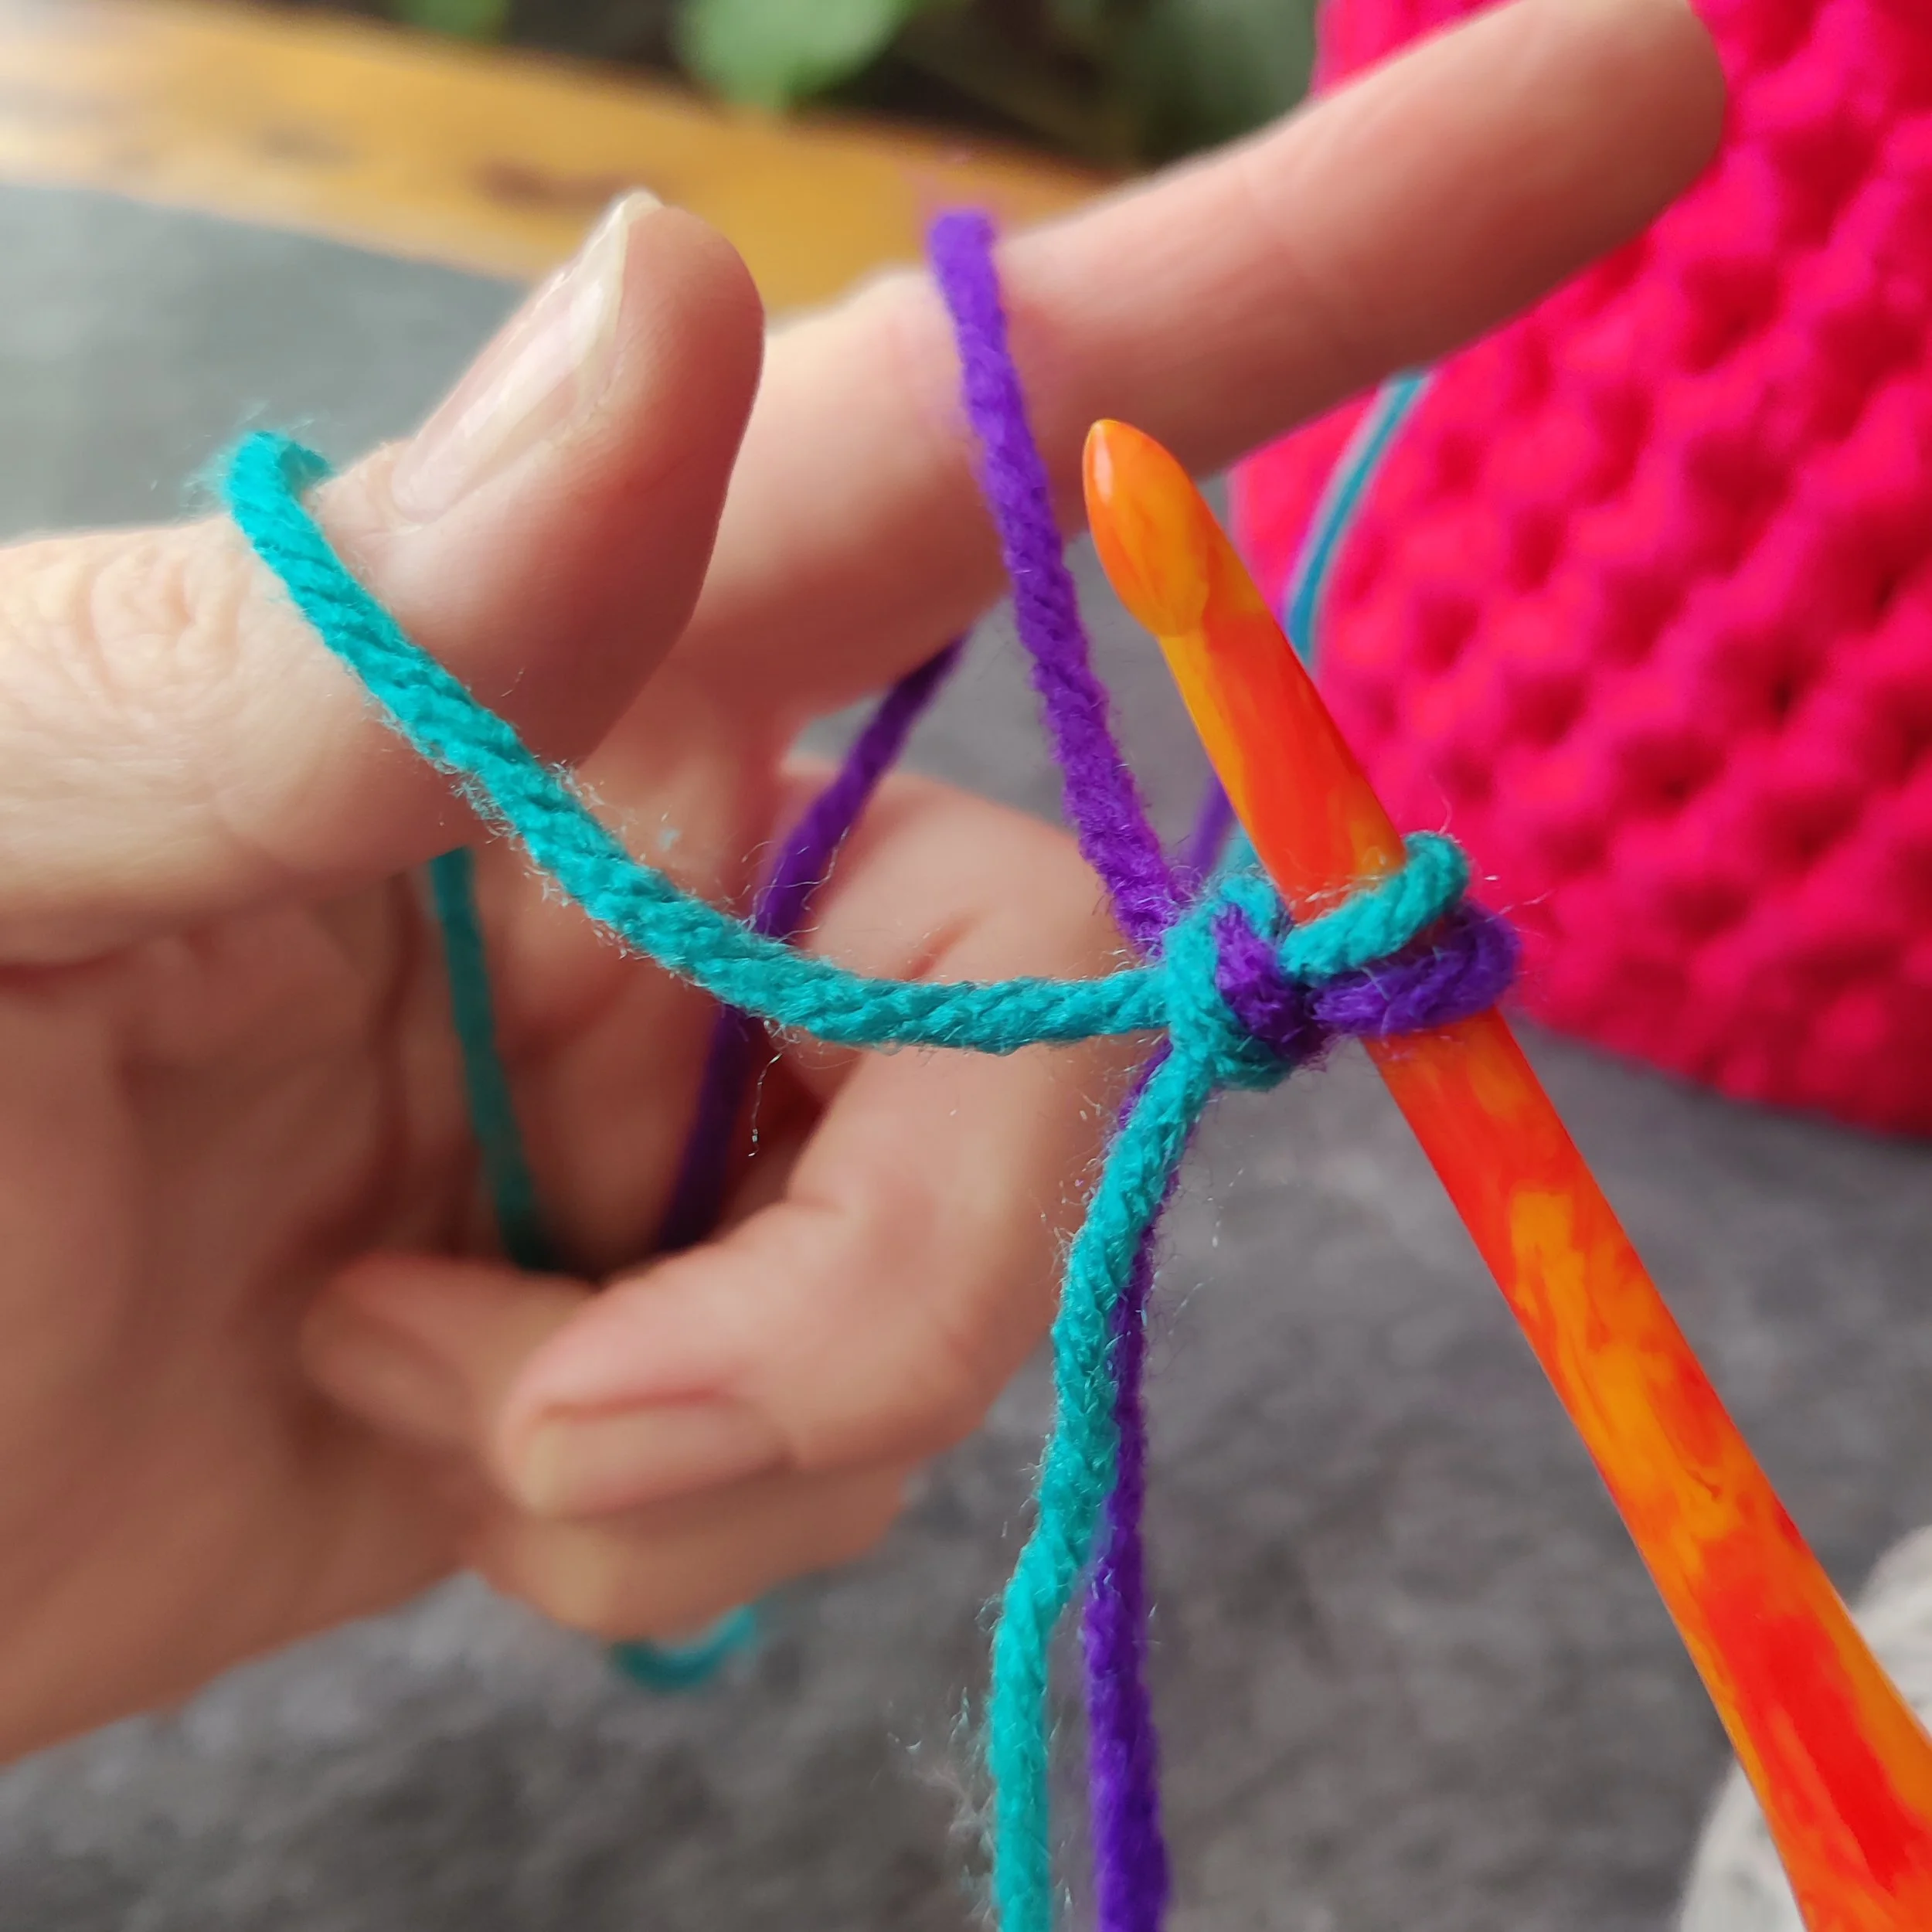
Separate your two yarn strands.
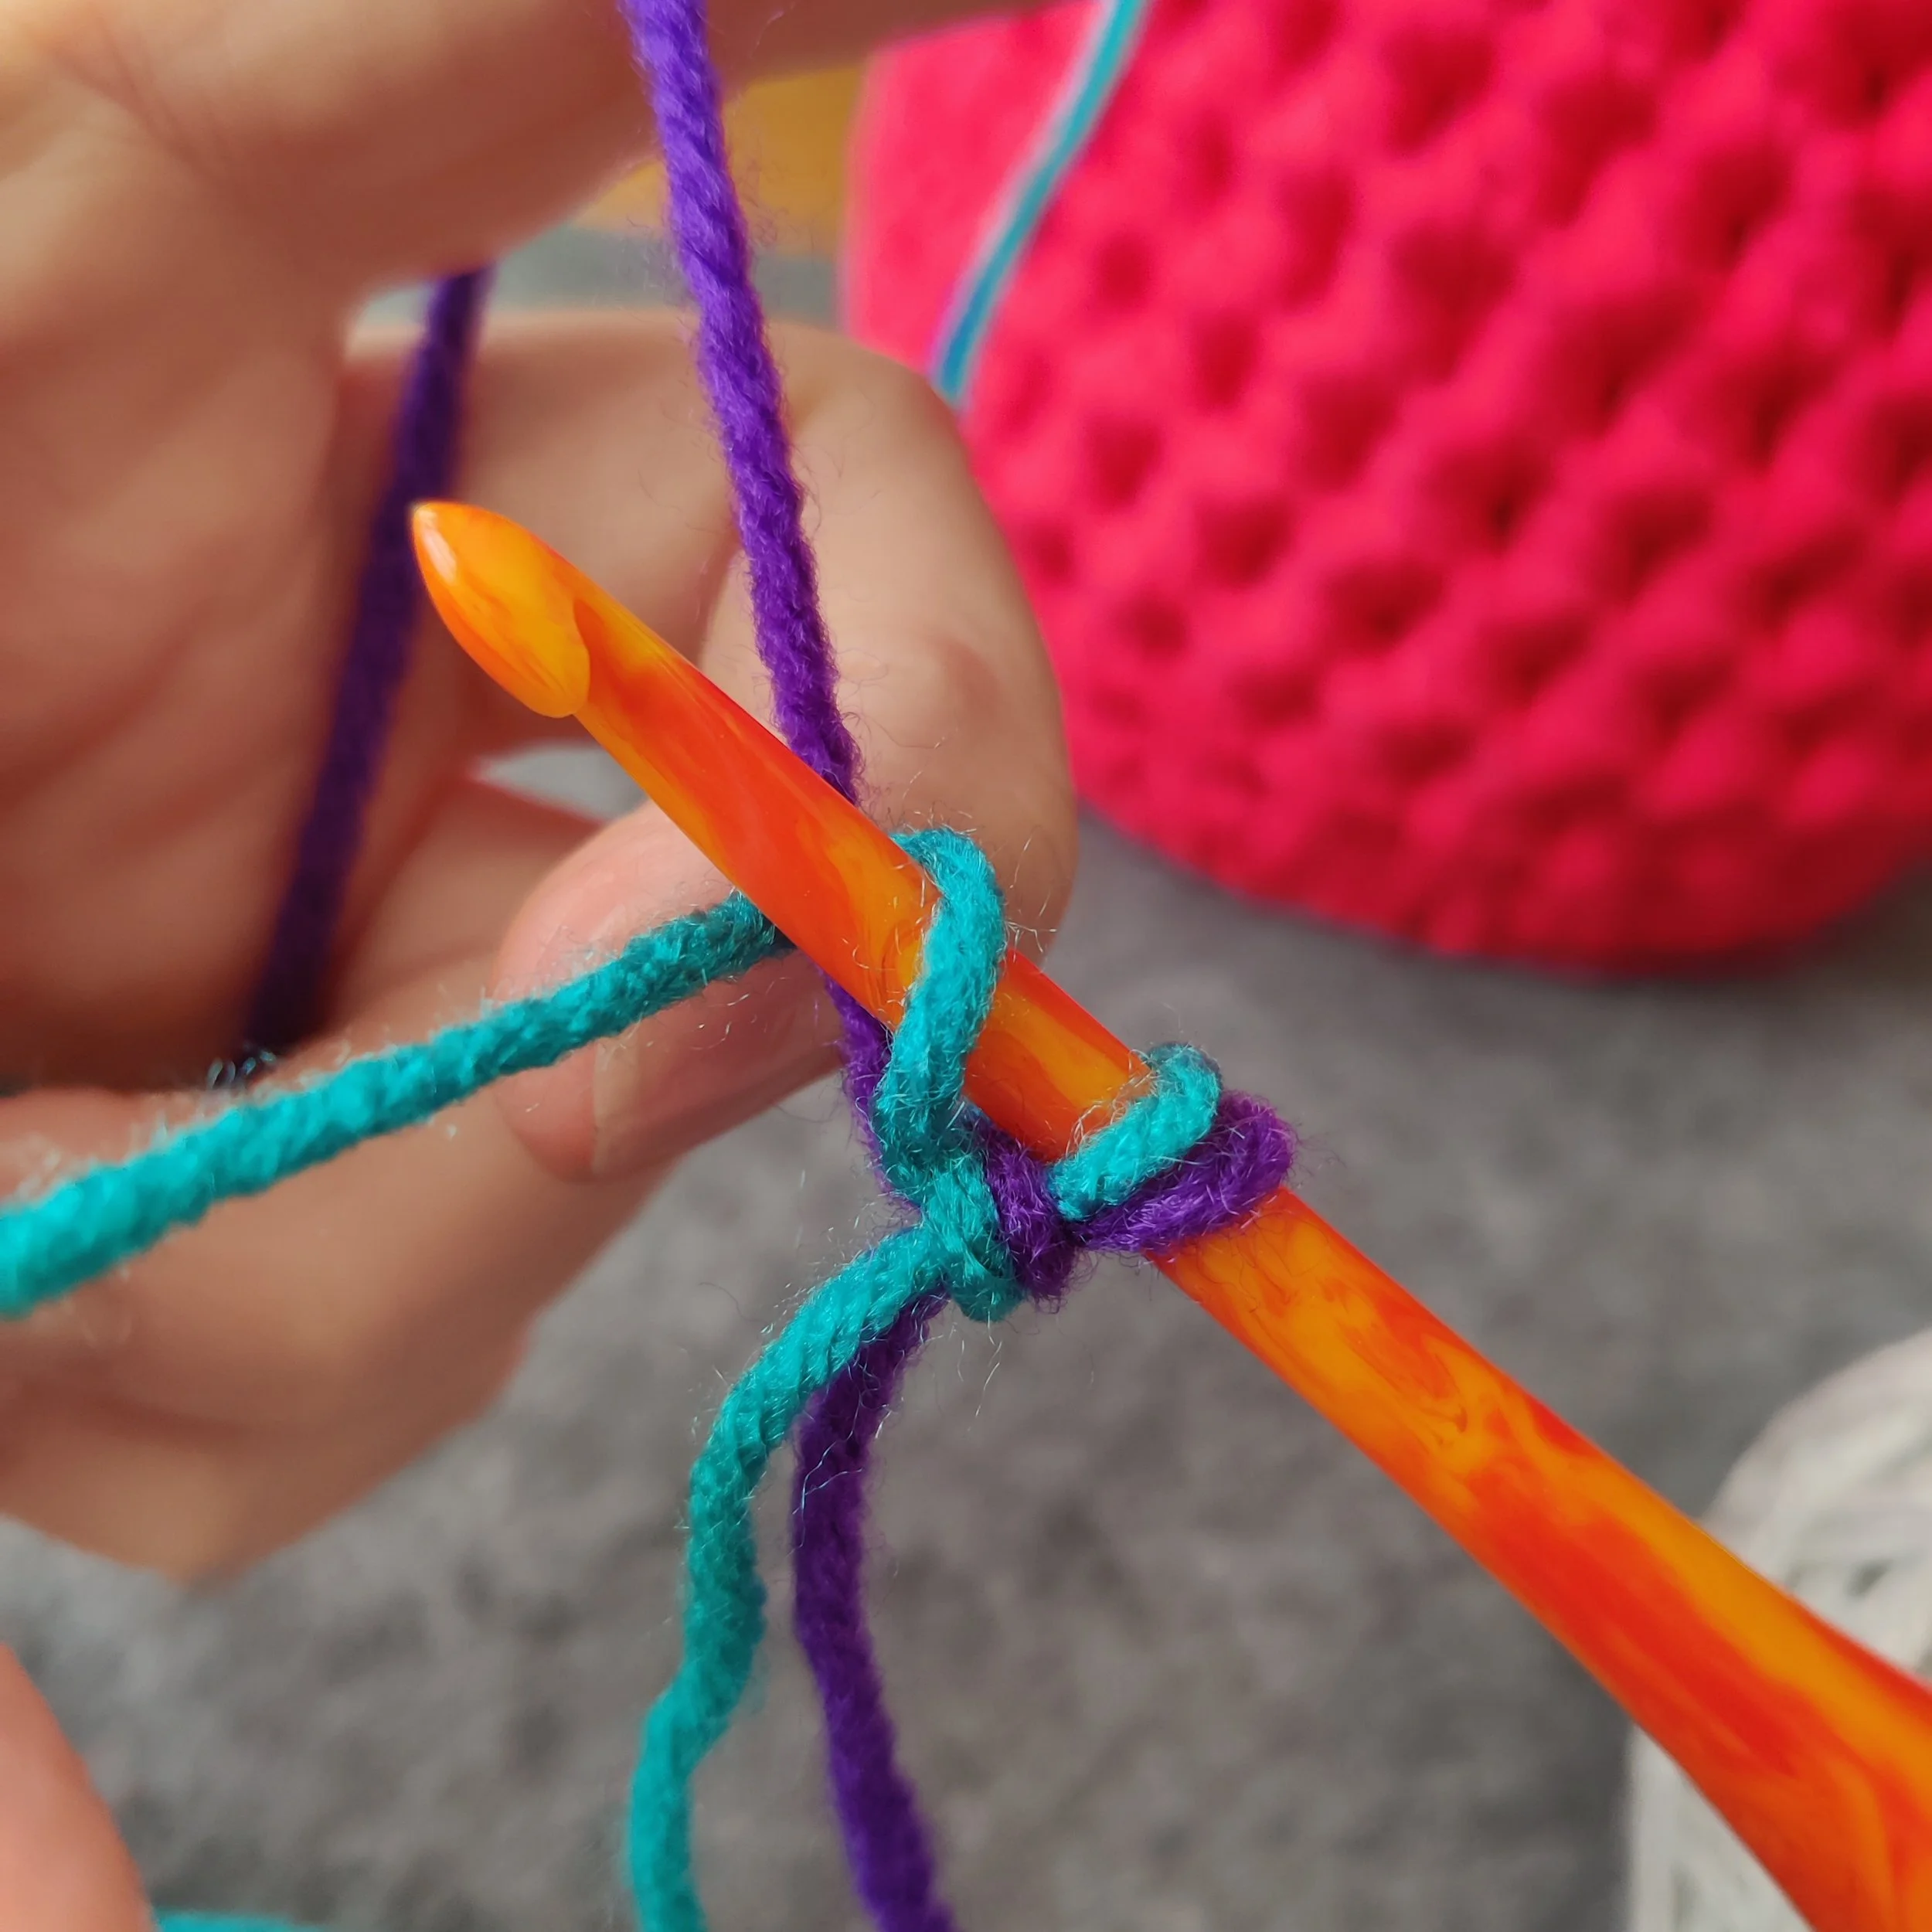
Bring the first strand up and over your hook to create a loop that goes from the front of your hook to the back.
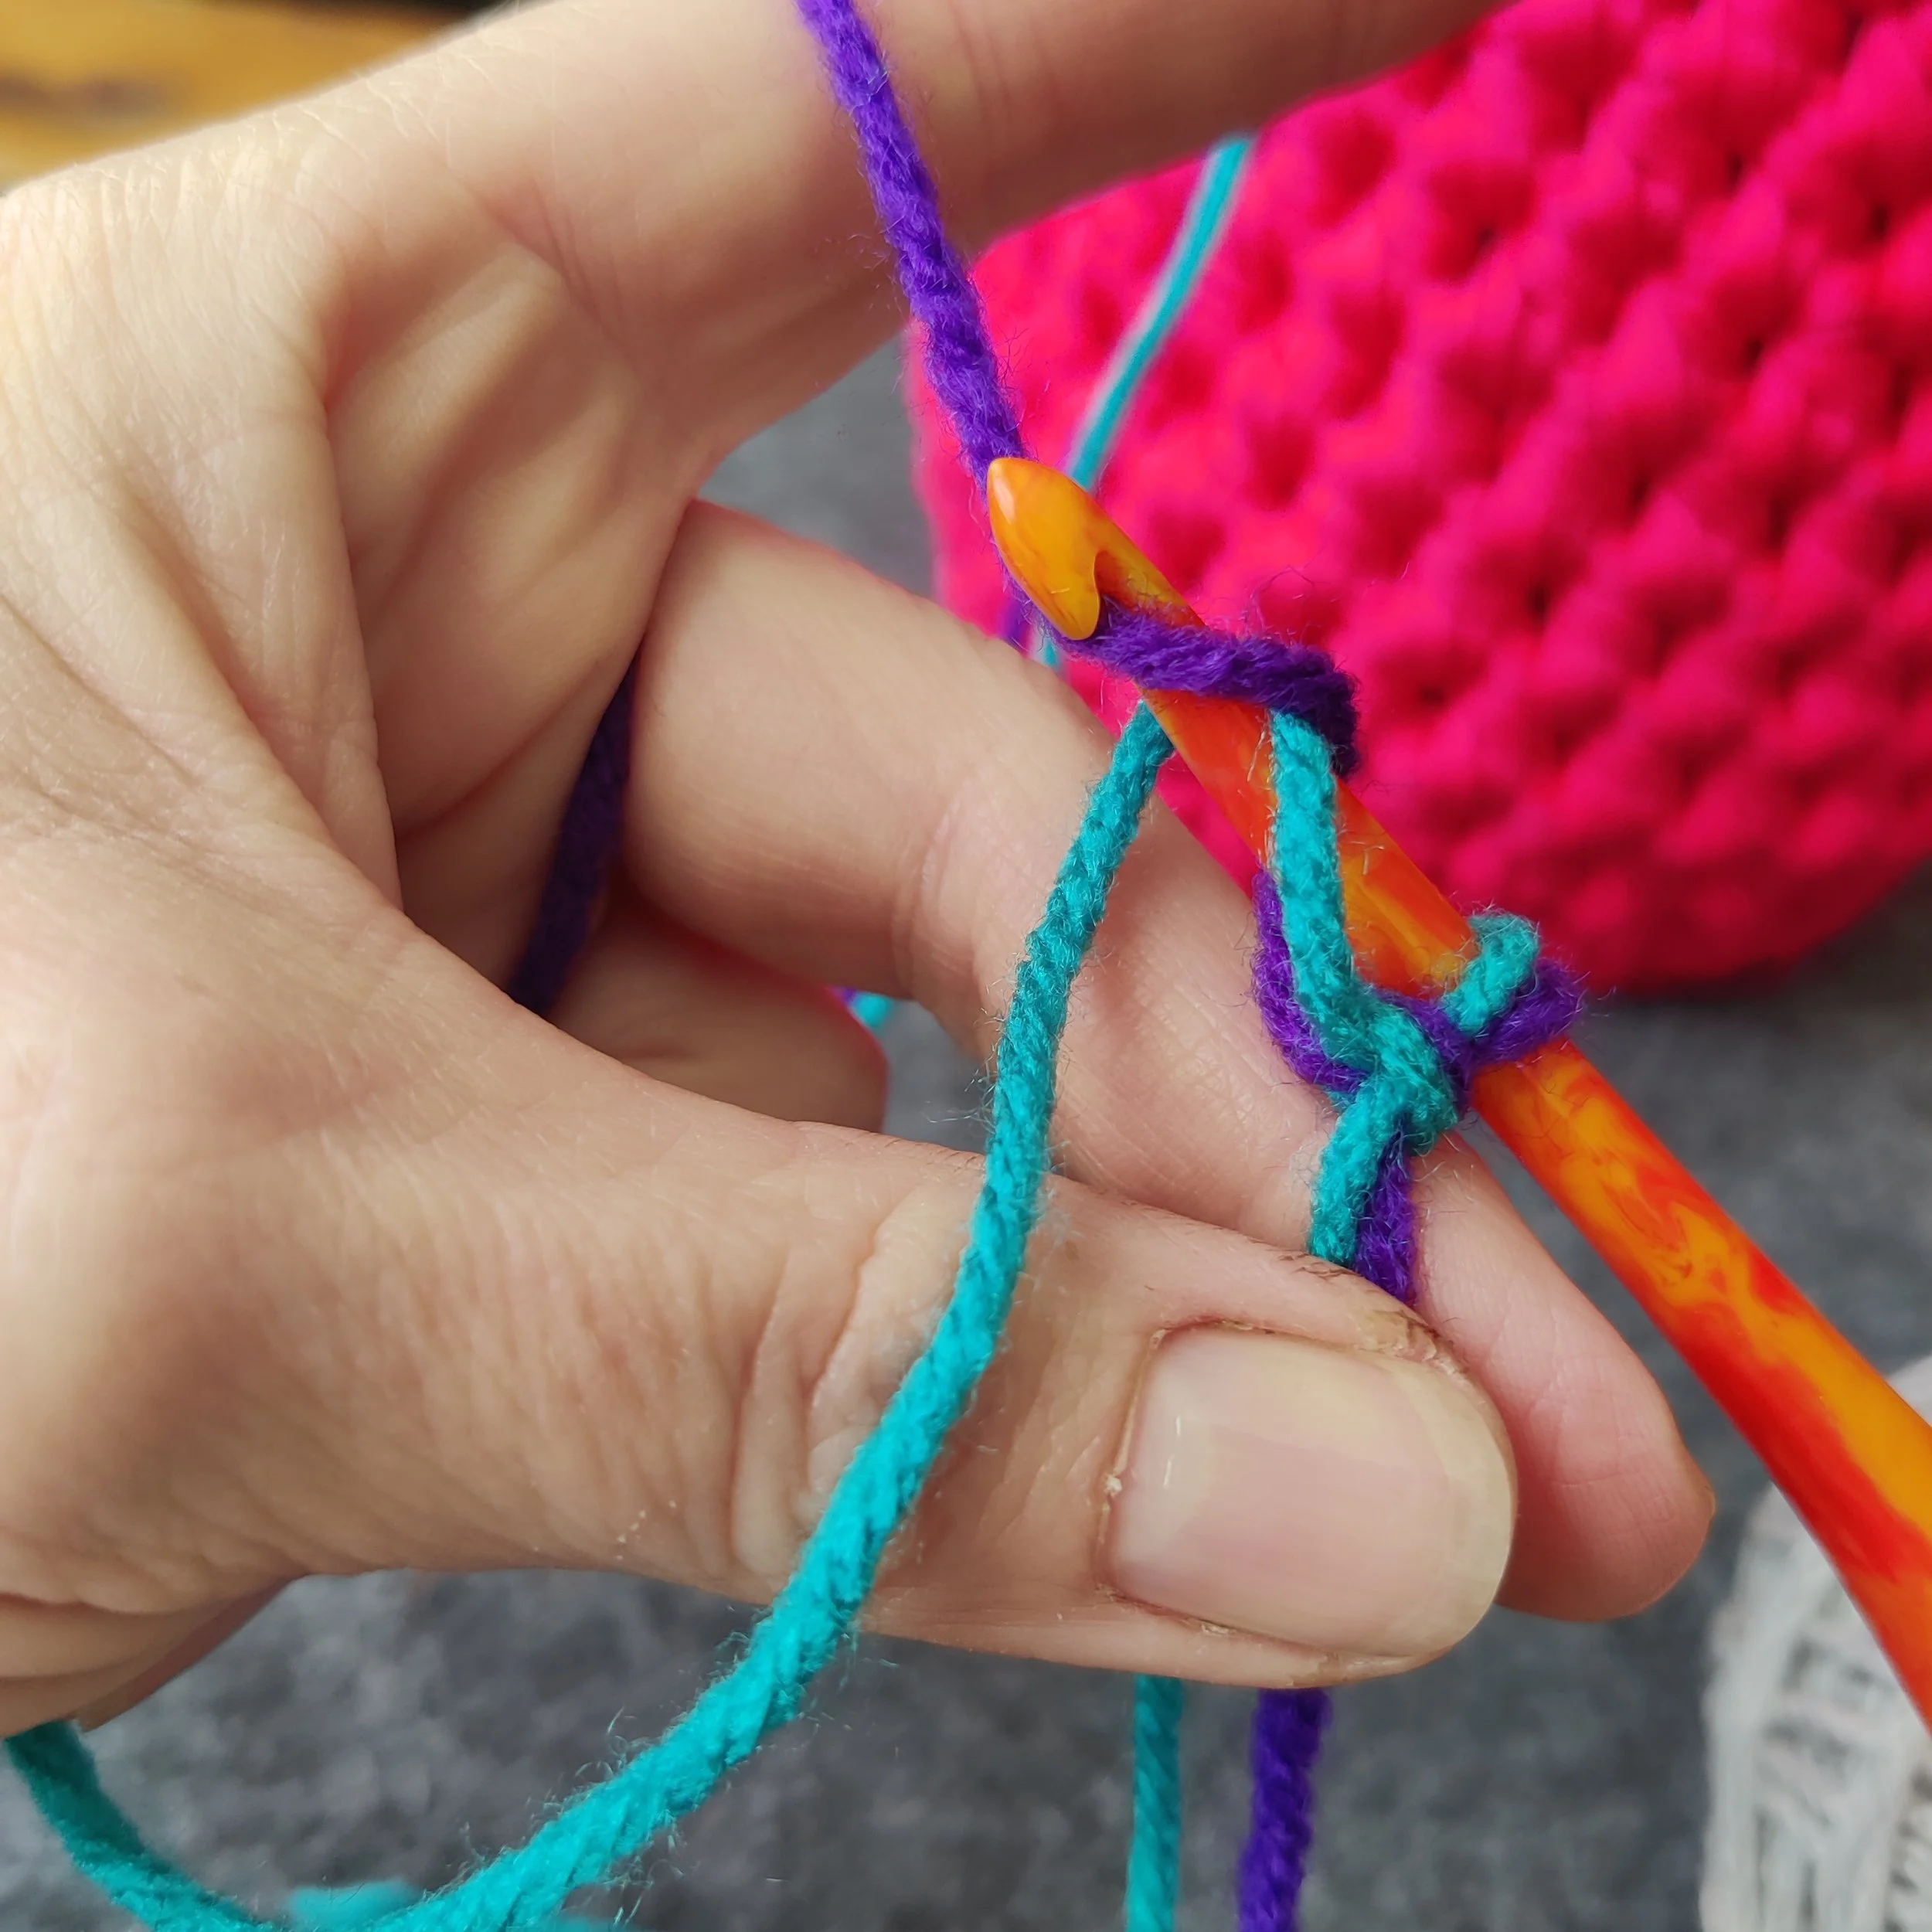
Wrap the second strand over and around your hook to create a loop that goes from the back of your hook to the front.
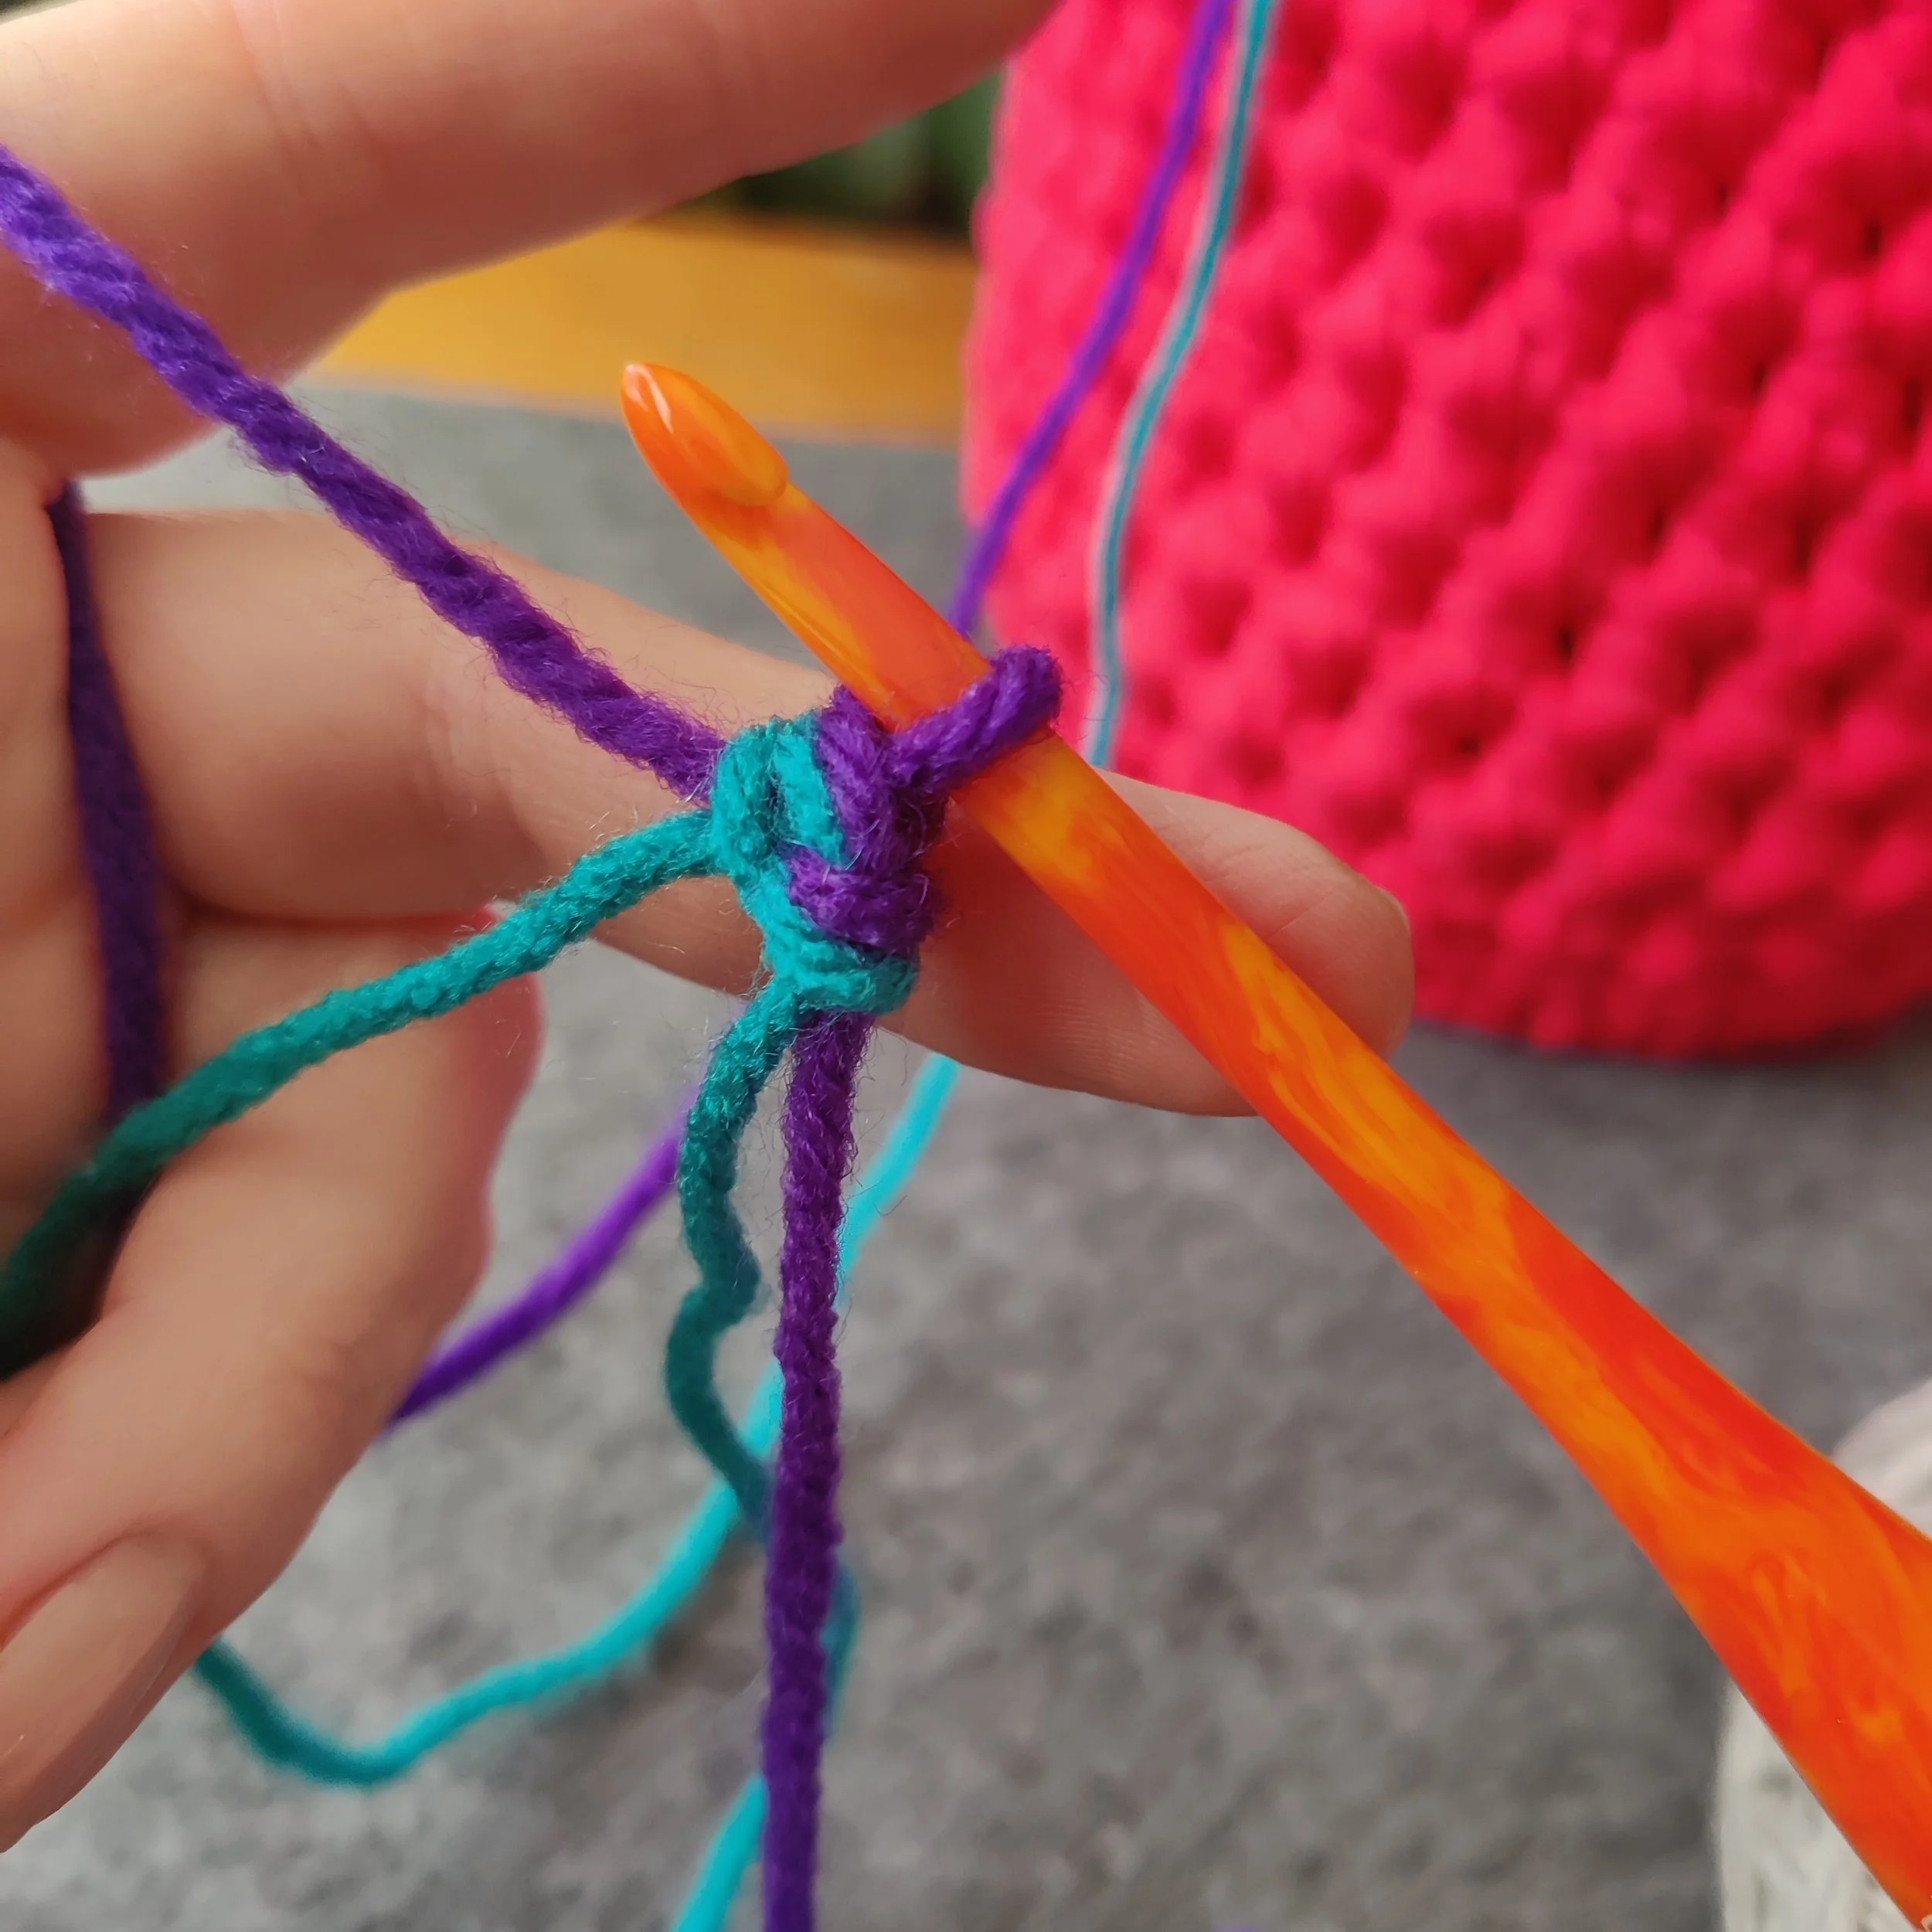
Pull the second strand (in this example the purple yarn) through both loops on your hook.
You've made your first cord stitch!
Tip: Use the same strand for each movement throughout the cord. One strand always goes under and around the hook, while the other is used to yarn over and pull through.
Step 4: Continue Your Cord
Repeat the following steps:
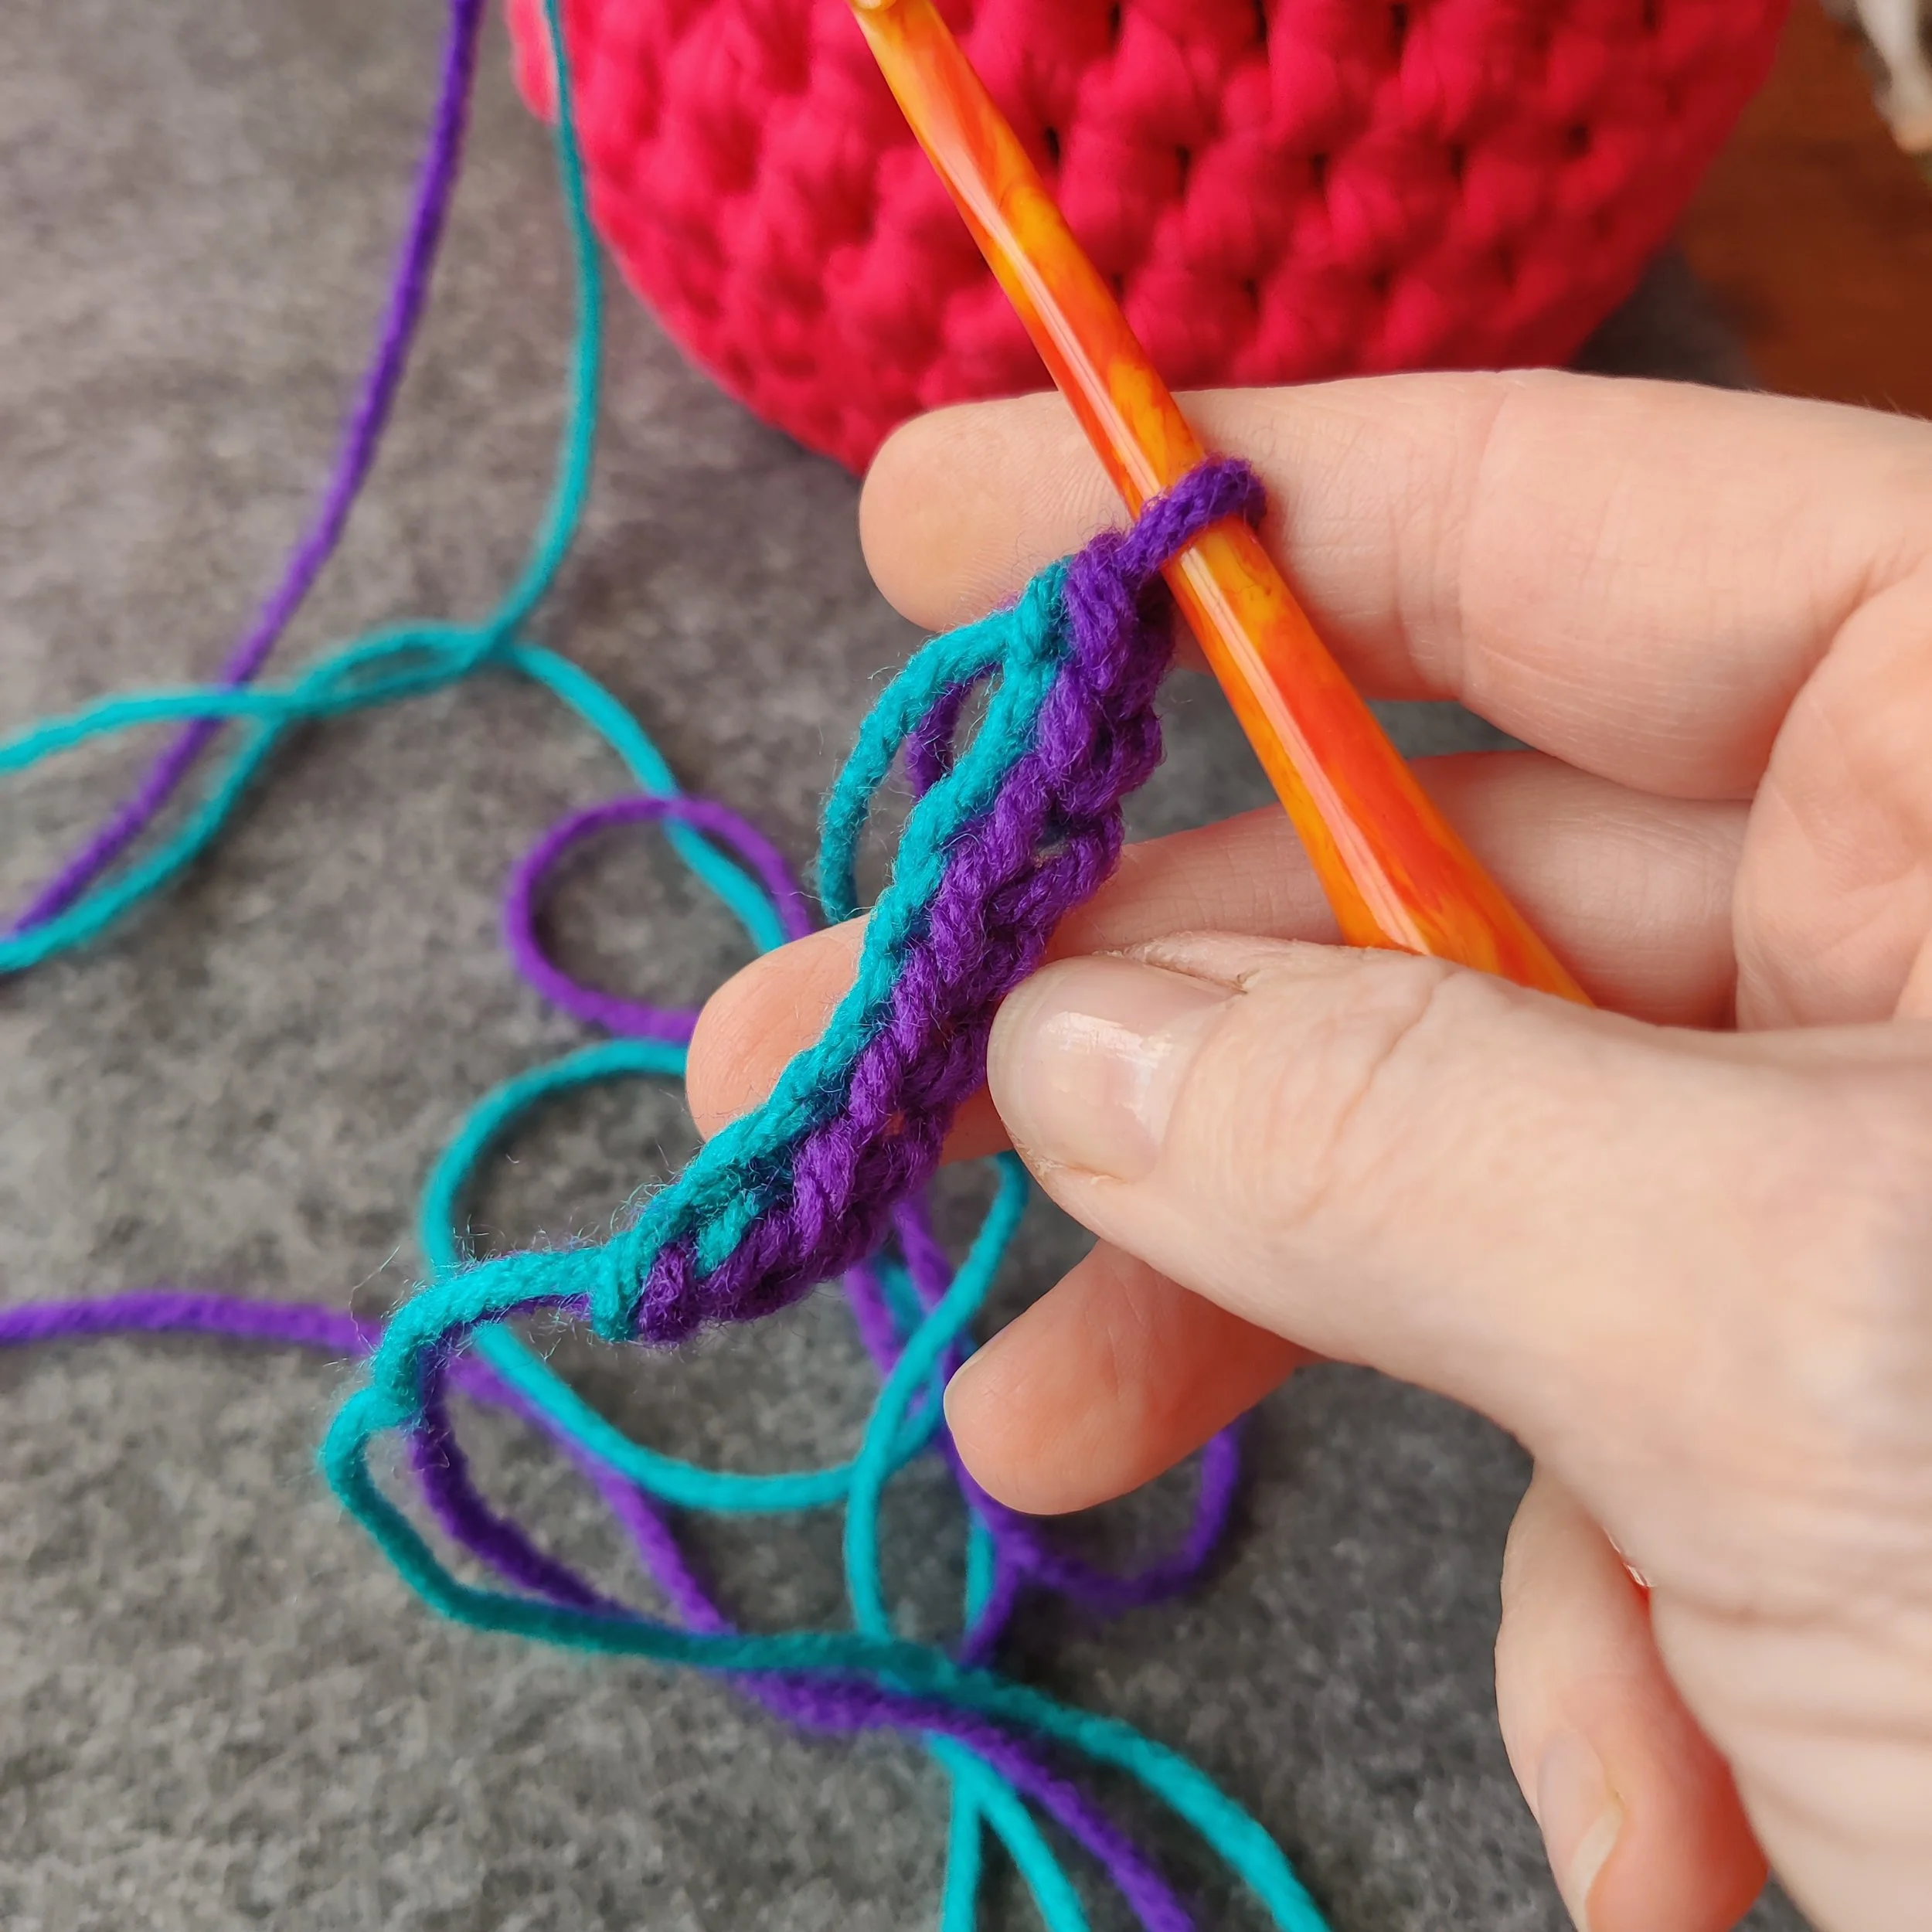
Bring the first strand up and over your hook.
Yarn over with the second strand.
Pull the second strand through both loops on your hook.
Continue until your cord is long enough to weave around the top of your bucket bag, leaving extra length for tying.
Step 5: Finish Your Cord
Cut both yarn strands, leaving a few inches to secure the ends.
Pull the strands through the final loop and tighten to secure.
Add Your Drawstring
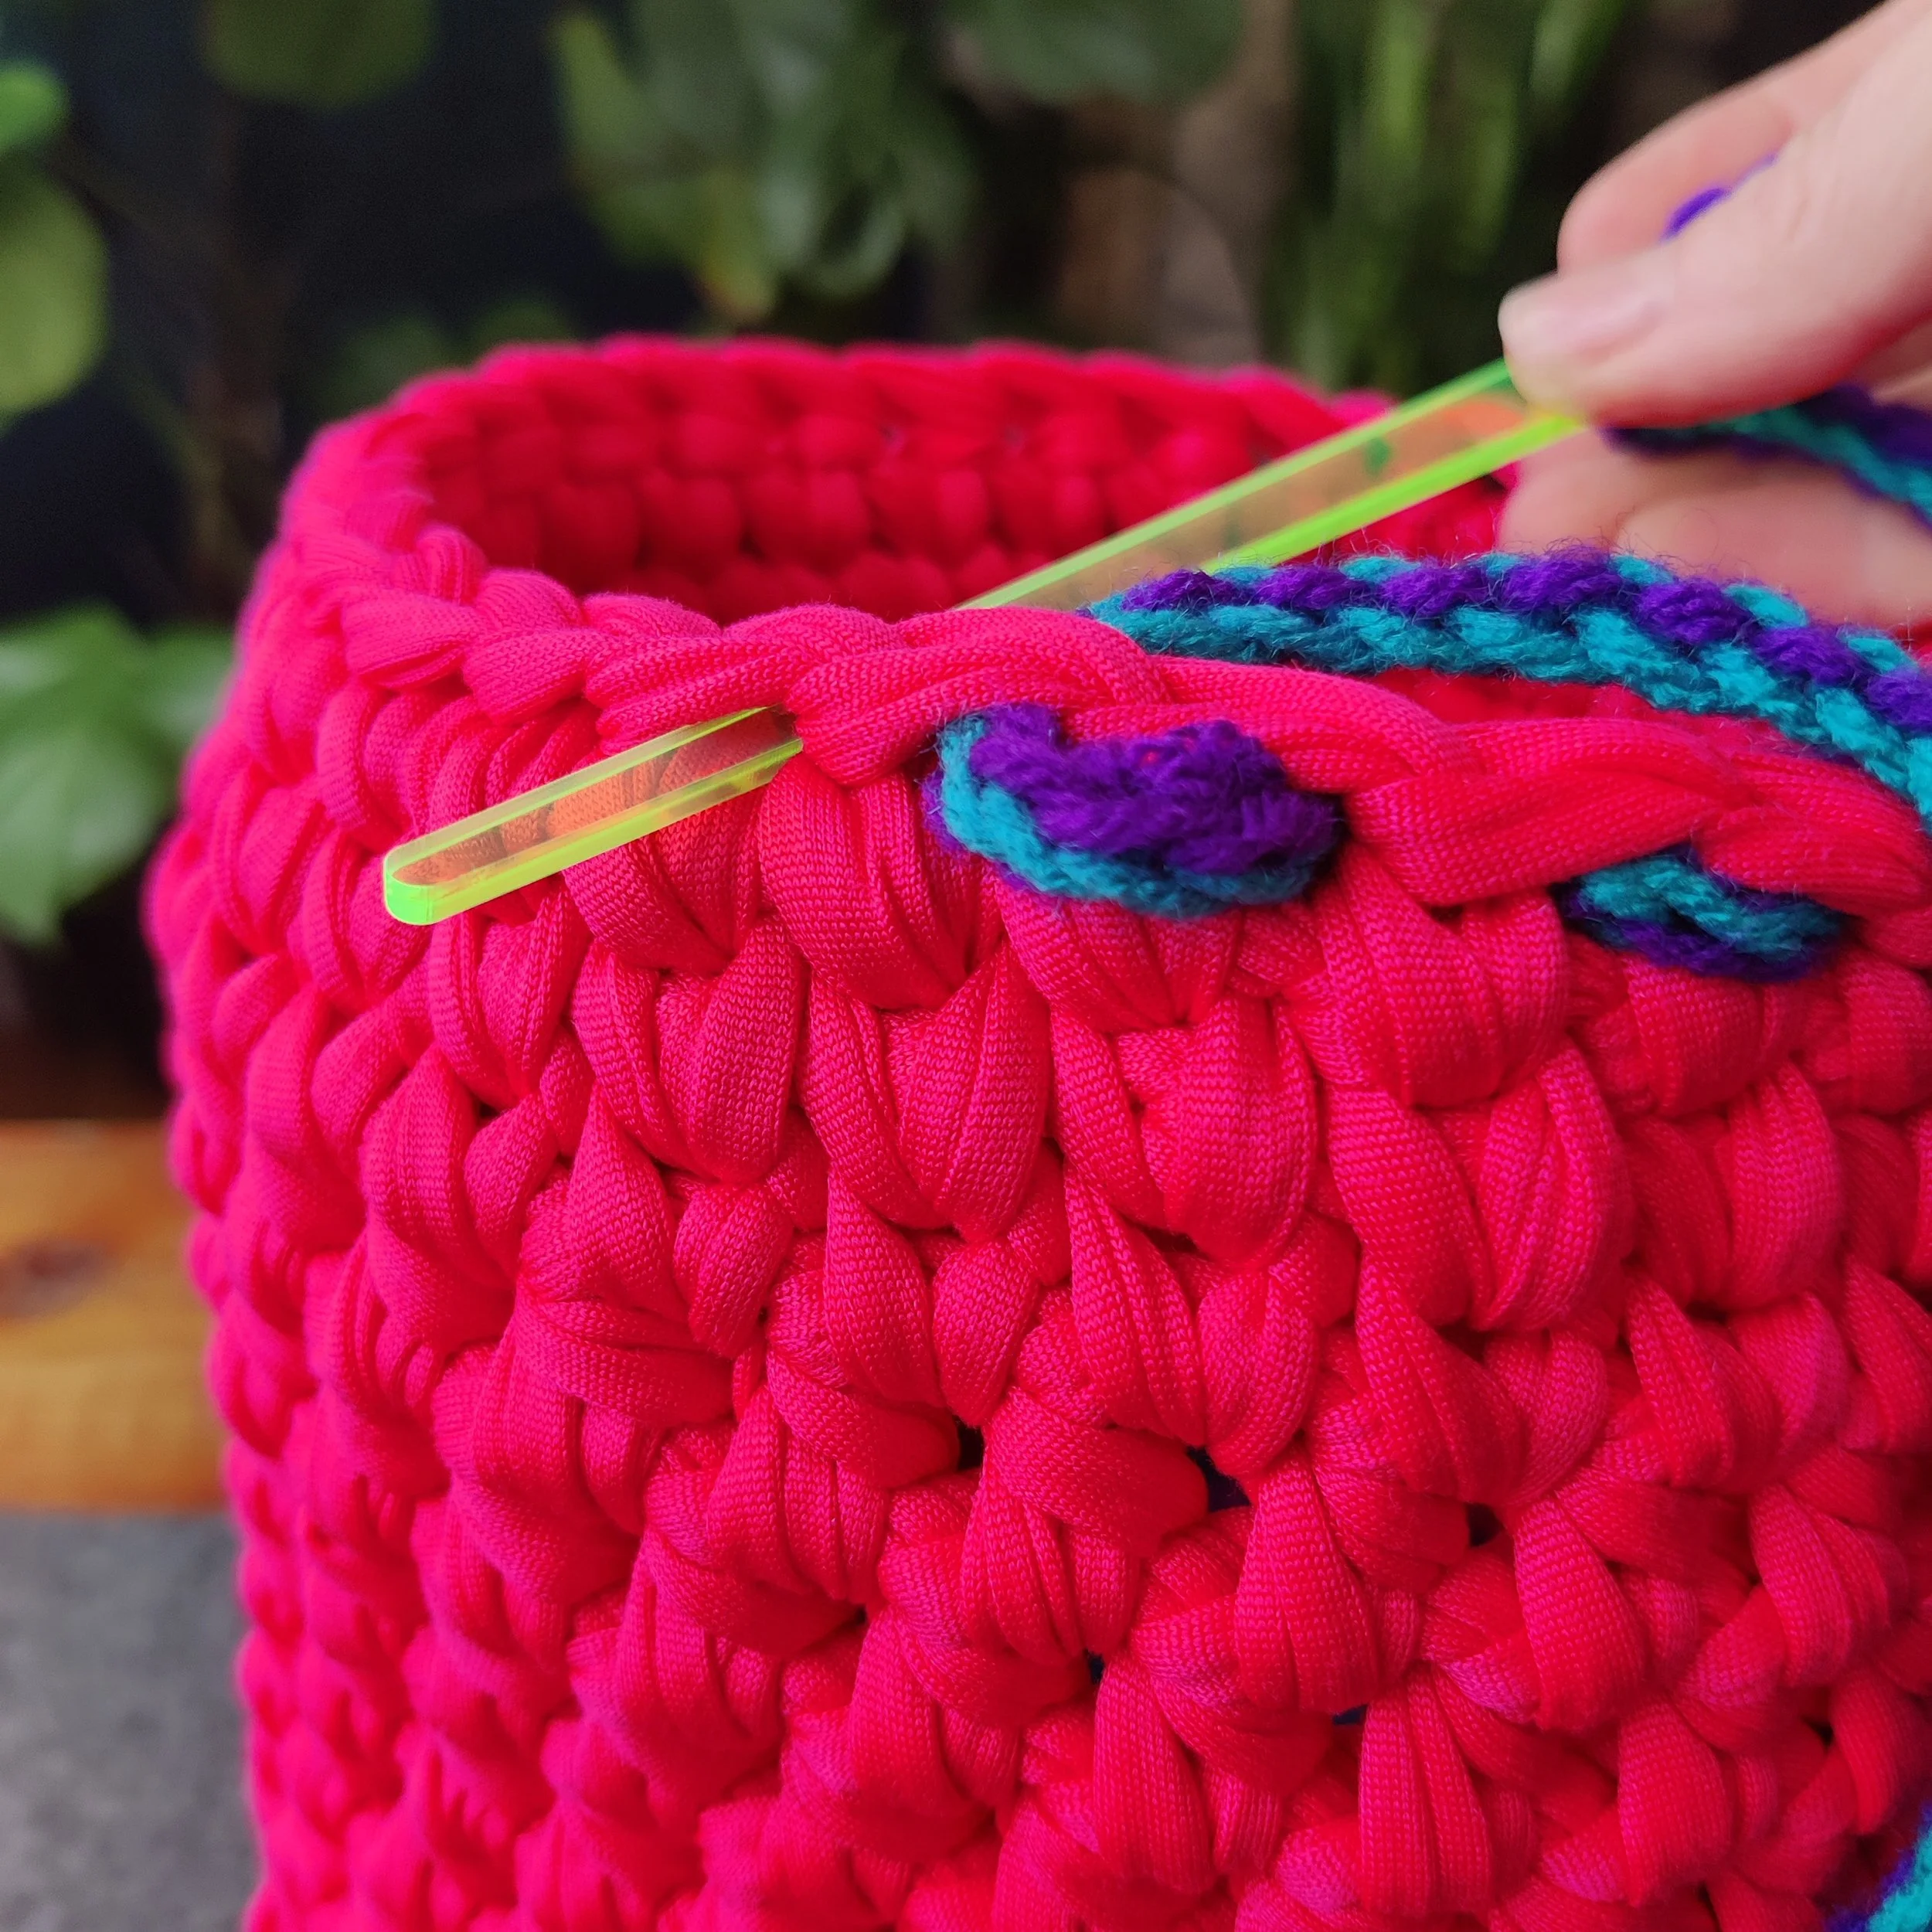
Using a tapestry needle or a crochet hook, weave your cord into the opening between your stitches working around the bucket.
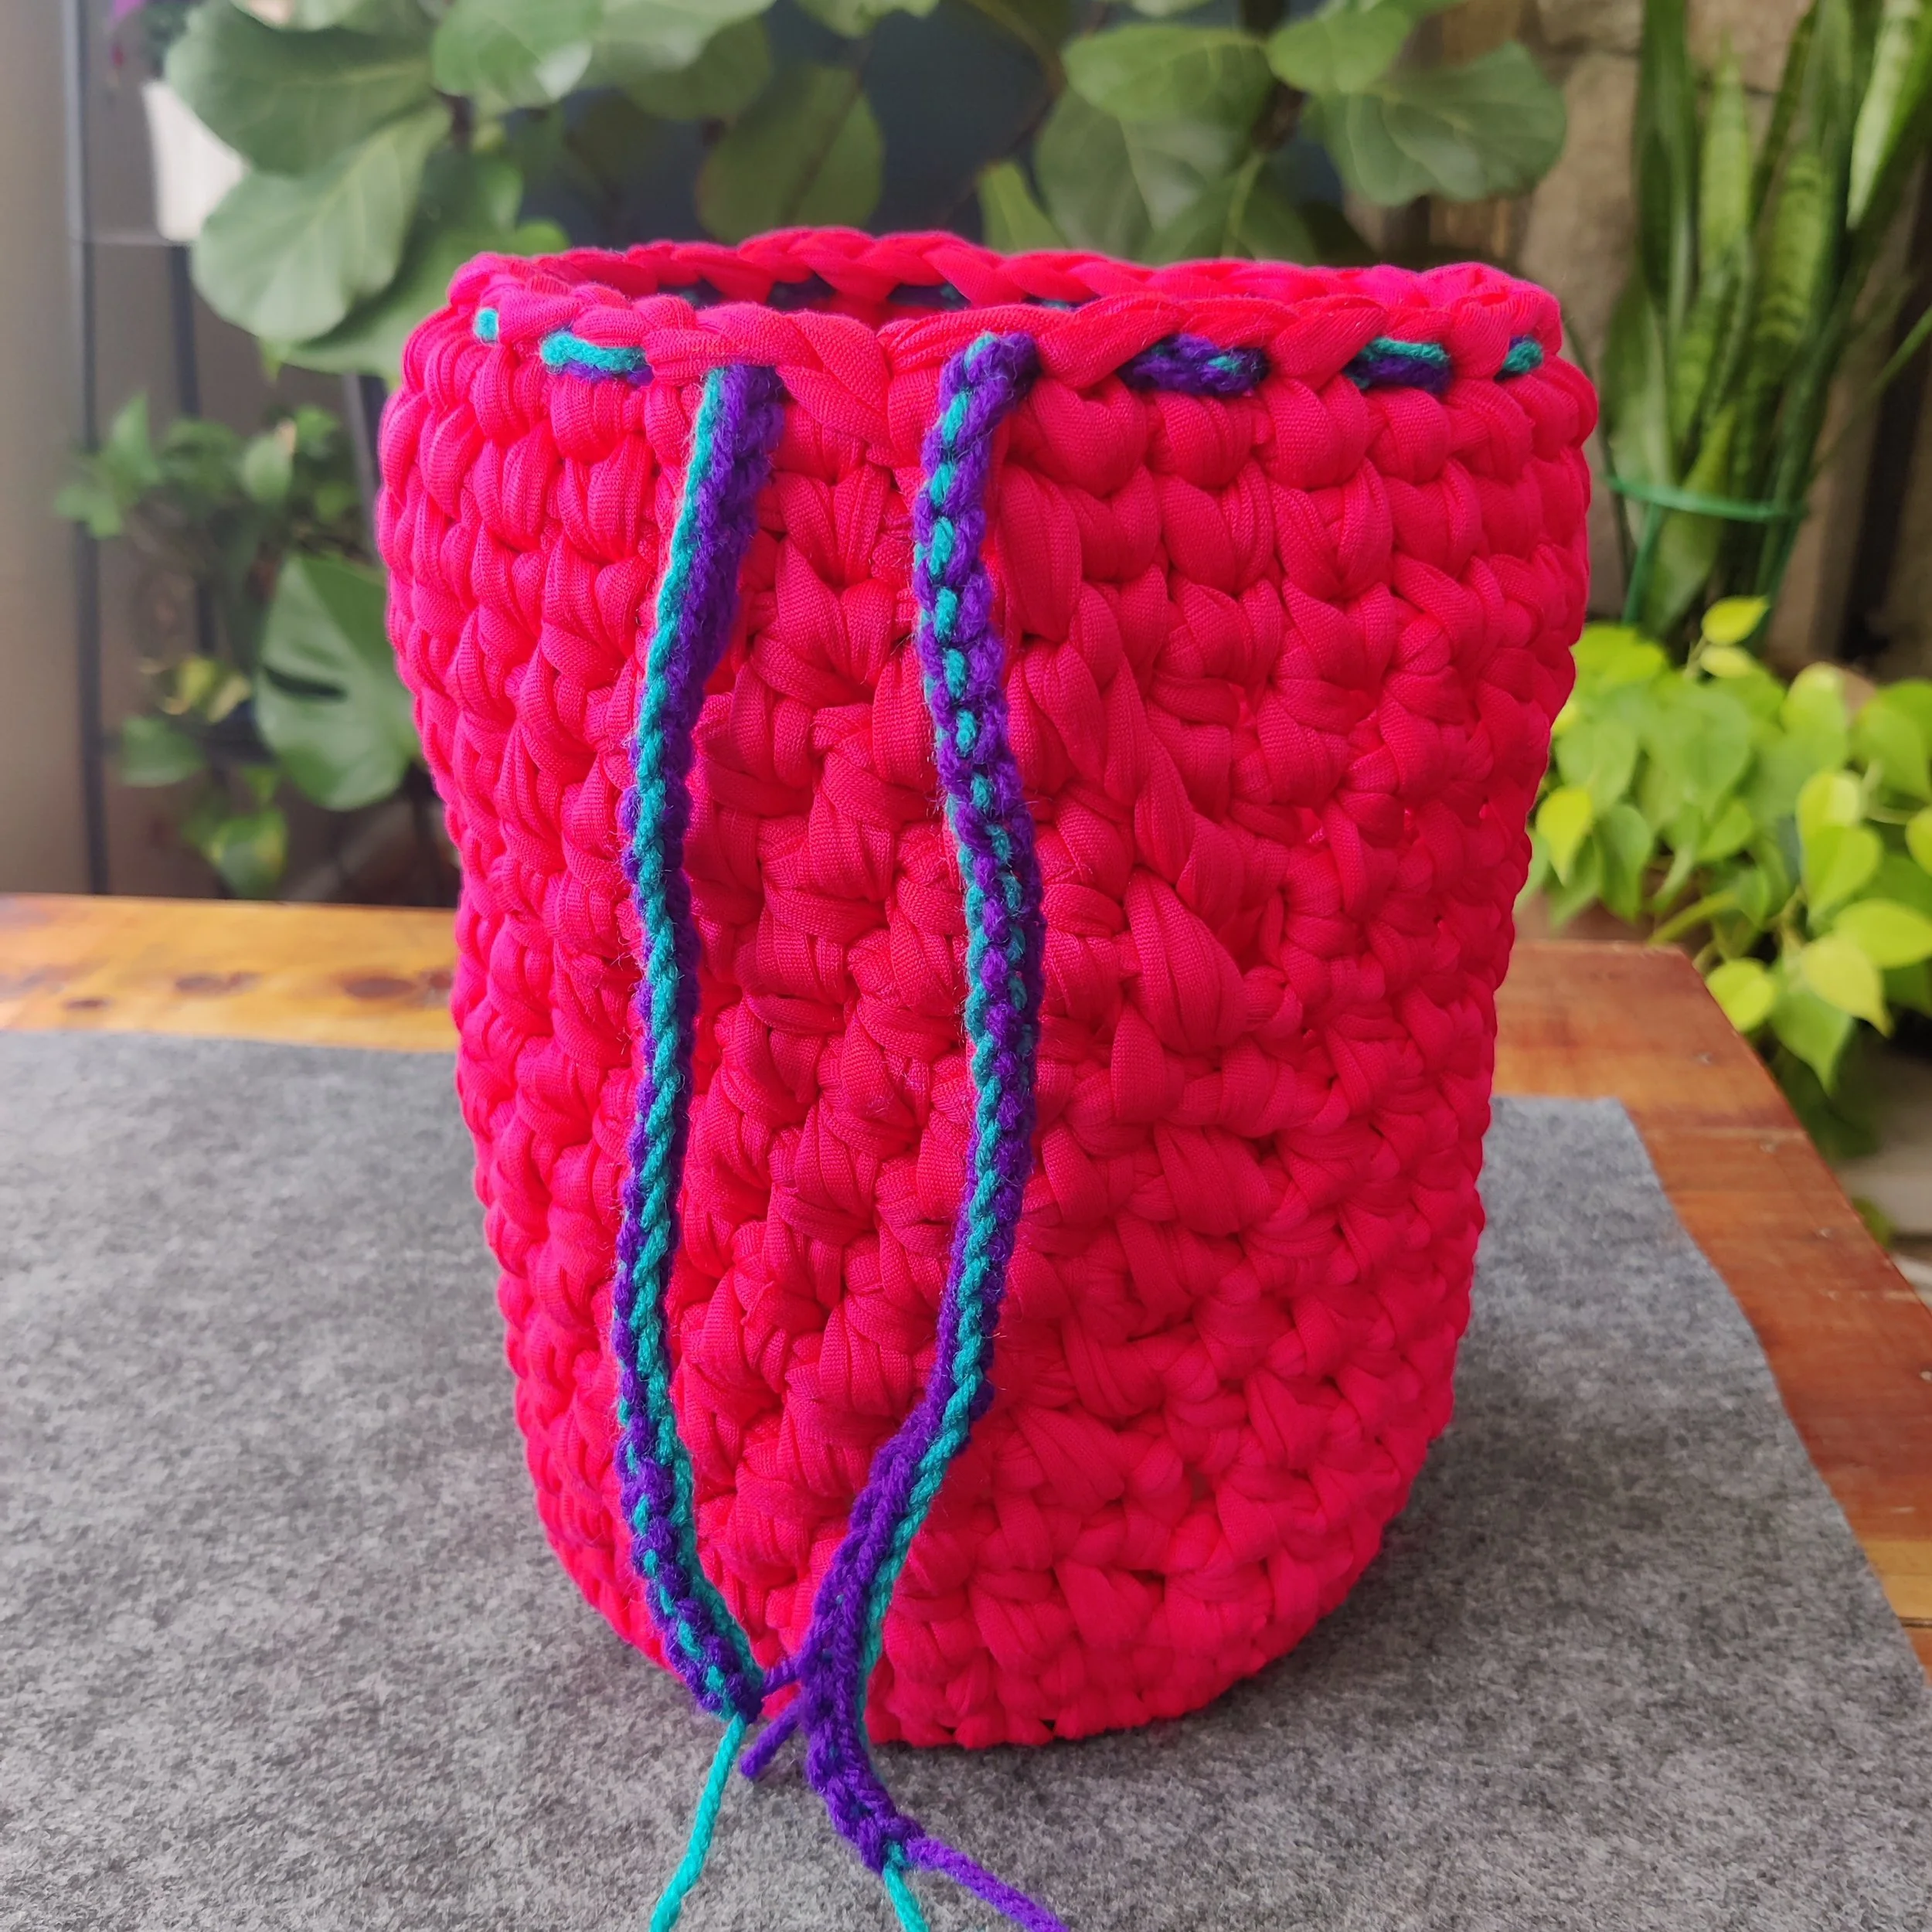
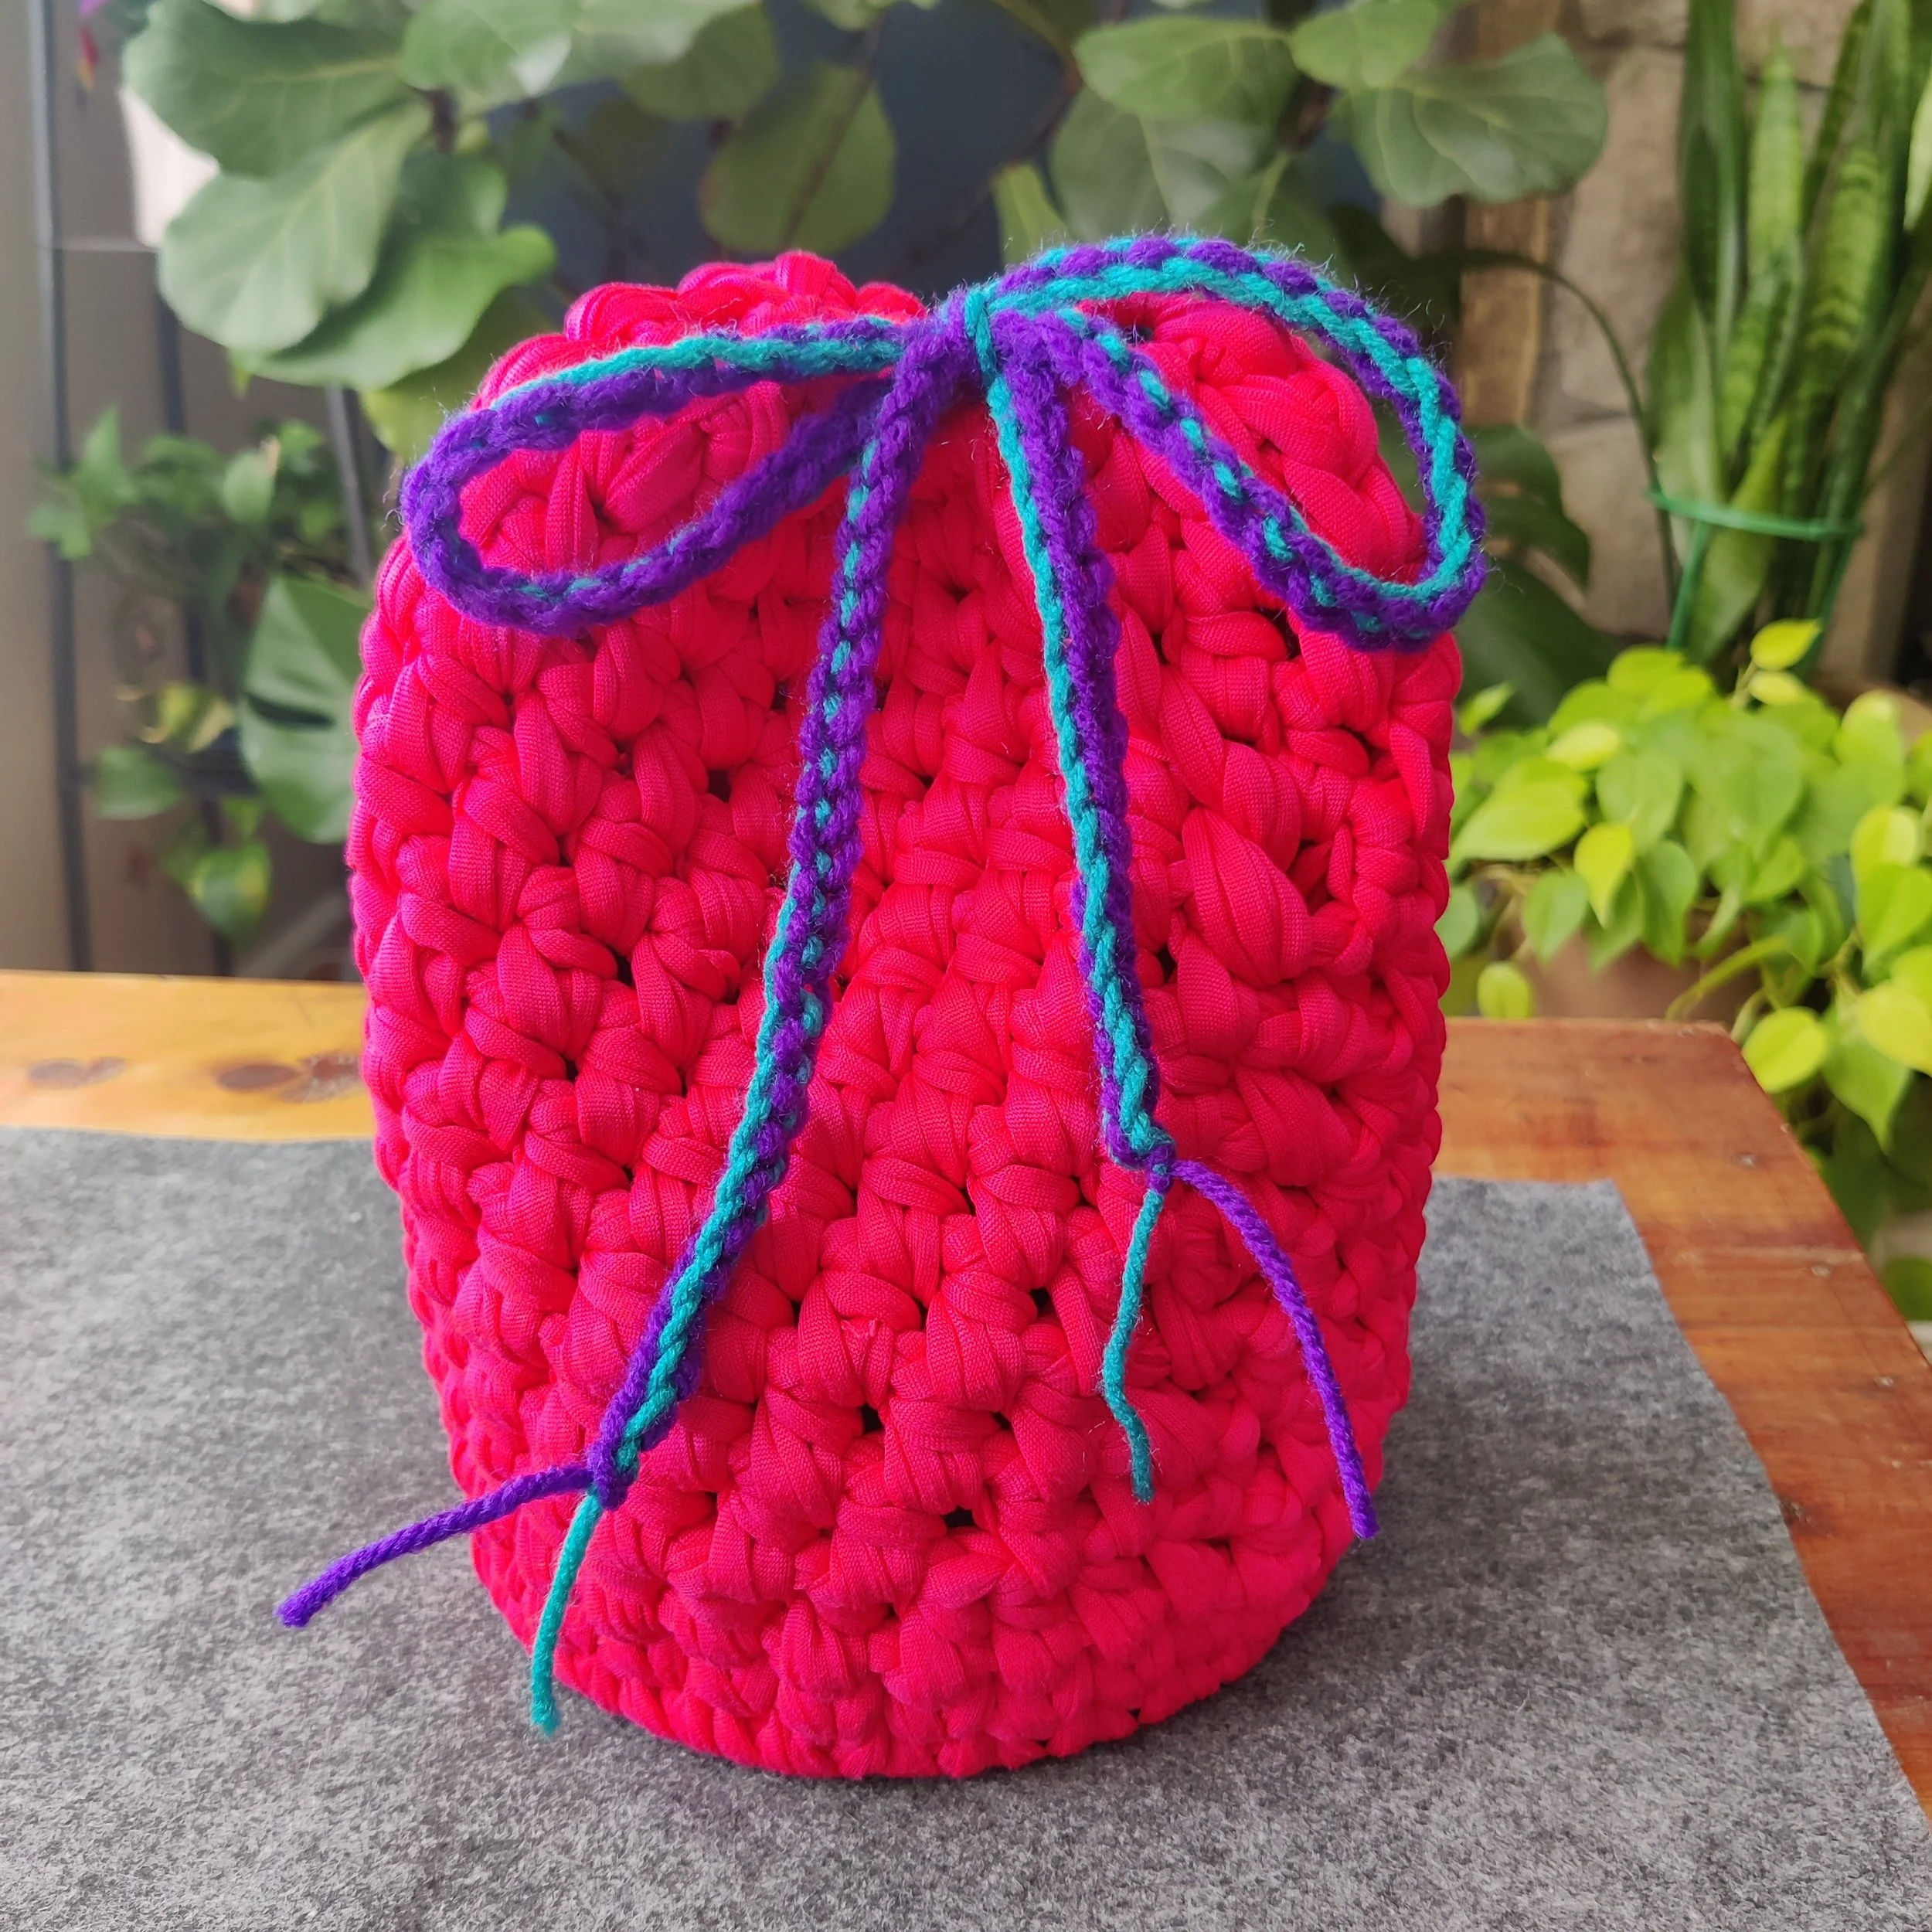
Bring both ends of the chain together.
Gently pull the ends to gather the top.
Tie the ends to keep your bucket closed.
Finishing
Weave in any remaining loose yarn ends and trim the excess.
Your Waterloo Works project is now complete!
Whether you made a yarn bowl or a project bucket, you've created something practical, beautiful, and entirely your own.
Helpful Tips
Keep your tension consistent. Even stitches help create smooth, balanced sides.
Choose your yarn carefully. Choose yarn that creates a firmer fabric that holds its shape.
Make it yours! Experiment with colors, textures, and decorative stitches.
Check your stitch count. Counting your stitches helps keep your project even as it grows.
Don't be afraid to experiment. Your project doesn't have to look exactly like ours!
Care Instructions
Spot clean with a damp cloth.
Do not machine wash or soak projects containing wooden components.
Allow your project to air dry completely before storing or using.
About Waterloo Works
At Waterloo Works, we believe the best projects are the ones you make your own.
Our wooden basket bases are designed to give makers a starting point, leaving the creativity up to you.
Whether you're making something for yourself or creating a handmade gift, we can't wait to see what you come up with!
Share your finished project with us!
Tag @Waterloo.Works on Instagram
© 2026 Waterloo Works. All Rights Reserved.
